
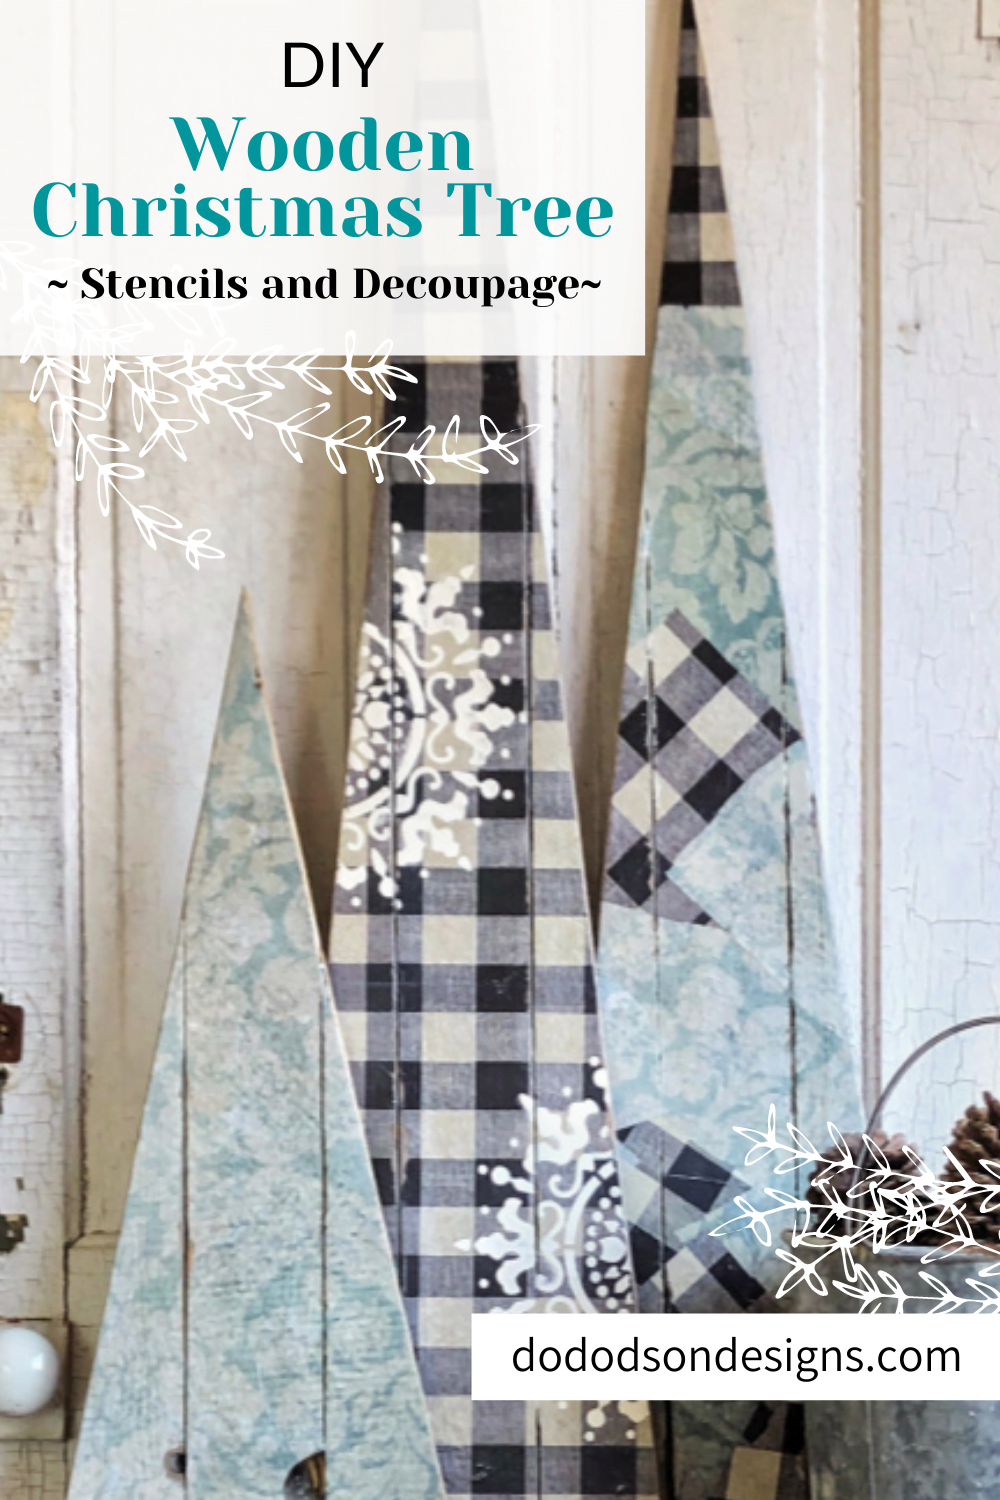
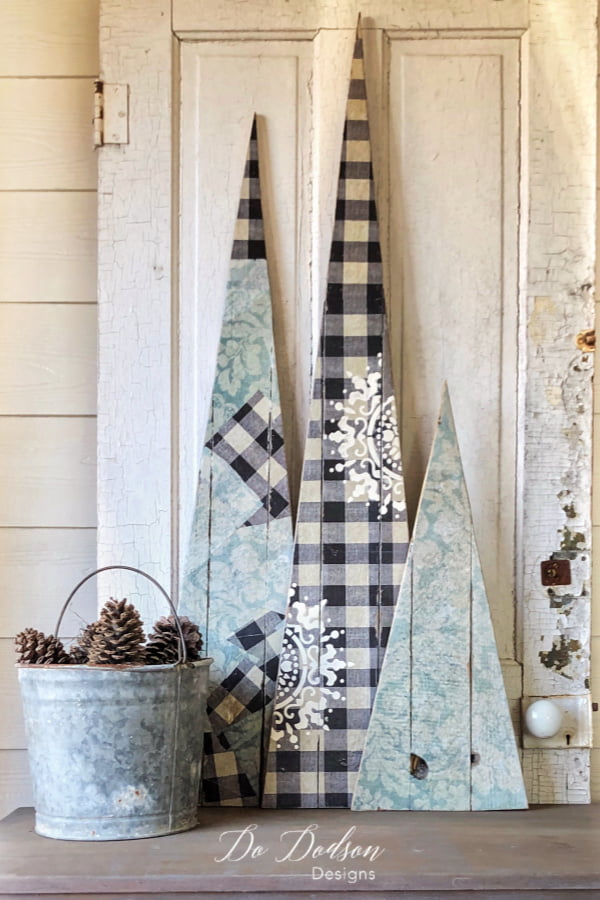
Wait till you see these! Today, I’ll show you how to make these adorable wood Christmas trees from weathered fence boards and some leftover scraps. It’s always around this time of the year that I start thinking about all the DIY Christmas decor projects I want to make. And because I like to put my own spin on my home decor, I’m decoupaging them with some scrap decoupage tissue paper. They turned out so cute, and I can’t wait to show you.
This post contains a few affiliate links to help you find the products I use. You are not charged extra to use any of the links, but any income I make will be used for more fun projects! To see my full disclaimer, click here.
How To Make Wood Christmas Trees
How stinking cute are these? I also made tiny churches from this same weathered fence lumber. CLICK HERE to get all the details. Once again, saving our old fence turned out to be a great idea. And you bet I say “I told you so” to Mr. Honey Do every chance I get. Ha! These are cute as is, but…


Product List:
Below are the supplies I used to create these adorable Christmas Trees.
- Weathered fence lumber (3-inch width)
- Carpenter’s Square
- Circular Saw
- Nail Gun
- Pencil
- Wood Glue
- scrap 1/4 inch plywood (or anything similar)
- Electric Sander (or medium grit sandpaper)
- Sanding Sponge
- Clear Coat (satin) aka decoupage glue
- Decoupage Tissue Paper Buffalo Check
- Decoupage Tissue Paper Damask
- Paintbrush (for topcoat)
- Stencil
- MUD (white) for raised stenciling
- MUD Spatula
- Gator Hide waterproof topcoat
Assembling The Trees
Use three boards approximately 3 inches wide to create the wood Christmas trees. The height of each tree depends on the cuts. Make them all the same height or stagger them as I did. My trees measured 48 inches, 42 inches, and 26 inches in height for your reference.
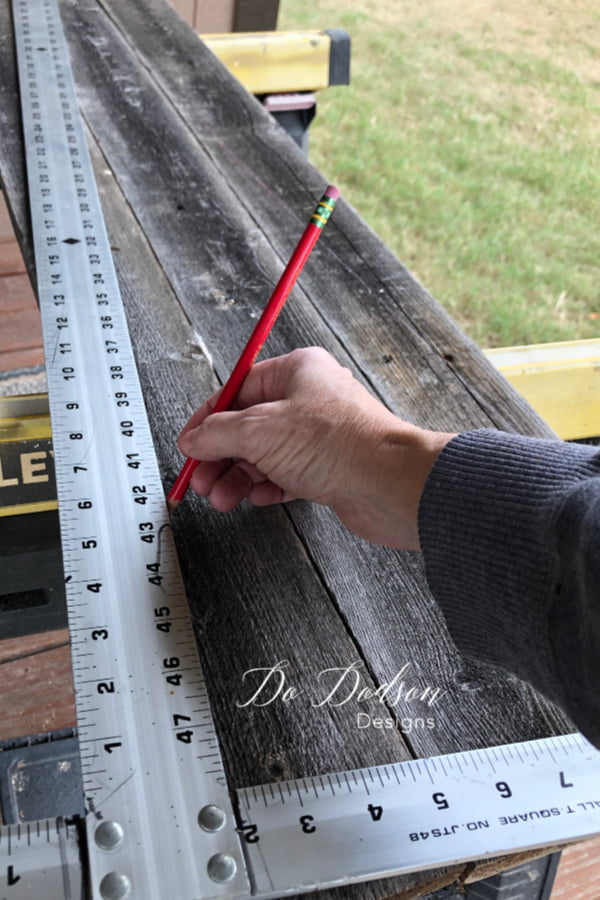
After cutting your boards, secure them with 1/4 in plywood (or whatever thin pieces of wood you have), wood glue, and nails. I save all my wood scraps pieces of wood for this very reason.

Decorating Your Wood Christmas Trees
Before you decorate the wood trees, if you’re using weathered lumber, lightly sand with medium grit paper to prepare the wood for decoupage. The surface will still be rough, but that’s okay. You’ll see as we go along.

Decoupage On Wood Christmas Trees
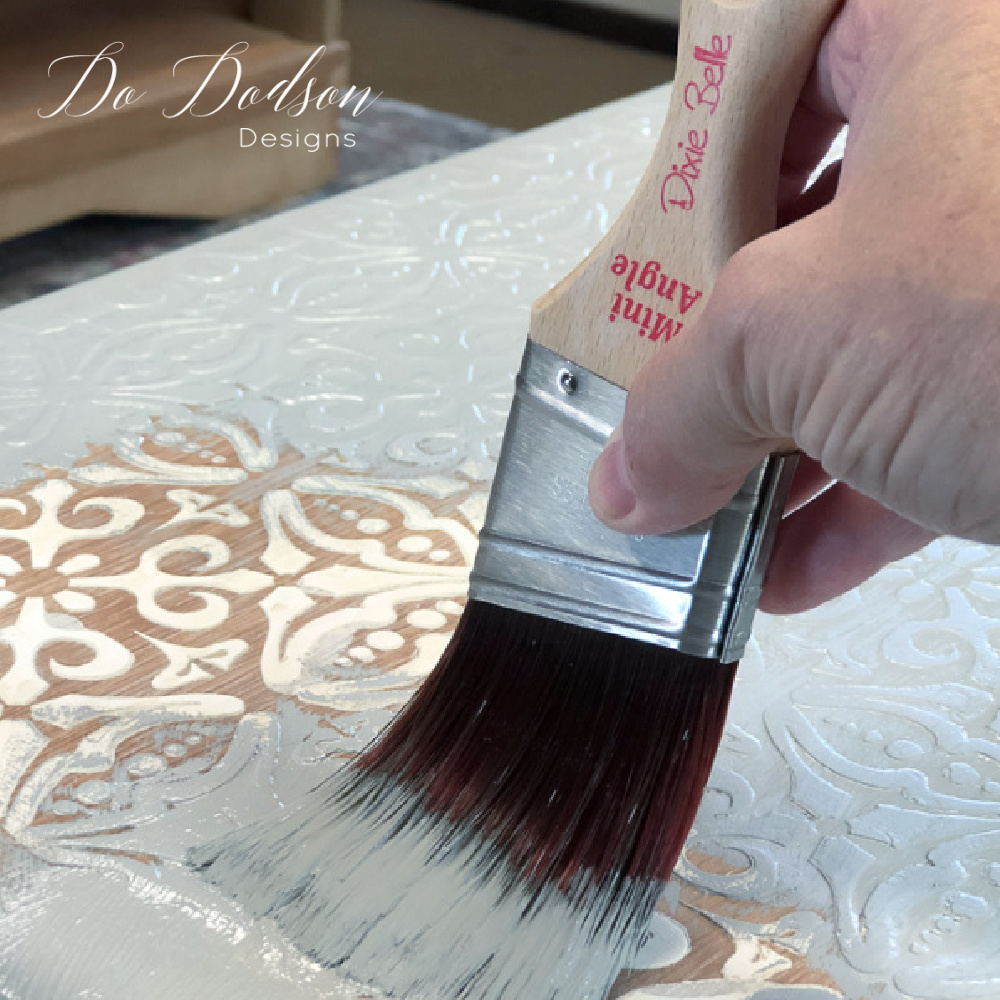
Apply a thick coat of Dixie Belle’s topcoat to the wood Christmas tree first.
Then, apply the decoupage tissue paper over the topcoat. The top coat will act as the glue and literally absorb it into the paper.
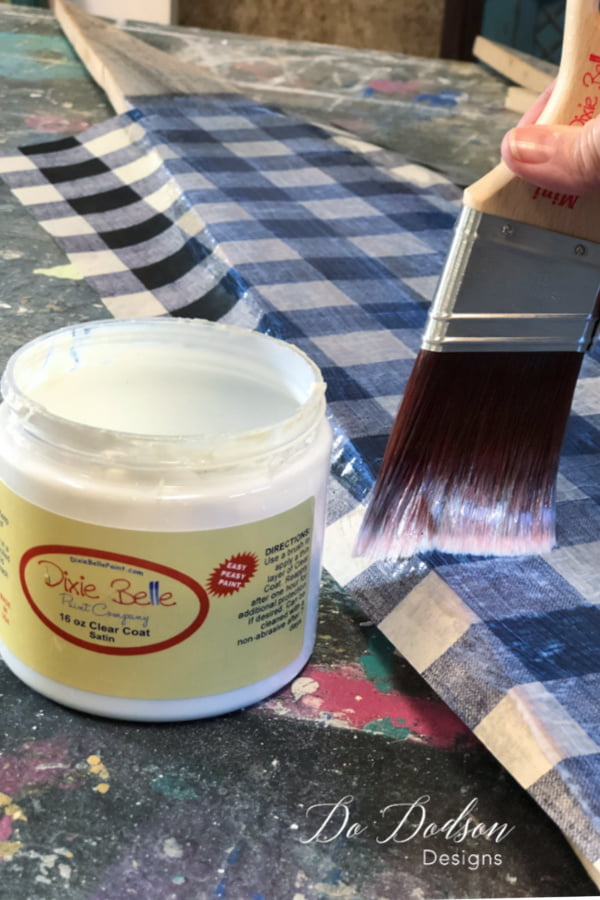
It’s so cool! After the paper is in place, add another layer of the topcoat on top of the tissue paper. The top coat will appear bluish in color but will dry clear.
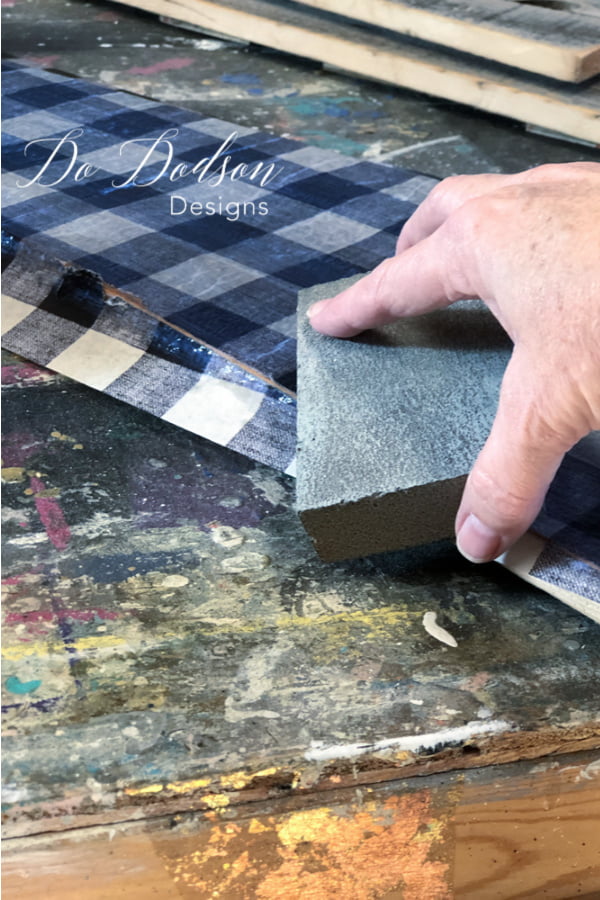
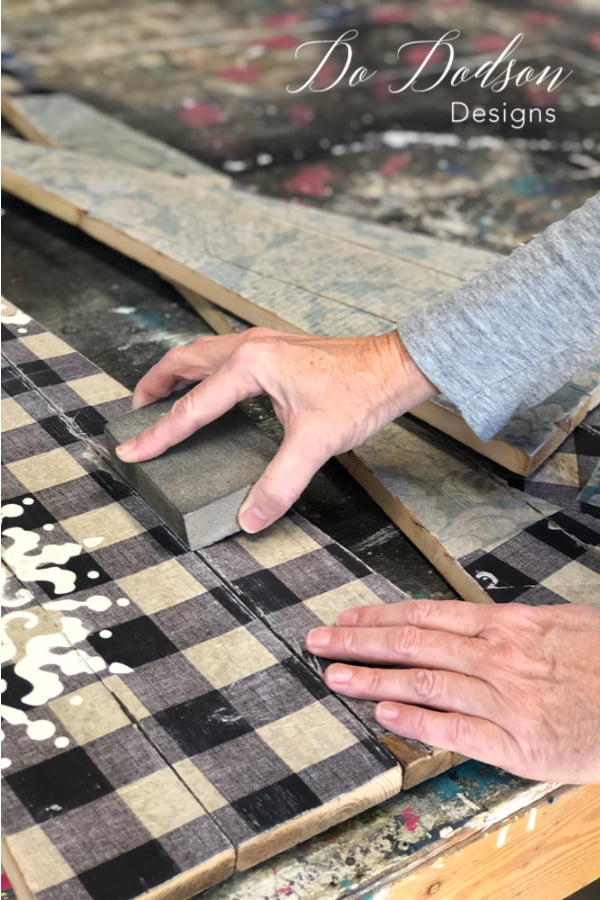
While the topcoat is still wet, use a sanding sponge to gently trim the edges of the tissue paper for a perfect edge. Gently rub away from the paper on the wood Christmas tree in one direction. Do not rub back and forth.
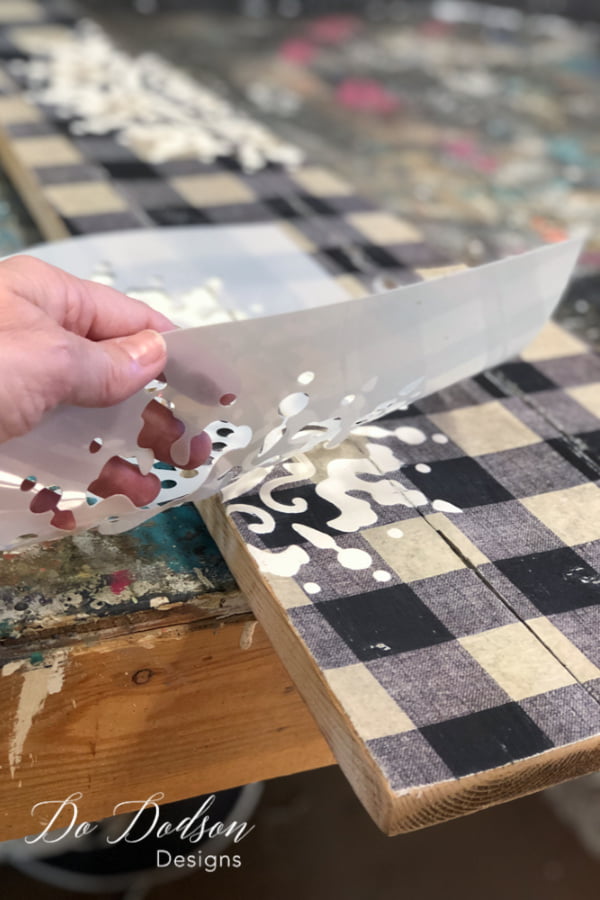
Adding A Raised Stencil
Use a reusable stencil and Dixie Belle’s MUD to create the raised design on the wood Christmas tree. Learn how to apply decoupage paper by watching the video below. I use this technique on furniture, too.
Distressing The Wood Christmas Trees
Here’s the fun part. Who am I kidding? It’s all fun.
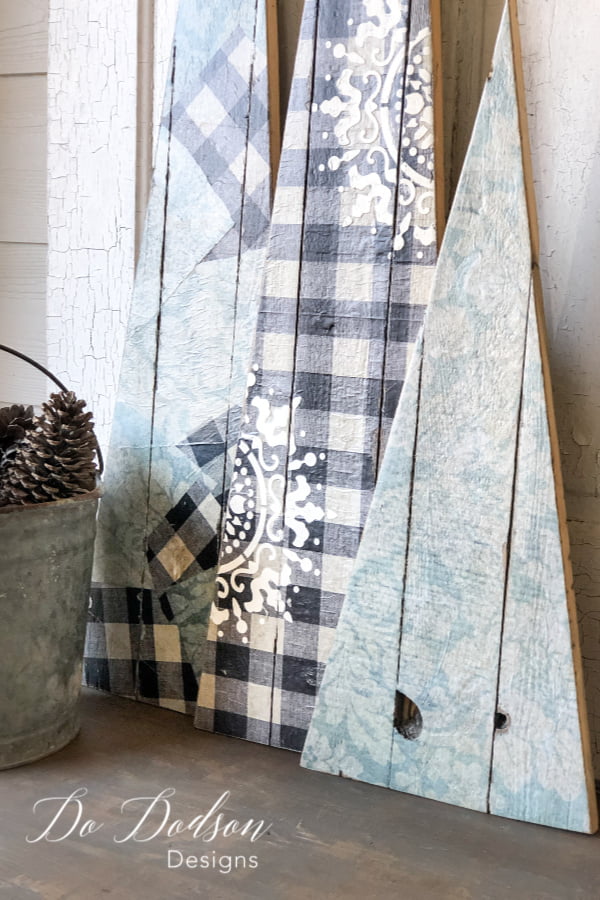
When tissue paper and Dixie Belle’s topcoat are applied on a rough surface (weathered lumber), it creates the perfect vintage look when distressed. All the rough areas sand back nicely to reveal a super-aged paper. If you’re using them outdoors, you will want to apply a water-resistant topcoat over your wood Christmas trees. Gator Hide is the perfect choice to protect your masterpieces. These little beauties are living on my front porch this holiday season.
Adorable Wood Christmas Trees
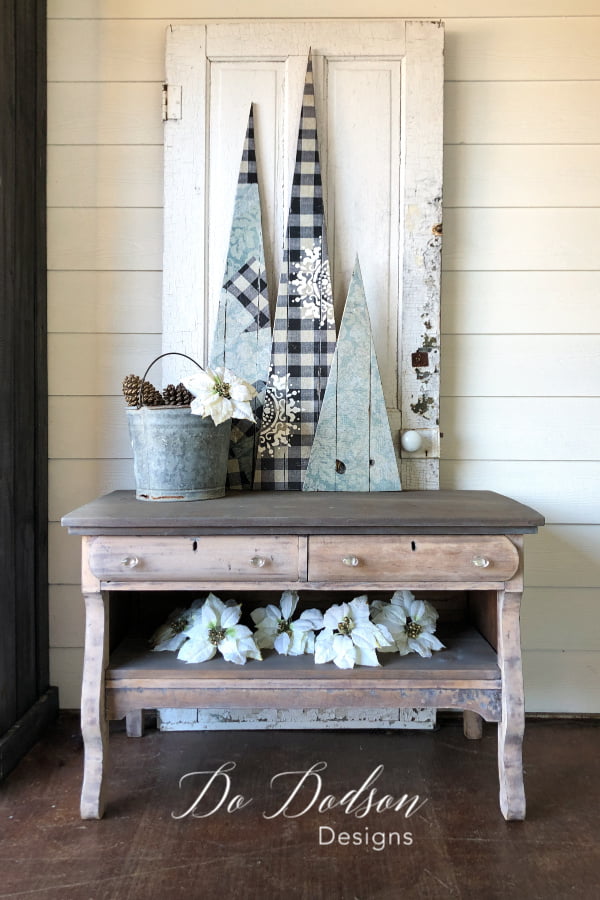
And THAT is how to use those leftover scraps to create wood Christmas trees on a budget. Unique and one-of-a-kind. You’ll be the envy of the neighborhood with these little cuties. Yes, I do have a dresser on my front porch. Would you expect otherwise? I’m creative! What about a Christmas tree door? CLICK HERE to check out this idea for your holiday decorating. Oh, and don’t miss these adorable scrapwood Christmas Churches. They were a HUGE hit and still are!
Do you decorate your front porch? I’d love to hear about your Christmas porch designs, too. Drop me a comment below.
Until the next project… xo, Do


Love your projects, when I grow up I wanna be just like you 🙂
Oh, Debbie! Don’t grow up! Thank you 🙂 xo
I found a pile of fence panels at the dump a few years ago…..took three or four days to talk my husband into going back for them. He was NOT convinced!! But in all, he’s used more of them than I have!!! Haha! They just don’t understand our “vision” until it comes to fruition and it’s staring them in the face…..then they have that aha moment and say things like “Wow, Babe! You’re so creative!!” LOL
I giggle a little every time I use them. Sweet victory. 🙂 xo, Do
These are fabulous! Thanks for sharing your vision and talent!
You’re so welcome! 🙂 xo, Do
Currently making a set…..well, my brother made them and now I’m painting/stencilling them. Thanks for the inspiration!!
Hi Sue! What a sweet thing for your brother to do. I’d love to see yours when they’re done. xo, Do 🙂
Gahhh…I love this project! I am absolutely going to have to try this! Thank you for the inspiration!
🙂 I like it a lot! Thanks! xo, Do
Love these!! Could I use Modge Podge Waterbase Sealer instead of the Dixie Bell?
Hi Bee! Yes, I don’t see why you can’t. I just prefer this topcoat for ease of use. 🙂
Ty so much!
You are most welcome! Merry Christmas 🙂
Wow! I do love these so much! I love the ideas and patterns you come up with. Bravo, my friend.
Thanks, Wendy! I’m working on a different set of wood Christmas trees for this year. Stay tuned! 🙂 xo
LOVE LOVE ALL YOUR WORK…..
Thanks Dottie! Come back soon. xo 😘