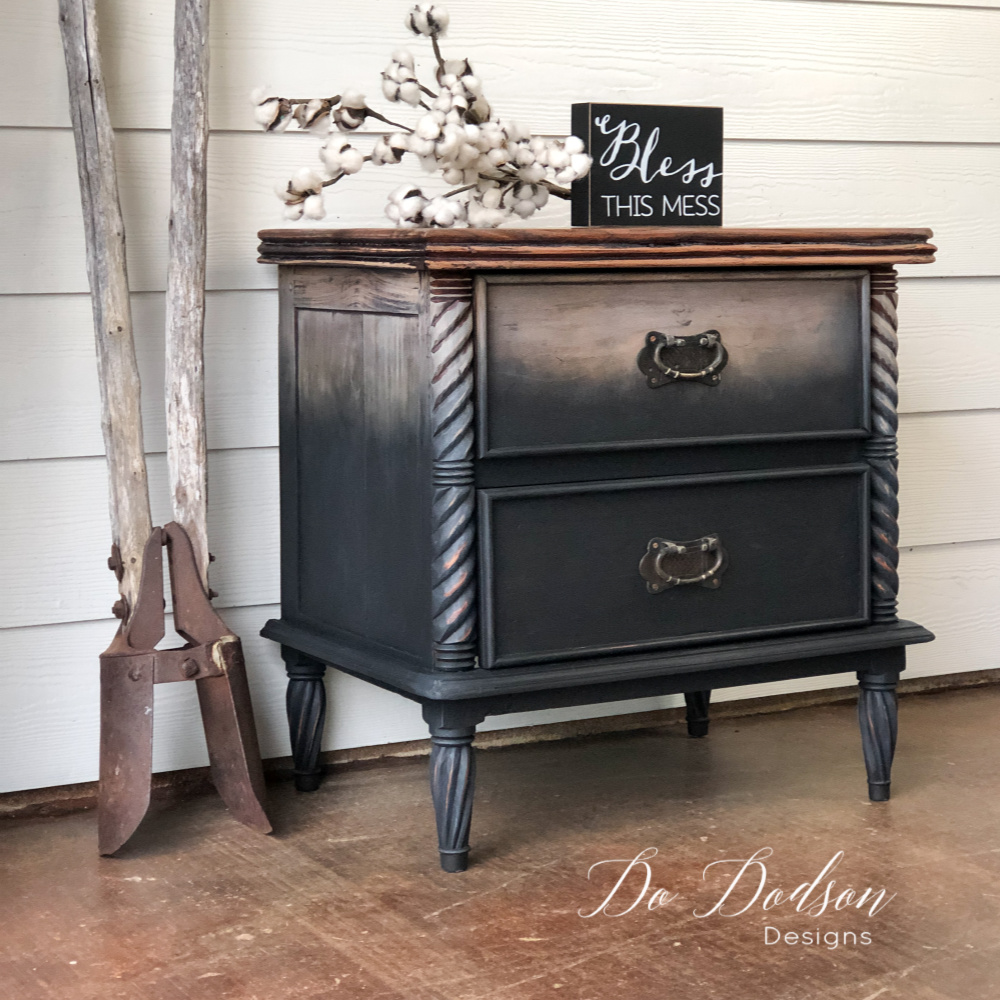
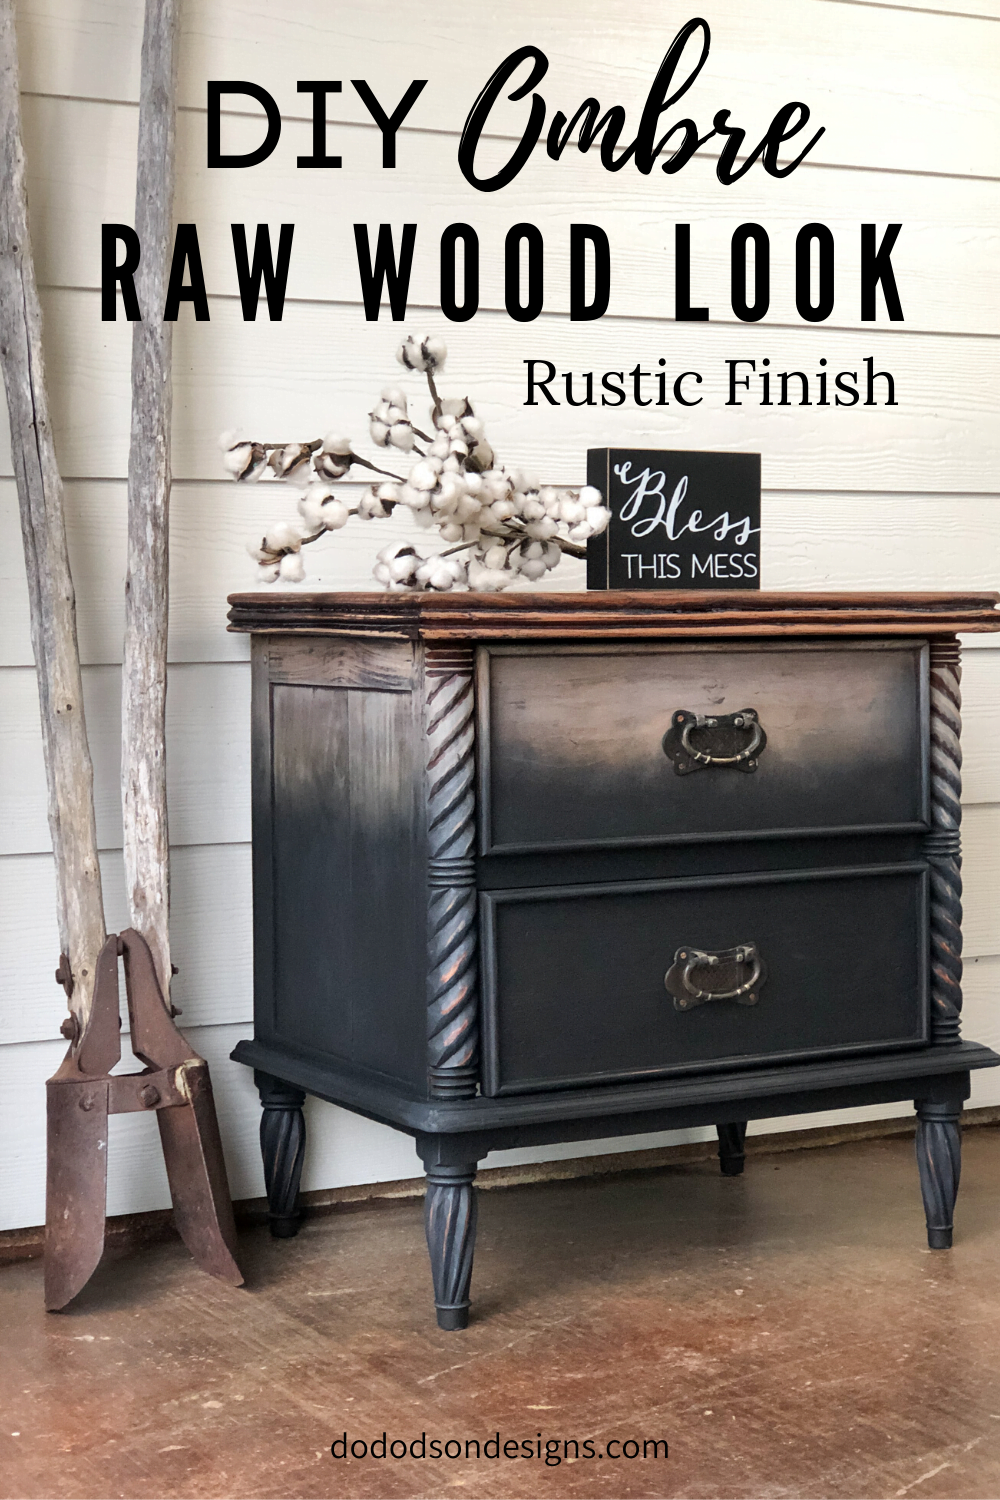
Do you love the DIY raw wood look on furniture? Me too! I see it pop up all over with the farmhouse style. But I also love paint and wood combinations when it’s appropriate. Today’s furniture makeover started as an experiment that took me by surprise, and I can’t wait to show you how it turned out. Today, I’ll show you how to create an ombre paint finish on raw wood furniture. It’s pretty cool!
This post contains a few affiliate links to help you find the products I use. You are not charged extra to use any of the links, but any income I make will be used for more fun projects! To see my full disclaimer, click here.
DIY Raw Wood Look Furniture – Ombre Paint Finish
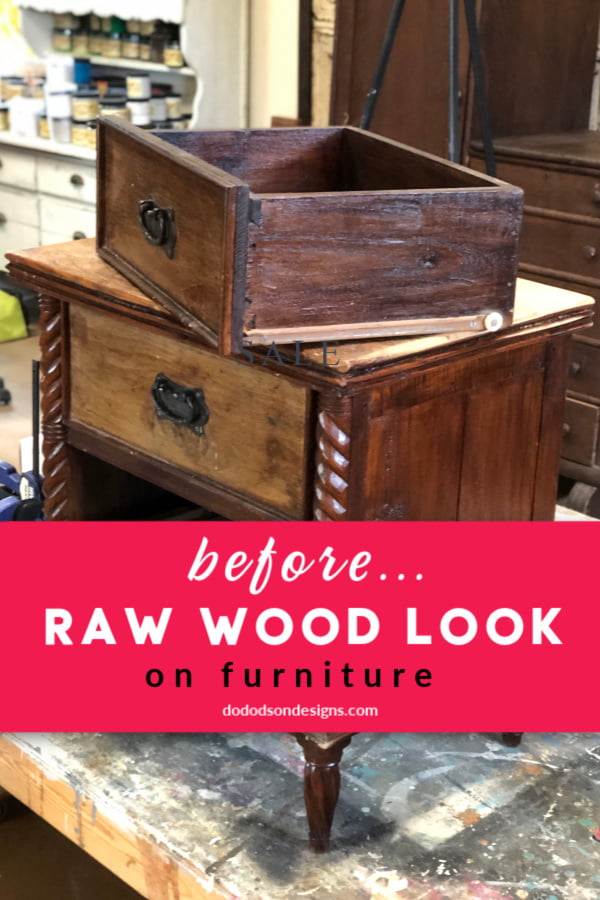
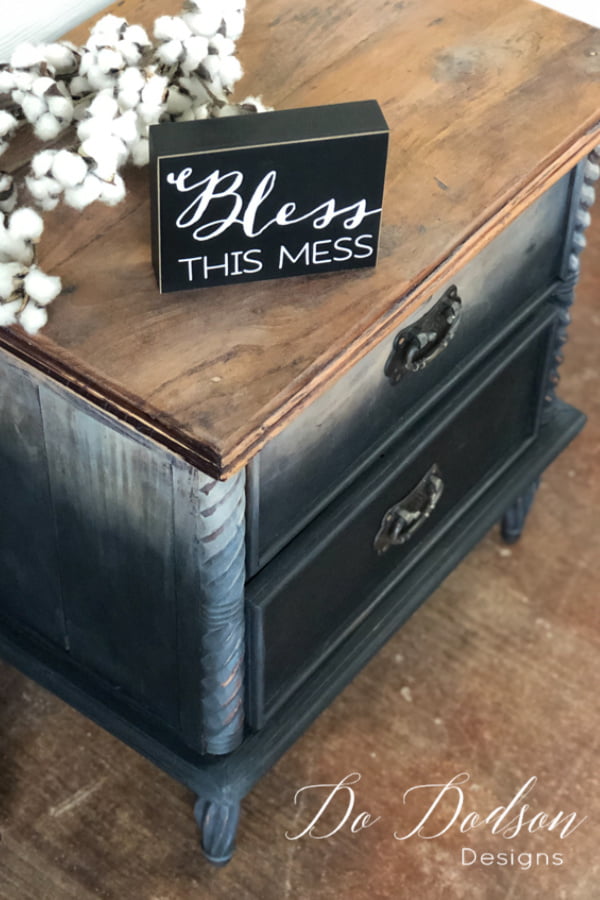
When I purchased this side table on Market Place, I had no idea that it was solid walnut. Can I say I have a thing for beautiful wood? Well, I do, and if you have been following me and my furniture makeovers for a while, you’ve seen me incorporate the raw wood look with wax but never paint. Here’s what you will need to recreate this ombre finish on the wood.
Stripping Wood Furniture
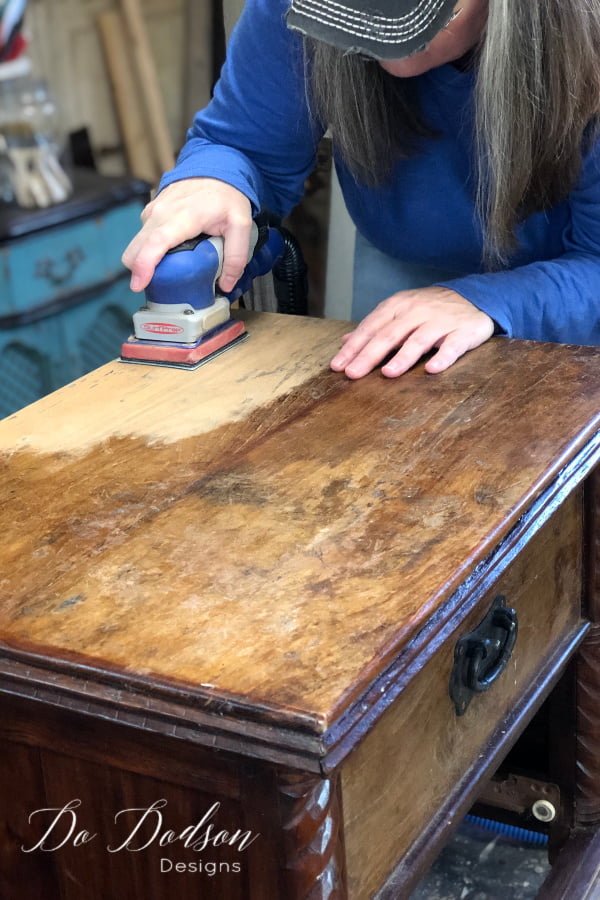
Well, there’s more than one way to strip wood furniture. But seriously, when you want a raw wood furniture look… the best way I have found is just sand right through all that old finish. I’m not suggesting that you should strip all wood in this manner. However, what I look for in a wood piece to use this method is age. Usually, those pieces have been stored in storage units, barns, or anywhere where the wood furniture has been stressed and caused to be brittle. The wood is very dry, and the varnish, lacquer, or finish sands away very easily.
Below is a chart that will help you understand the different grits of abrasives and what they’re used for.
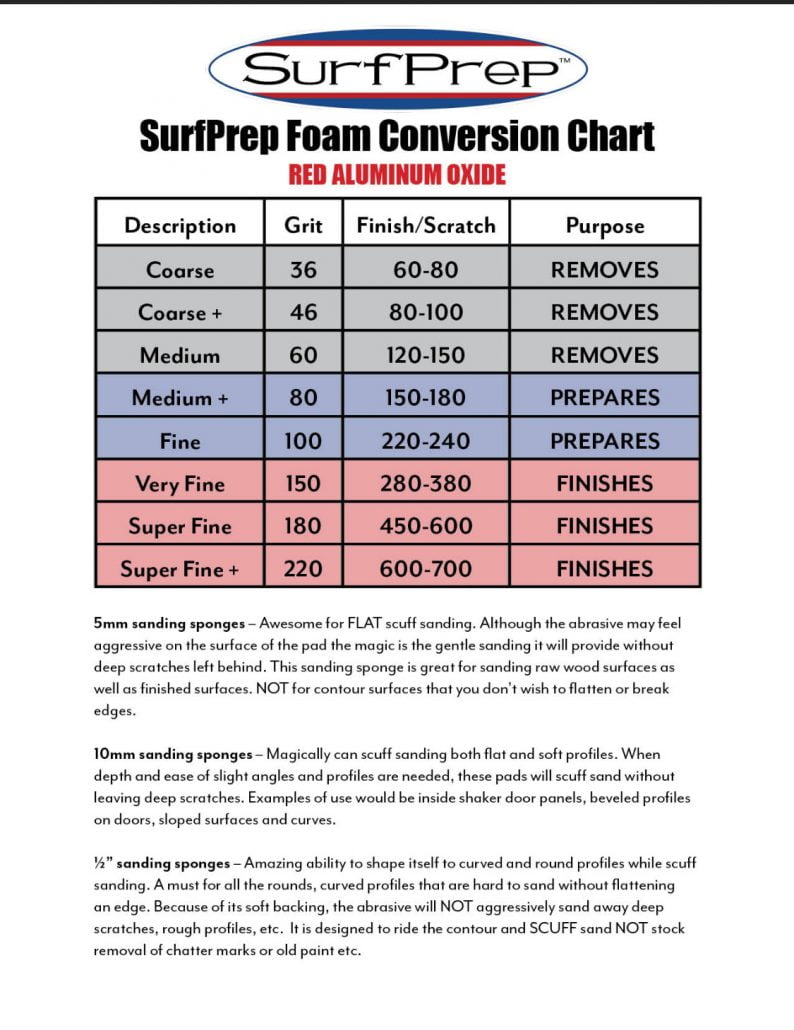
What Grit Of Sandpaper Will I Need To Get A Raw Wood Look?
I usually start with an 80 grit paper, and if that doesn’t cut through quickly, I step it up to the 60 grit. This side table was stripped in about 15 minutes with my Surfprep Sanding System to get this raw wood look. It’s quick and easy when you have the right tools. Of course, you can always hand-sand if that’s your thing.
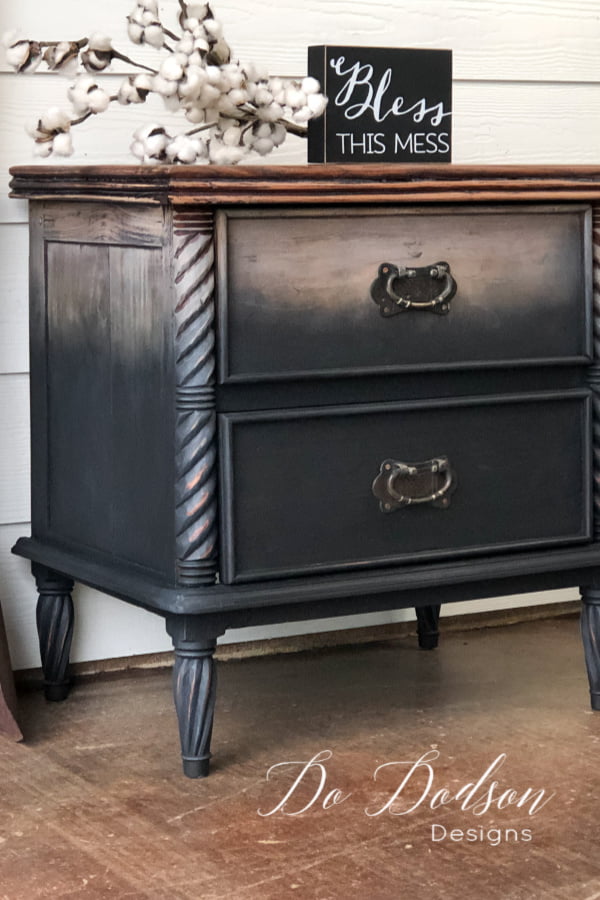
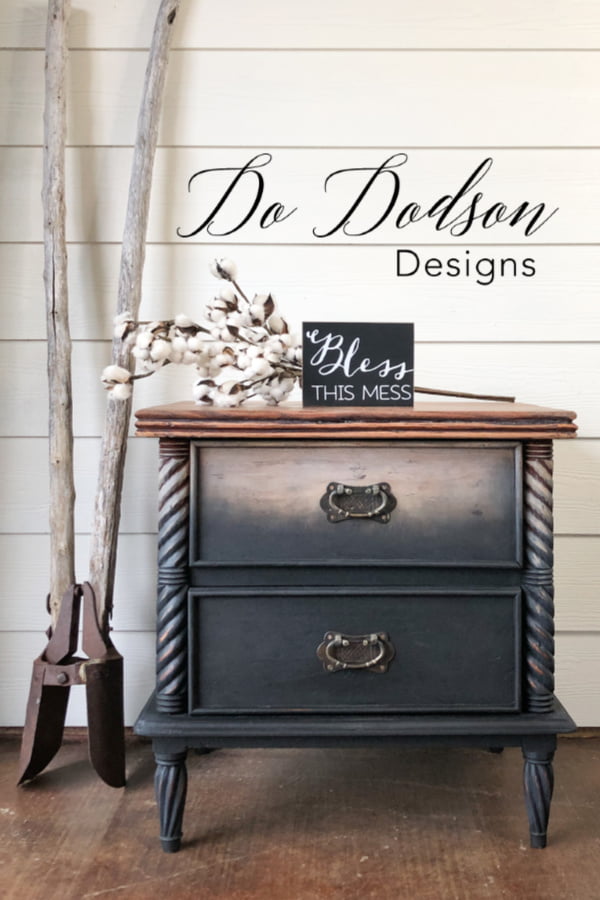
How To Get An Ombre Paint Finish On Raw Wood
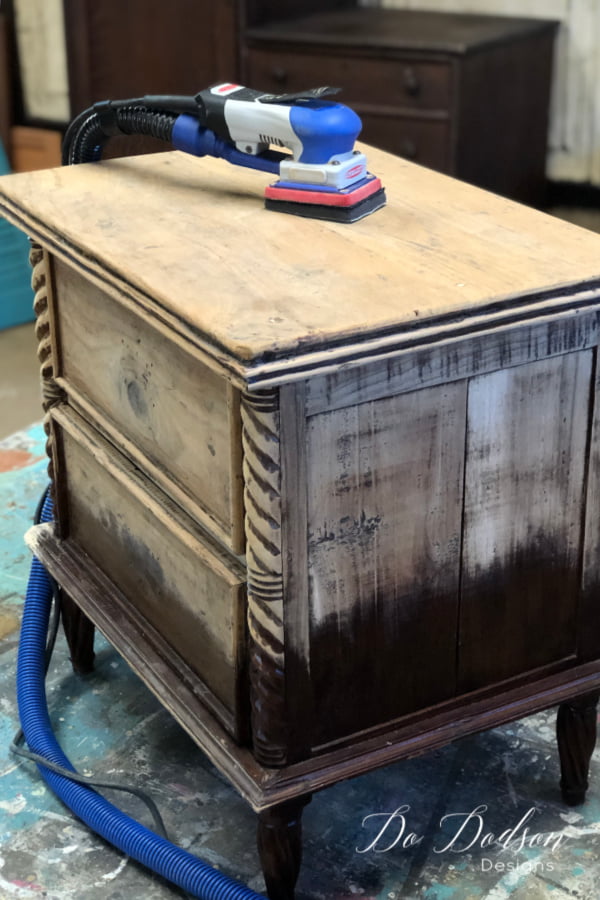
Using a paintbrush, paint up into the raw wood and stop where you want the blending to start. Use your imagination with this step and create a unique design. For this makeover, I went in a semi-straight line across… about 2/3 up from the bottom of the piece. Allow the paint to dry a good 24 hours before the next step.

Blending Paint Into Raw Wood
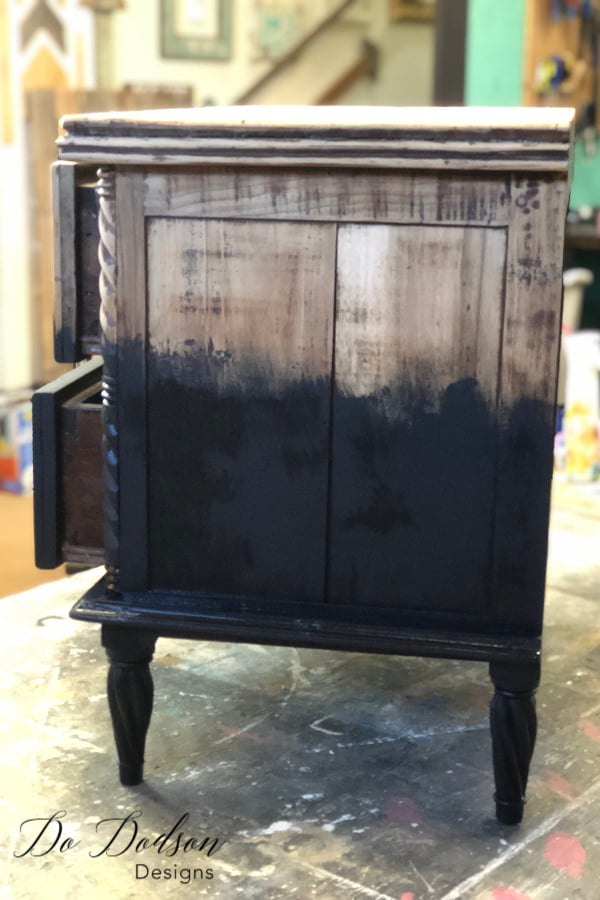
Next, apply the same color of paint (Caviar) right below the raw wood where the paint meets the raw wood. Use your water mist bottle to dampen the raw wood while pulling the wet paint up into the wood. The water will help dilute the paint and aid in blending the paint on the damp wood. Repeat this process until you get the look you want. It’s easier than it looks, I promise. But if you’re a visual learner (like me) and video is the way you learn best, I created a tutorial for you in The Art Of Painting Furniture Video Library. CLICK HERE to learn more about how to get my latest furniture painting tutorials.
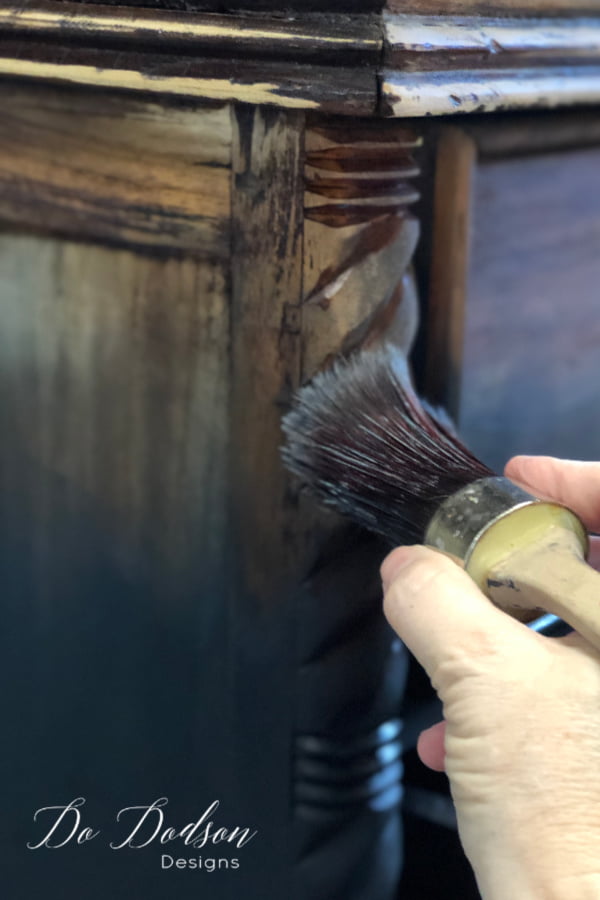
How To Seal The Raw Wood Without Making It Dark
Sealing raw wood can be a challenge. All tops coats will change the look of the raw wood somewhat. But I have found that white wax keeps the raw wood, keeps it light, and gives more of a natural wood tone. And if your wood has undertones of orange-red or yellow, it will help tone those colors down.
For an experiment, I’m pretty excited about this finish. I will be using it again on a larger piece and maybe with a bold color—so many ways to change this look.
So, what do you think? Would you try this look on your furniture? I’d love any feedback on this process and if you would have done it differently. Bend my ear in the comment section below.
Until the next project… xo, Do
Very Nice! I just have to learn to go for it!
Hi Paula! Yes, we hold back for fear of failure. It’s only paint, so go for it. It’s how we learn. 🙂 xo
I for one would not paint an antique or sand to lose the years of natural patina on the piece, especially if it was hand made and dovetailed. ?This one makes me sad.
Painting other less valuable pieces is great and improves Them!
Hello Wilma,
I appreciate your love for these old pieces and I value your opinion. This piece would have ended up in the landfill if I hadn’t saved it so the value is in the save. Thanks for your input. 🙂 xo, Do
Lady, you are so talented!! ? What a beautiful idea. I would love to try that on a piece. ?
Thank you, Wendy! It’s always a lot of fun when I learn something new. You totally should try it. 🙂 xo, Do
I love, love, love this piece. You did a fantastic job!!!! I’ve been ordering from Dixie Belle like crazy lately and I always use your link. I’m just a beginner and trying to learn how to do this diy stuff. You and Dixie Belle are my heroes!!
Thank you, Barbara! I appreciate that more than you know. Thank you for stopping by.
Happy painting! xo, Do 🙂
I love this combo and this look very much. I can’t wait to find a piece like this to try it. Simple yet elegant.
Oh great, Leslie! You must share your thoughts and a pic too when you get it completed. Thanks for stopping by. xo, Do 🙂
You are one talented lady. I only wish I did t have to wade thru so many ads to see what you are doing ☹️
Hi Judie,
Thank you for your sweet comment. As for the Ads… I know they are a nuisance to my readers but this is how I make money. It allows me to pay for the website and programs that it takes to share what I do with you. I wished there was another way, but I too have bills to pay. Thank you for your understanding. xo, Do 🙂
Thank you so much for sharing do. I love it. I was a role painter for years,then quit to help with grandkids and my mom,but I’m now a senior myself so starting to paint again. Have a lot of raw pine items left as I had a carpenter cut my wood. This will possibly work on some. They are smaller decorative pieces and I just started with f2f chalk pant. Love your work so thank you do.
Hi Patt! Yes, I’m the caregiver for my parents now so I do understand about the time. So glad to hear that you are picking back up. I always say that paint is therapeutic and without it, I would be lost. Enjoy and have fun with it. Keep in touch. xo, Do 🙂
This makeover looks beautiful. I too have struggled with painting old pieces and there was a time I would have, and have, left old pieces as they are. But my home, while it has a little farm house style it is more eclectic and I no longer feel guilty if I decide I want to remove old stain and add some paint. I am such a novice yet but as you have often said, the piece speaks to you and once it does you might as well not try to fight what it is saying to you. Its more rewarding to listen.
I have an old dresser right now that I am sanding down to raw wood. Will then decide which direction to take. Initially my plan was to paint. Will see what it says once i finish sanding.
Thanks for sharing and for all the tips and videos.
I couldn’t agree more, Joanne! The direction of a true artist is always unknown. I too believe that the design will reveal itself as you go. So many different factors involved. I’m so happy you shared this with me. 🙂 xo, Do
This piece is a beauty. But is white wax enough to protect dining table?
Hi there!
No, I would not recommend a wax finish for a tabletop… but, you can add a waterproof topcoat like Gatorhide (Dixie Belle product) if you used the Dixie Belle wax. It’s the only wax I have found that is waterbased and after being properly cured, you can apply a top coat for protection. I have used these products on a tabletop. Here is what I recommend.
Dixie Belle Gator Hide https://dixiebellepaint.com/gator-hide/?aff=80
Dixie Belle Wax https://dixiebellepaint.com/best-dang-wax/?aff=80
I hope this helps answer your question. Good luck.
Do
Thank you so much. This is a great help but how long this takebeas till it’s cured?
I would give it a few weeks stored at room temperature indoors.
I’m in the process of striping a walnut telephone table and I asked my daughter if she would like ombre last night. I wasn’t to sure, I knew I wanted black. Seeing your piece here sealed the deal. Thanks! I’ll check out your video for some pointers.
Hi Teresa! I’m so glad I could give you some inspiration for your project. Have fun with your makeover on the gossip/telephone table. I don’t see them around here very often.