Looking for a simple and budget-friendly DIY scrap wood sign project? Learn how to make a rustic, large DIY wooden sign with this easy-to-follow, step-by-step, detailed tutorial.
Thanks to Dixie Belle Paint Co. for sponsoring this post. While I was compensated to write this post, all opinions are my own.
* As an Amazon Associate, I earn from qualifying purchases and through other companies as well. You will not be charged extra when you purchase through these affiliate links, but any income I make helps me create more amazing DIY projects to share with you! To see my full disclaimer, click here!
The Charm Of A Farmhouse Wood Sign
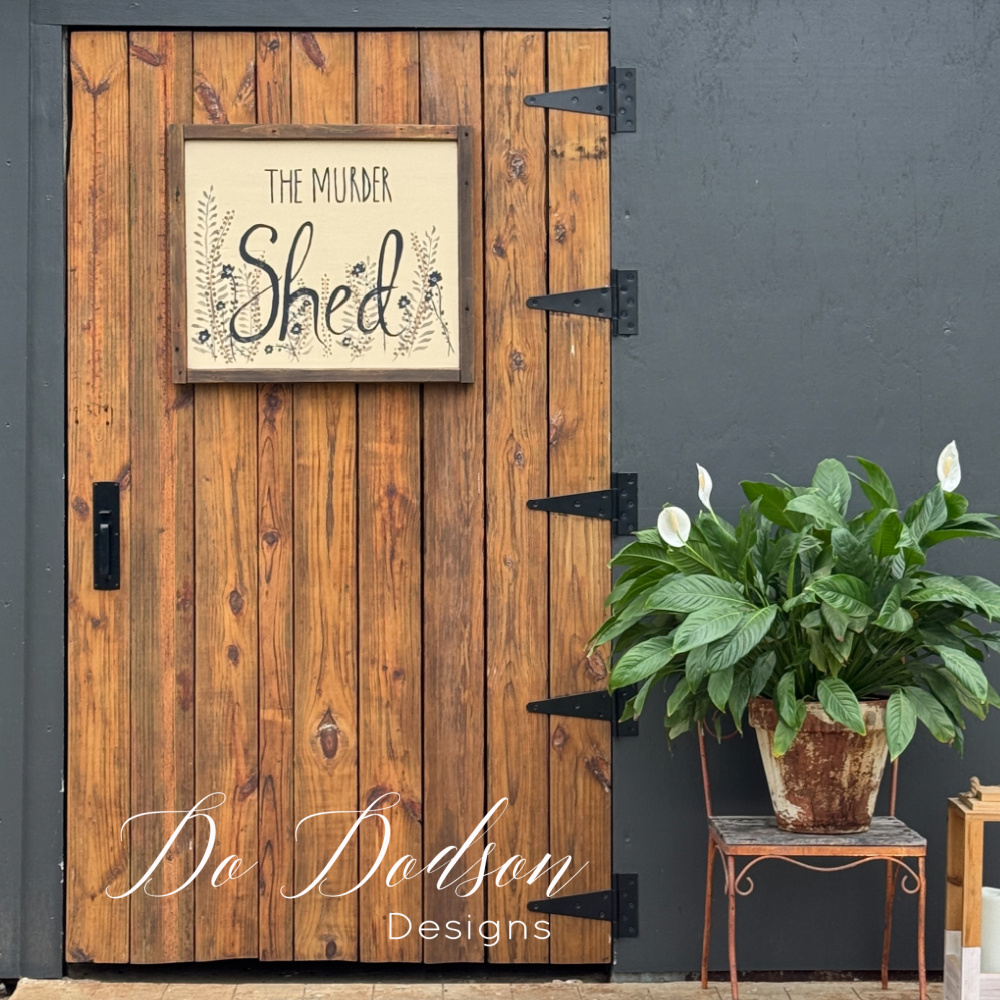
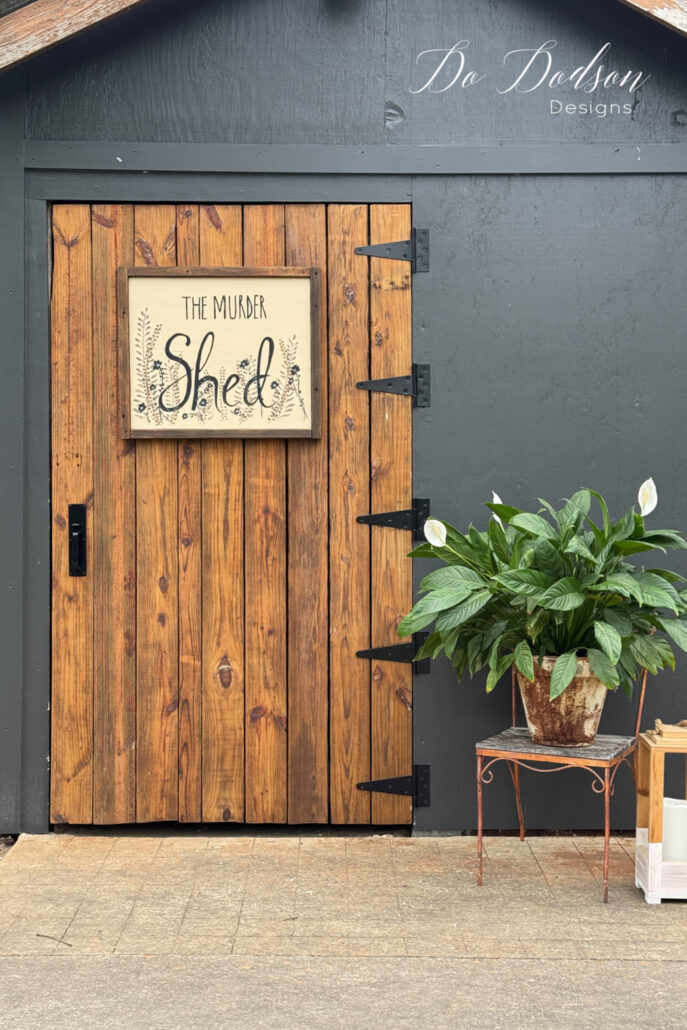
Painting signs can be a fun way to add personalized charm to your outdoor home decor. Why not? I love to see a home with outdoor charm, and our little shed that sits at the entry of our house deserves to be pretty, too. Even if it has a funny name, I’ll explain later how it got its name.
It was named by my lovely daughter-in-law. She has quite a sense of humor, and we love her and her creative mind.
The plan was to make a scrap wood sign with the shed’s given name to hang on the door. Yeah, we name everything here at the Dodson Mini Ranch. It’s a southern thang.
And if you love reversible signs, here’s a great tutorial by Missouri Girl Home.

Materials Needed For Wooden DIY Signs
- scrap wood (MDO plywood) for exterior use
- 2×2 or 1×2 strips of wood (frame pieces)
- pencil
- circular saw or miter saw
- wood sander or 220 grit sandpaper
- wood glue (exterior)
- brad nailer with nails
- paint brush
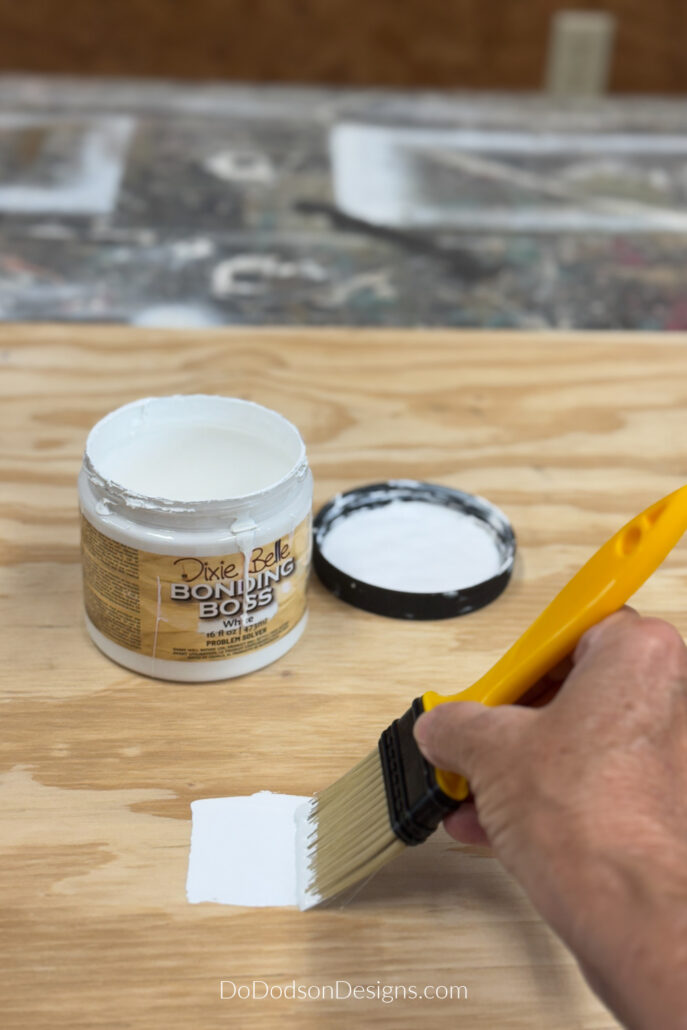
- Bonding BOSS (stain wood tannin blocker)
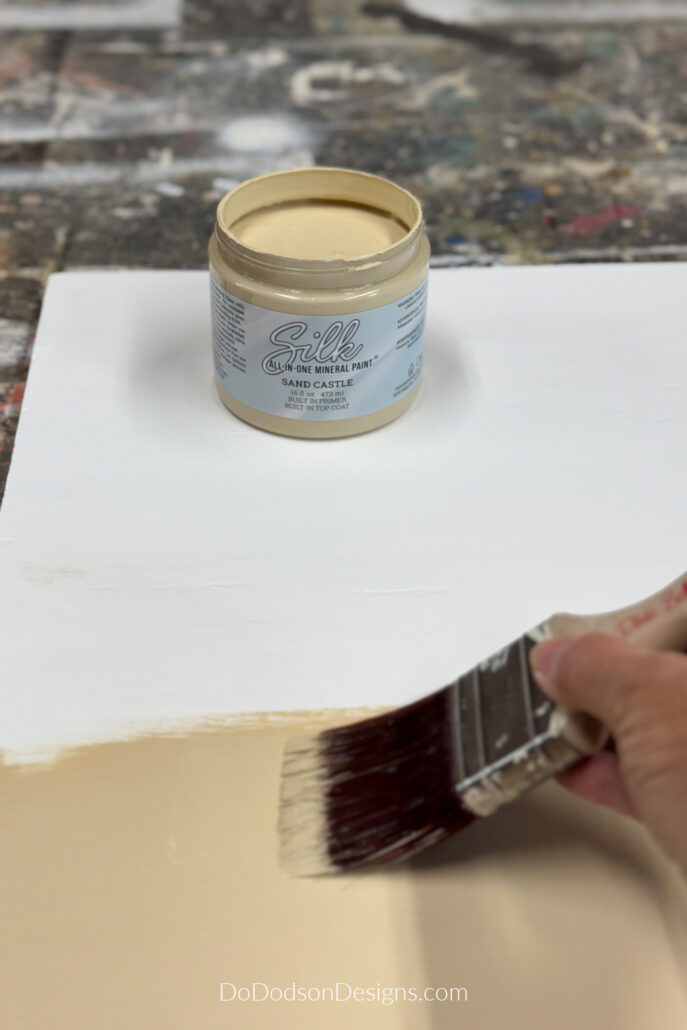
- Sand Castle SILK All-In-One Mineral Paint (built-in primer and topcoat)
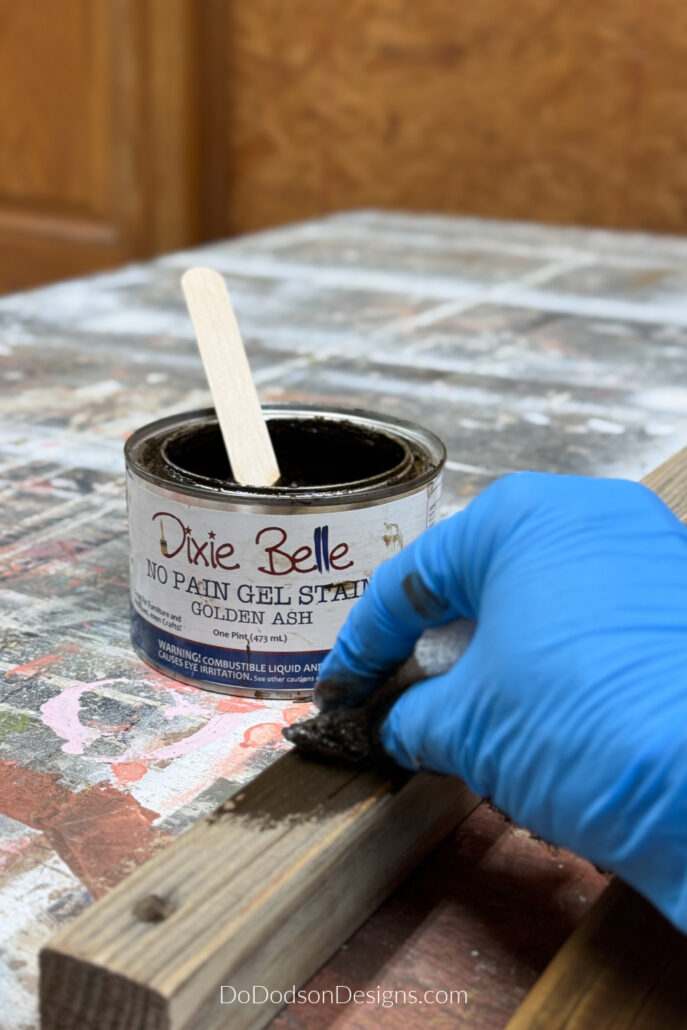
- NO PAIN GEL STAIN Golden Ash (for the wood frame)
- Chocolate Chalk Mineral Paint
- Caviar Chalk Mineral Paint
- Hurricane Gray Chalk Mineral Paint
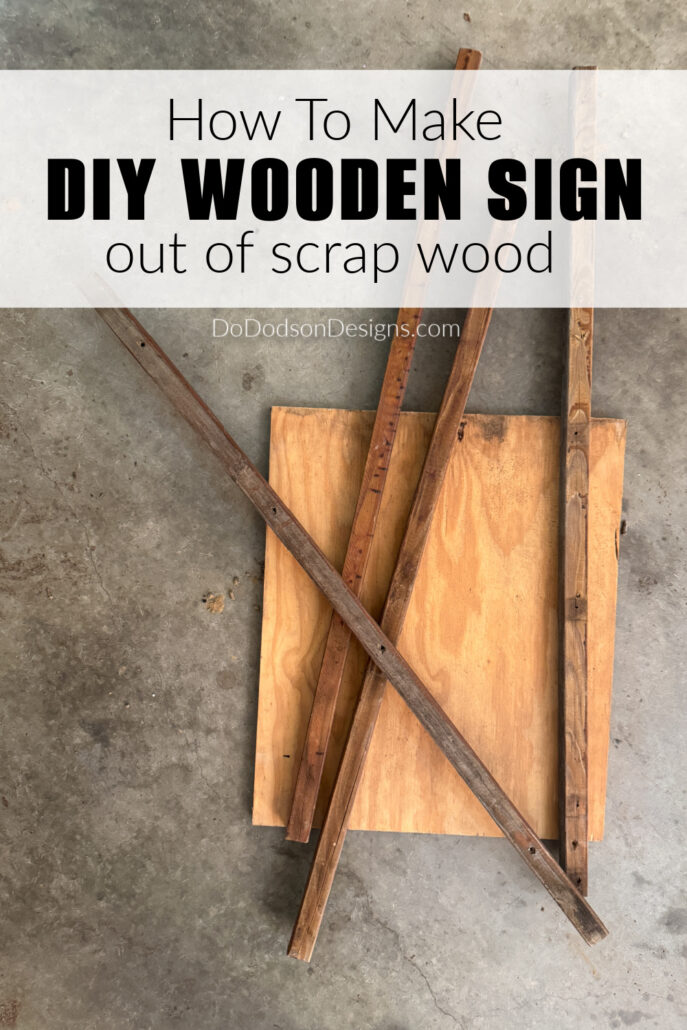
Step 1: Gather Scrap Wood Pieces
I went to the scrap pile to see what I could come up with. I’ve made many DIY signs in the past using pallet wood and leftover fence pickets, but for this wooden sign, I wanted a large piece.
As luck would have it, I found a piece of MDO (medium density overlay) plywood that was the perfect size—20×24 inches. No cutting was required—that rarely happens. The smooth surface of plywood makes painting signs much easier, and it’s designed for exterior use. PERFECT!
In my honest opinion, a larger sign needs a frame to complete the look. So, I grabbed four sticks of 2×2 treated lumber, but you could also use 1x2s. The size of your sign will determine that, but sign-making has no rules.
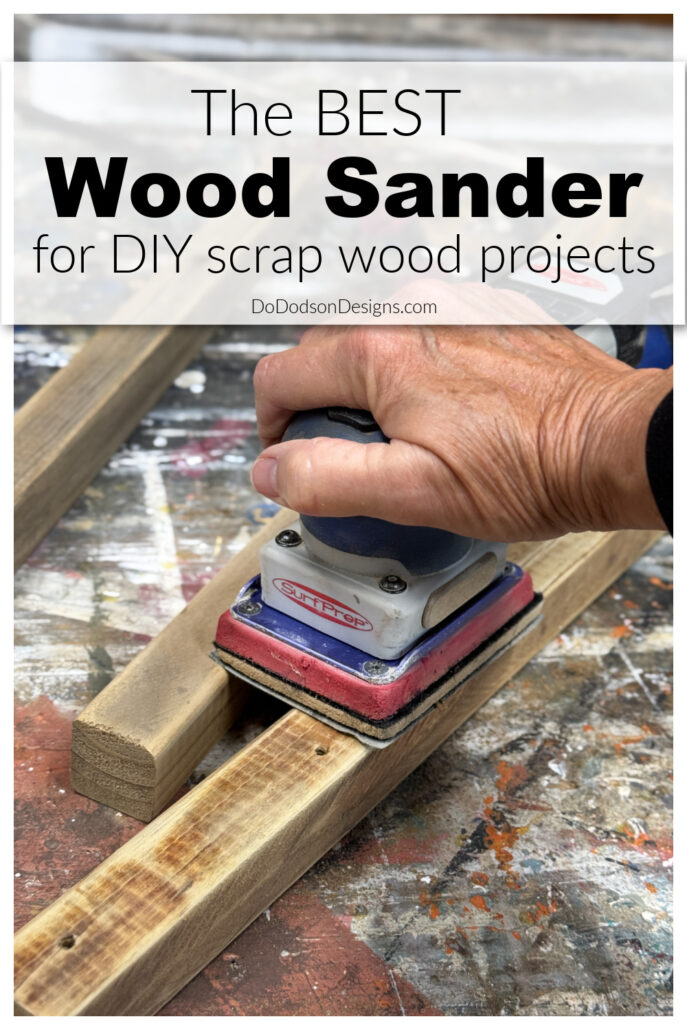
Step 2: Cut, Sand, And Prep The Wood
Next, I measured the 2x2s for the frame around the plywood.
First, cut two 2×2 side pieces to the same size as the plywood sides of your wood sign.
Then, cut the top and bottom 2×2 pieces longer to overlap the side pieces, creating a 90-degree corner. Square. This is a simple frame with no mitered corners.
I sanded all the wood pieces with 220-grit abrasive and wiped away any dust from the sanding.
Next, stain or paint the wood. I don’t recommend building the frame until after finishing the wood.
Step 3: Paint Or Stain The Wood
If you plan on painting your plywood sign, you’ll need a stain and a tannin blocker, especially if your background color is white or a lighter shade.
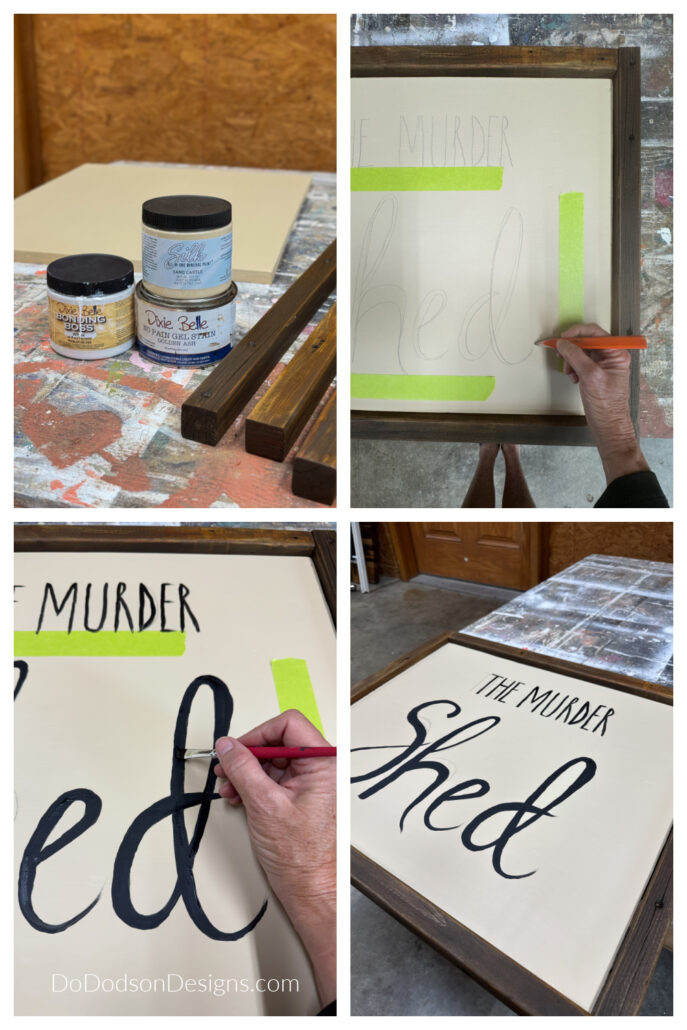
I used two coats of Bonding BOSS by Dixie Belle Paint Company to block the wood tannins before painting. This product is an all-in-one problem solver. It blocks stains while adding a bonding surface for your paint.. It can be used on multiple surfaces.
The first coat typically dries in a few hours, and then you can apply the second coat. Of course, that depends on humidity and temperature. Wait 24 hours to ensure proper cure time before painting for best results.
For the wood sign’s base color, I chose SILK All-In-One Mineral Paint in the color Sand Castle. It’s warm with beachy, sand vibes, but not too yellow—more of a cream color. Two coats were applied for full coverage.
This paint has been my go-to for the last few years due to its all-in-one properties. It has a built-in primer and top coat that dries to a matte finish in 24 hours, making it perfect for small DIY projects.
For the 2×2 wood frame, I chose No Pain Gel Stain in the color Golden Ash. It complements the colors I chose beautifully and was easy to apply.
I wiped it on the wood with a clean cloth (my favorite way), rubbing it into the wood. Wipe away any remaining stain on the surface with a lint-free cloth. This finish does not require sealing, but may take extra dry time overnight.
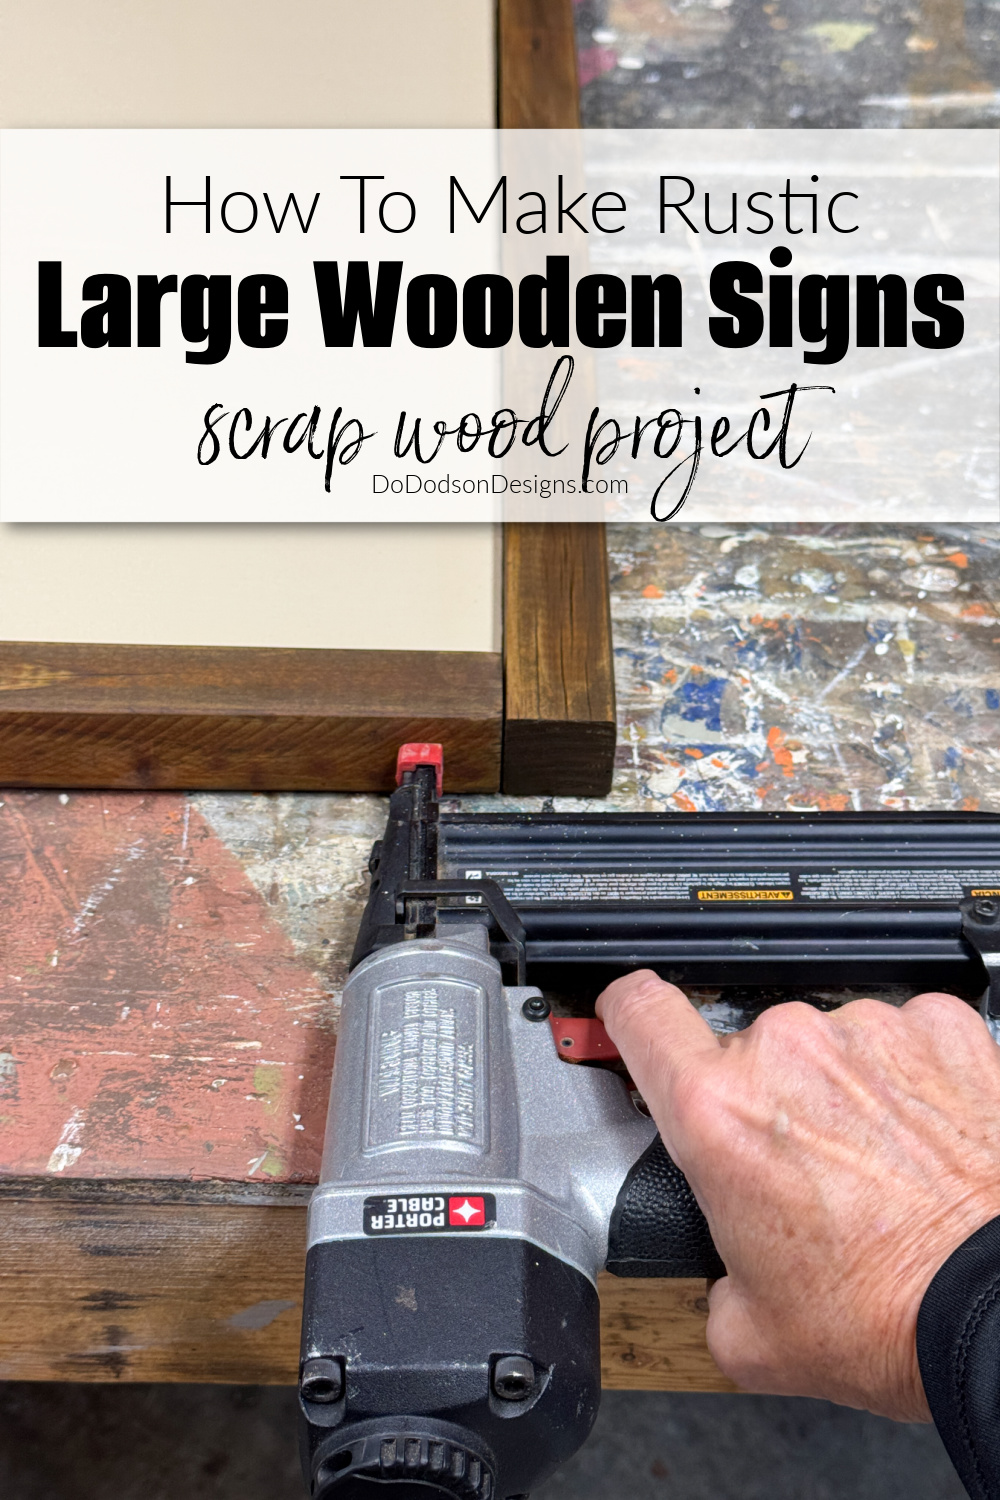
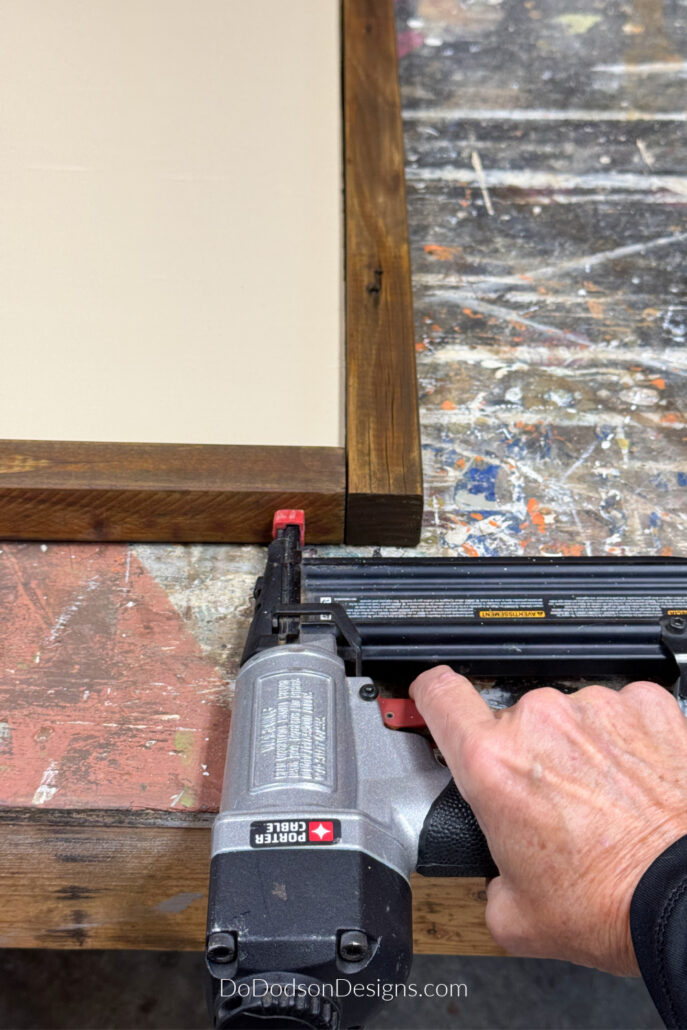
Step 4: Adding The Frame To Your Wooden Sign
Add a bead along the outer edges of the plywood sign using a waterproof exterior wood glue. Align the 2x2s along the edge of the sign board and secure with a brad nailer, or use a hammer and nails. Wood screws will also work.
STEP 5: Stencil Or Hand Lettering On The DIY Wooden Sign
Most of you will probably opt to use a stencil for your sign. Me? I’m a rebel and super cheap when it comes to spending money on a one-time stencil. Most of the time, I’ll try to free hand it, but before I do, I’ll come up with a design in my mind.
Fonts are important when making a DIY wooden sign. If you use more than one, they must work well together.
If you want to try free-handing a design, I suggest going to an app like PicMonkey or Canva (both have a free version) and playing around with the fonts.
Here is what I came up with for my sign. LOL, I should have warned you.
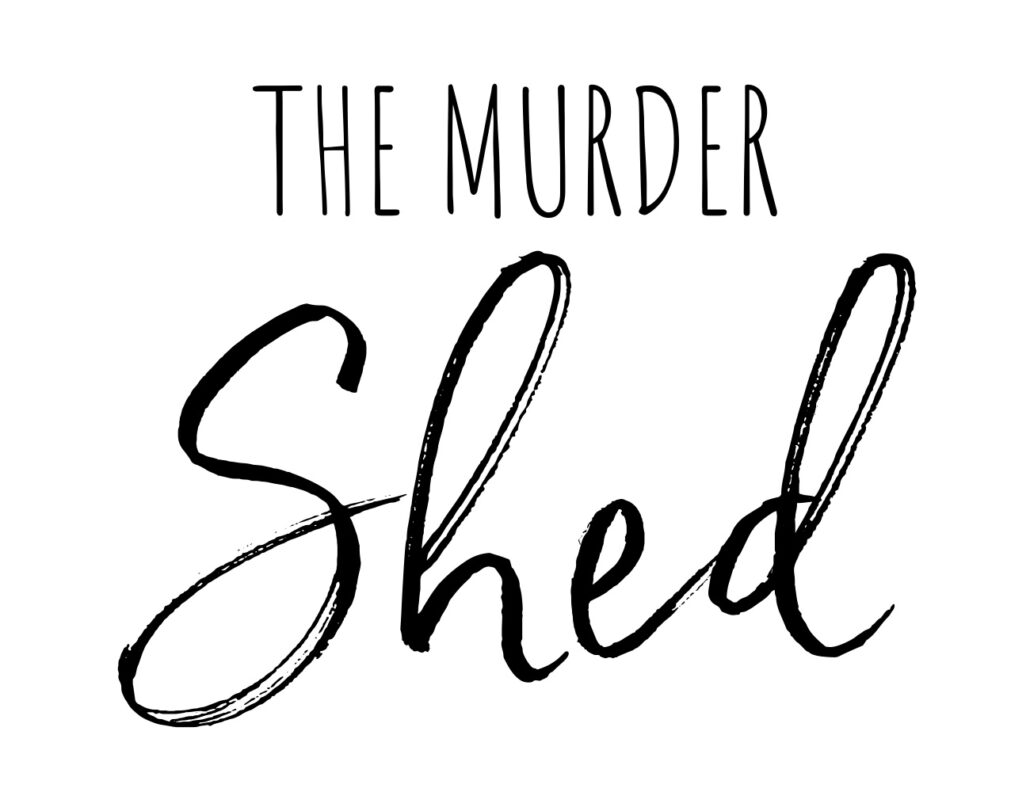
Using gentle release tape, I sectioned off a border around the edge to help keep my design centered. Then I counted the letters (spaces) to find the center for the largest word. SHED
Using a pencil, I lightly wrote the letters as best I could to make the word “SHED.” It took me several tries, and you can see it wasn’t perfect.
I painted the letters using a small artist’s brush with black “Caviar” chalk mineral paint.
When I was happy with that, I did the smaller letters above.
To cover up my mistakes and leftover pencil marks, I used the same paint as the sign’s base color. THIS WAS THE TRICK! Because I used the SILK All-In-One Mineral Paint, the stain blocker covered the pencil marks beautifully on my DIY wooden sign.
Now the story…
When we purchased our ranch home in 2022, we also bought the land: a barn, a chicken pen, and two sheds. The smallest shed is at the property’s front entrance and was used as a small garage for the former owner’s motorcycle. It’s the first thing you see when you drive through the gate. It was a bit rough and had some age with it.
It needed a lot of work, and I even mentioned tearing it down, but I was met with a firm NO. Can you guess who?
The little shed quickly became home to all our garden supplies, including chainsaws, axes, and big, scary swinging tools hung from the rafters.
One day while visiting, the daughter-in-law wanted to know what was in the little shed by the road. I’ll never forget that day. When she came back from exploring the shed, all she could say was that it looked like someone had been murdered in there. LOL, The Murder Shed! I had to make the wood sign!
Step 6: Add Any Embellishments Or Finishing Touches
Because the word “murder” is on the sign, I had to come up with a design that would camouflage it a bit—or at least add some beauty to my DIY sign.
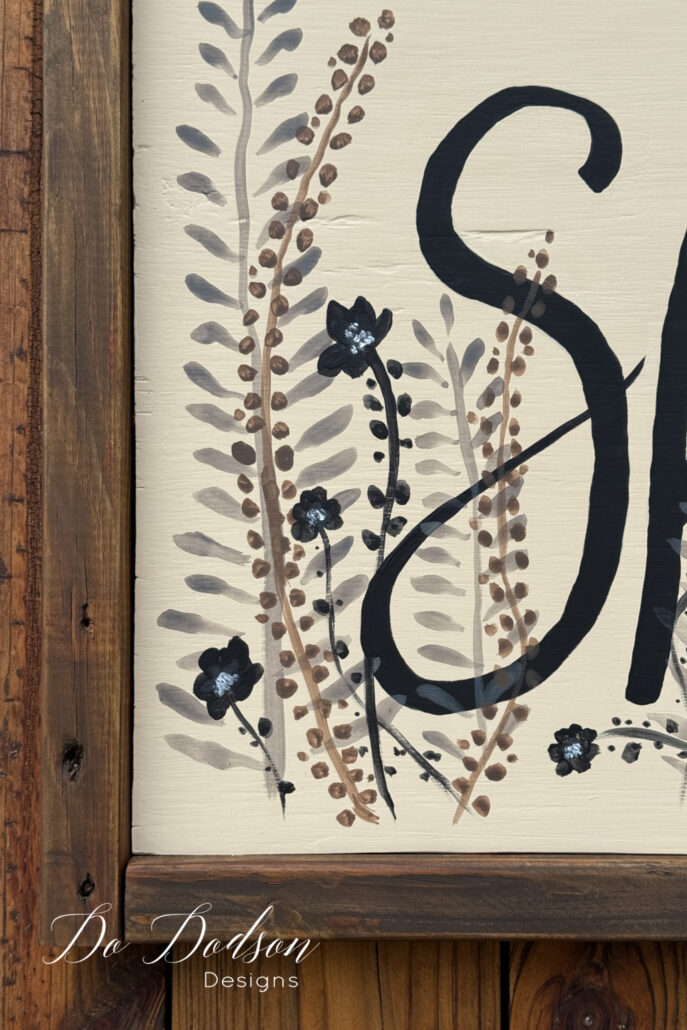
Here’s the fun part. I made watercolors using Dixie Belle chalk mineral paint in hurricane gray, chocolate, and caviar.
Using minimal artistic skills, I started with the watered-down gray chalk paint for the first layer of wild flowers and painted over the words.
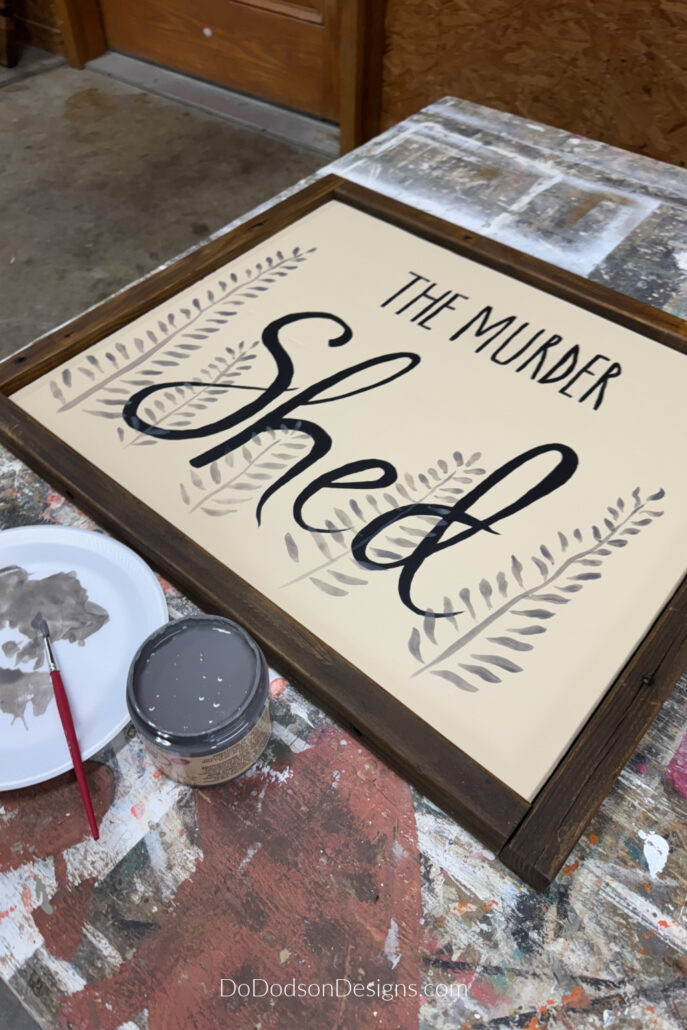
The second layer was with the brown, adding more wild flowers.
For the third and last layer, I used black chalk mineral paint (not watered down) to create a depth of field.
I did go back and add a touch of white in the centers of the black flowers.

The DIY Wooden Sign That Makes Me Giggle
The wooden sign DIY scrap wood project couldn’t have turned out any better. I’m delighted with it.
Every time I drive through the gate, I giggle a bit. I painted the shed black! It’s appropriate, and it blends more with our property and doesn’t stand out like a sore thumb.
The little shed with the funny name is starting to take shape. I’ve been working on this DIY project off and on (weather permitting) for the last year, and I’m getting close to completing it. You better believe you haven’t seen the last of this fun DIY project! There’s more to come with a shocking before-and-after reveal.
With its modern updates, it doesn’t look like a murder shed anymore—well, at least the outside doesn’t. DIY wooden signs are a fun way to express yourself and your unique style.

I hope you enjoyed this tutorial on my unusual wooden DIY sign. If you have followed my blog for any time, you know I don’t always follow the rules. I follow fun, and this one fits the bill.
If you liked this project, I’d love to hear what you think. Please share any tips or tricks you have with sign-making in the comment section below so that we all can benefit. I have learned so much from your comments over the years.
Don’t forget to share and PIN this for later on Pinterest!
Until the next project… xo, Do
I was told once that “Normal” is only a setting on your washer and dryer. And, as my Poppa said when I was very young and told him I wanted to be an Artist, he said that all Artists are a little weird and that is what makes them so creative. Yes, after a 63 yr career as a Graphic Designer and counting I have been told that I am not “Normal” and quite a bit “Weird” at times. I must admit, I love your Murder Shed sign, it is so you and all of your creations personalize your personality to a T!
YES! Your Poppa was a wise man and he is 100% spot on. I’ve always said that I’m proud of my unique abilities to express myself. 63 years as a graphic designer is so awesome. My daughter in law wants to do that same thing and I always encourage her to follow her dreams. Stay “weird” my friend. stay weird. Thanks for sharing and have a beautiful weekend, Saundra. xo Do
I Love it ! We name lots of things here too. I’ve definitely gotten some strange looks at time.
It’s ok. Life needs to be fun and interesting, right ???
Thanks for the detailed process. Not sure I have your artistic freehand abilities. Eeeee.
But… maybe I’ll give it a try.
Note: I have a concrete gargoyle – named Frank. My daughter’s mother’s day gift when she was a smallish child.
Frank tend to get moved around a bit. My daughter generally will notice – and wonder what bad thing Frank has done now. 🙂 Sometines he is looking outside. sometimes in a corner after getting caught from a night of debouchery.
soooo, the saga goes on.
I couldn’t love this more. Your daughter had no idea how much joy she was giving you at the time. A gift of a life time. Frank 😂😂😂 Thank you so much for sharing this. It made my day. 😁
I so enjoyed this, and like you, your DIL has a fun sense of humour! I’m also guessing this is a GREAT security measure…lol. Any stranger thinking of coming onto your property will think twice after reading this sign! 😆 🤣 😉 Happy Easter my friend, enjoy your weekend! XOXO
Exactly what I was thinking too! Kill two birds with one stone. 😂😂😂
Funny, I made this sign on Good Friday. The day Jesus was murdered and hung on a cross. The good news, he has risen. Happy Easter my friend. 🙏🏻
Love your creative style and your thorough instructions! Your sign came out great and looks perfect on your Murder Shed. Easter blessings to you and your family…and thank you for sharing your God-given gifts with all of us.
Thank you, Paula. I’m always happy to share with others that enjoy DIY. I hope you have a beautiful Easter. HE has risen. ❤️