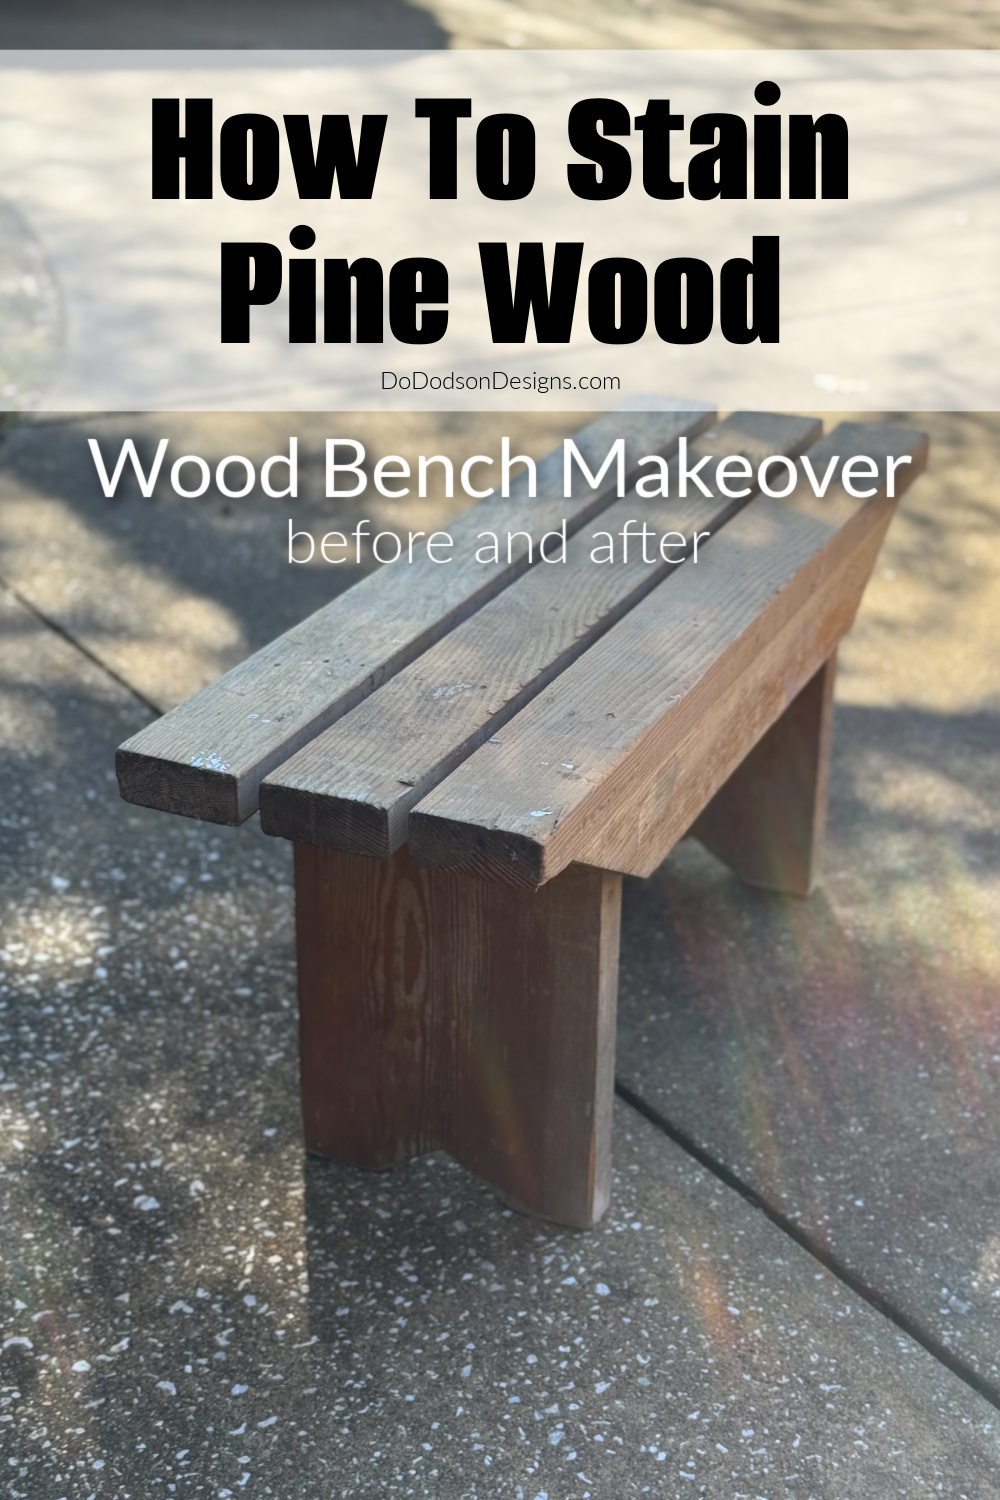
Hi friends! I found this old pine wood bench last year that definitely needed some love. Today, I’ll show you how I updated it for my bathroom and how to stain pine wood quickly and easily with water-based gel stain.
Thanks to Dixie Belle Paint Co. for sponsoring this post. While I was compensated to write this post, all opinions are my own.
* As an Amazon Associate, I earn from qualifying purchases and through other companies as well. You will not be charged extra when you purchase through these affiliate links, but any income I make helps me create more amazing DIY projects to share with you! To see my full disclaimer, click here!
How To Stain Pine Wood (Bench Makeover)
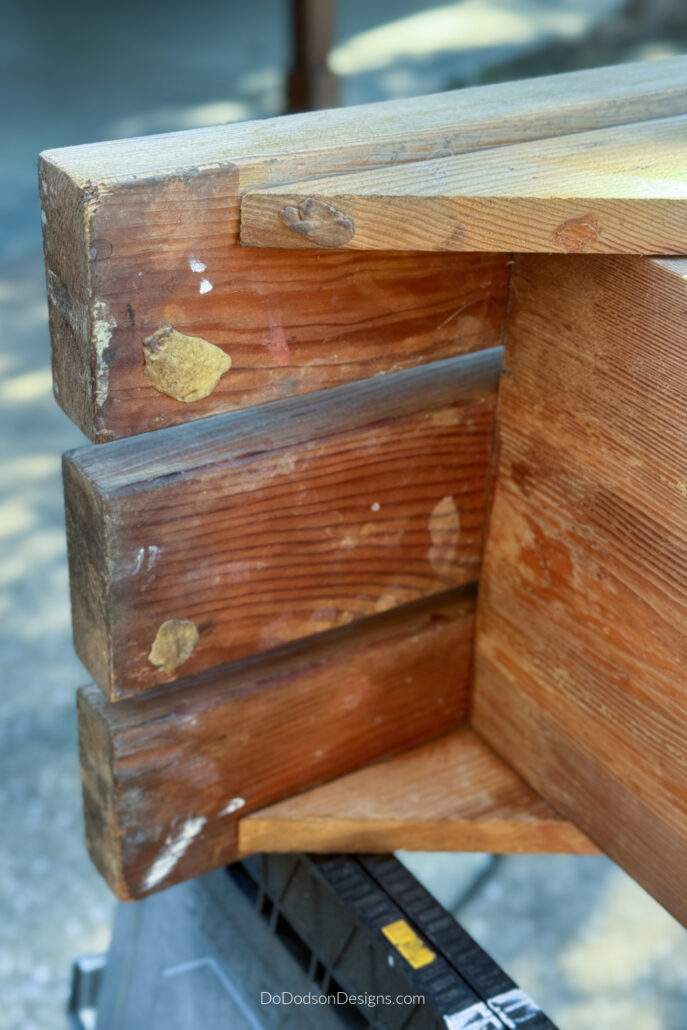
Before starting any furniture makeover, I always inspect the piece from top to bottom and underneath. And wouldn’t you know, I got a SURPRISE!
A funny story about gum: I giggled when I flipped this wood bench upside down to clean it. There it was! A childhood memory of sticking gum where it should never be stuck.
But MY gum (when I was a kid) was smashed under the wooden church pew. My Grandma would be so mad at me if she knew. I learned it from my Grandpa. 🙂
My Grandpa would always stick his ABC (already been chewed) gum to his headboard before bed. I swear to you, the man would chew that same piece until it was gone. After he passed away, my brother stuck a new piece of gum still in the wrapper in his pocket at the funeral home. I’ll never forget that! He said it was just in case Grandpa needed to chew on his way to heaven. I miss him. Someday soon.
I’ve also stained old wood and furniture for various DIY projects. The links are below.
I also found this tutorial with helpful tips and tricks for staining pine wood, which you should check out, too.

SUPPLY LIST:
- Pinewood bench or pine wood
- lint-free cloth, clean cloth (cotton), or sponge applicator
- electric sander (my preferred sander)
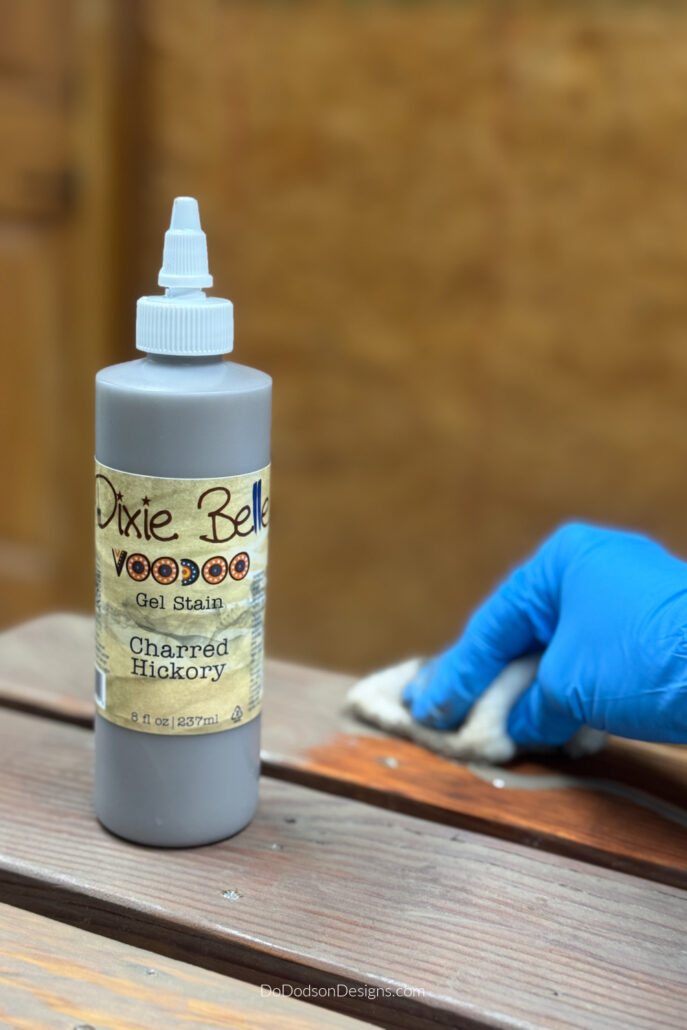
- VooDoo Gel Stain Charred Hickory (water-based) Dixie Belle
- fine mist spray bottle (for water)
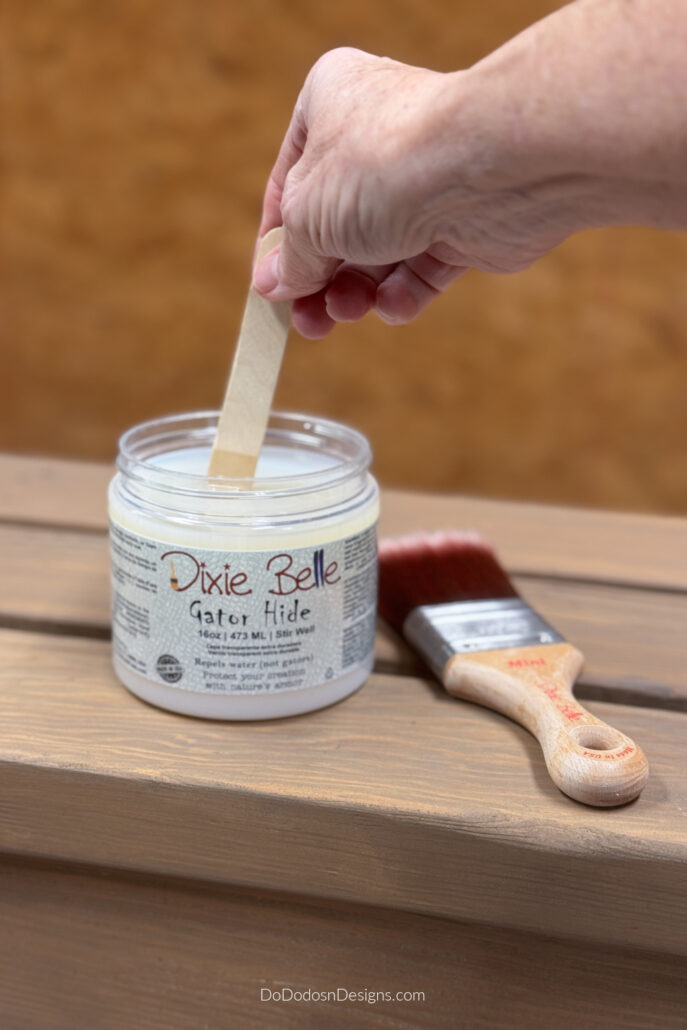
- Gator Hide Dixie Belle’s clear water-based top coat
- 2-inch mini synthetic paint brush or foam applicator
Cleaning and Sanding The Wood
After scraping all the gum off, I used Krud Kutter and water to remove the built-up dirt and grime that had accumulated over the years, not to mention the dirt it had accumulated sitting on my front porch all summer.
After scrubbing it thoroughly, I used the water hose outdoors to rinse away the cleaner. I sat it in the sun to dry, and it was ready to go the next day.
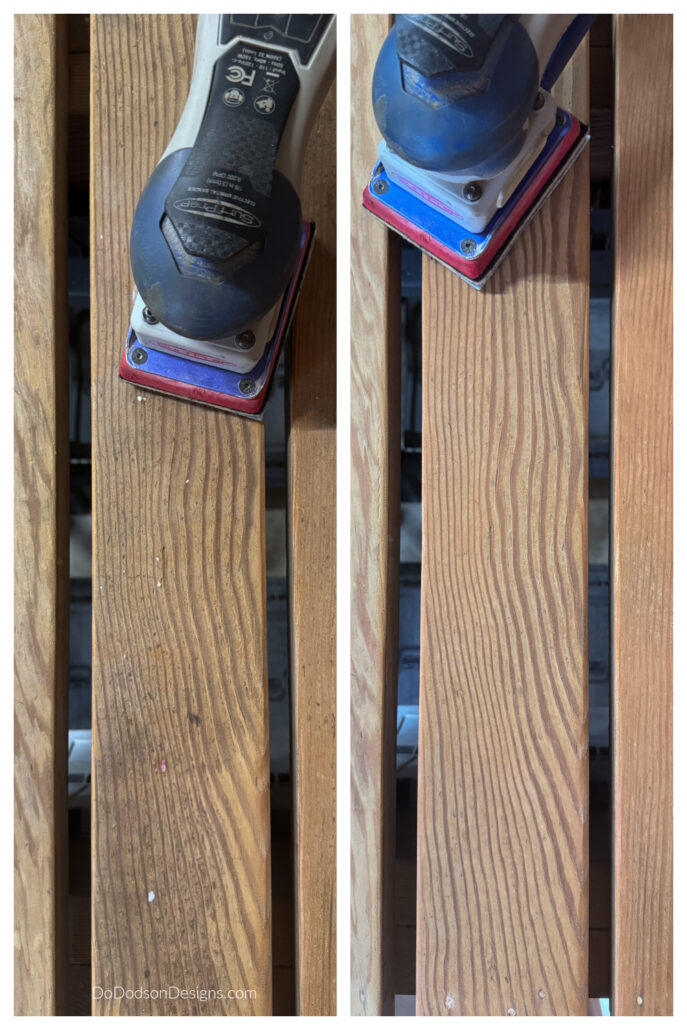
To prepare the wood for staining, I first used 100-grit sandpaper to remove the rough spots and splintered brittle areas. This may seem aggressive, but deep gouges and splintered wood must be addressed. I’ll be sitting my tushy on this bench. LOL
Pine wood is soft, so using the 100-grit abrasive made this quick and easy. Rip it right away.
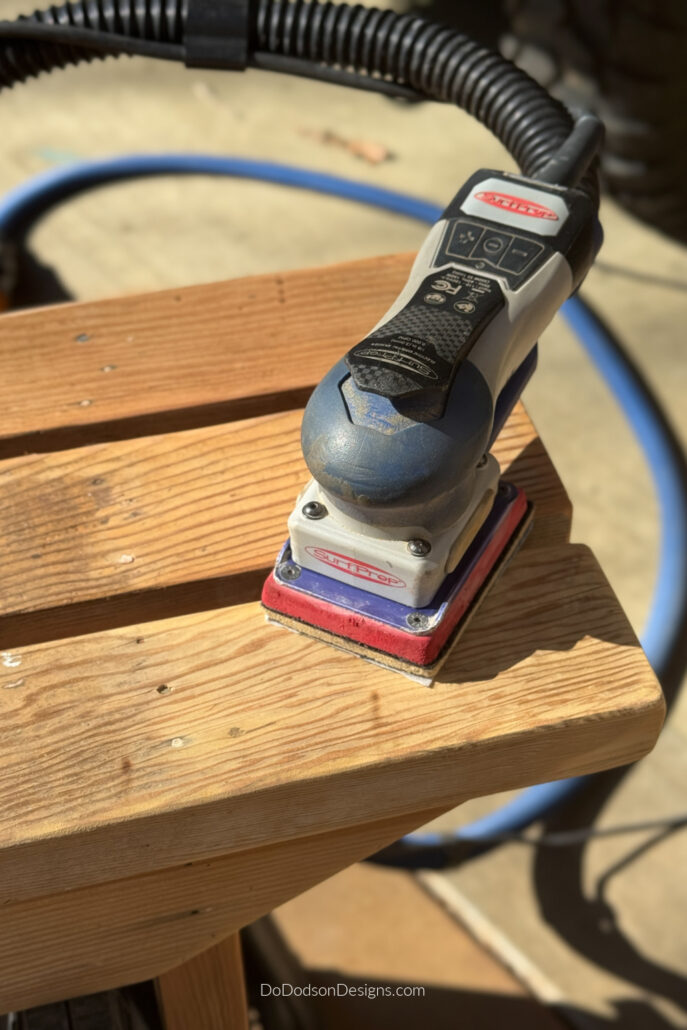
In the final step, I switched to 220-grit sandpaper, which showed off the wood grain and gave me a nice, smooth surface on which to apply my stain.
I’m glad I decided to leave the nail holes as is. I think it adds to the rustic charm of the project.
Choosing A Water-based Stain Color
Water-based stains come in a wide variety of colors and shades. It is important that the finish works with your personal preference. I suggest you try a few options and see what works best for you.
Here are the four options I am working with today—the ultimate water-based solution for wood staining.
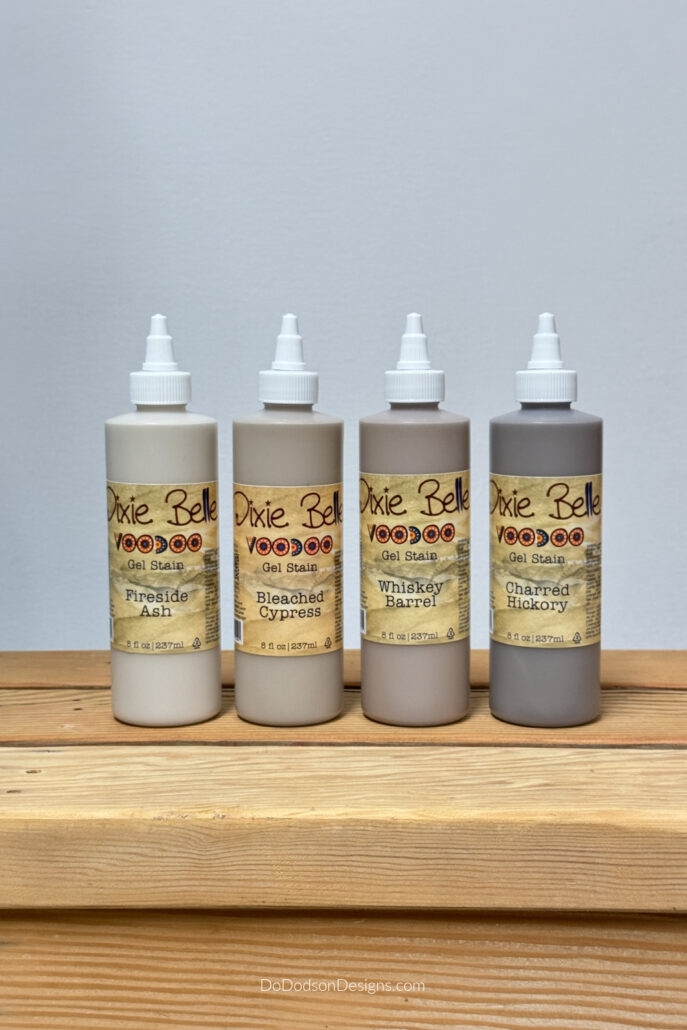
I think the darkest stain in this collection of wood stain colors is perfect for matching the color in my bathroom. It’s called Charred Hickory, and I think it will be a great match. The other colors were too light to go well with my room’s decor. I have other projects to do in the future that these colors would work well with, so I’ll save them for then.
When I chose this stain color, I considered that pine wood has underlying yellow and sometimes orange tones. The tint of gray in this color should cancel or tone them down.
Do I need A Pre Stain Wood Conditioner?
The answer depends on the type of wood. I would say yes if this were a maple or oak dresser. The pre-wood conditioner helps with color blotches and gives a more even stained finish.
Since I’m working with raw lumber, I have another method for getting an even-colored finish. In the next step, I’ll show you how to get a consistent color for each coat so you don’t have to go back and recoat a section that you missed.
How To Achieve A Consistent Color
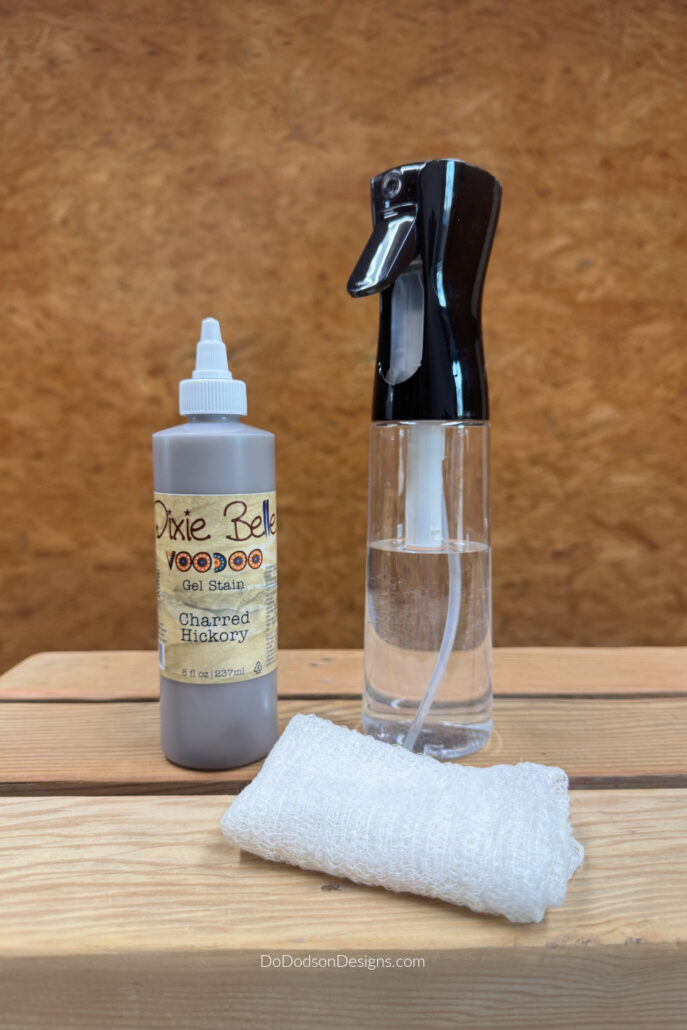
It is best to wet the wood first to get an even stain. Using a mist bottle, lightly mist the area you want to stain with water. This is a crucial part of staining pine wood because if you don’t apply water, you could end up with an uneven color or shade.
This means that dampening the surface of the wood before application will prevent the stain from being absorbed too quickly and lengthen the dry time before it is fully absorbed.
How To Apply Water-base Stain
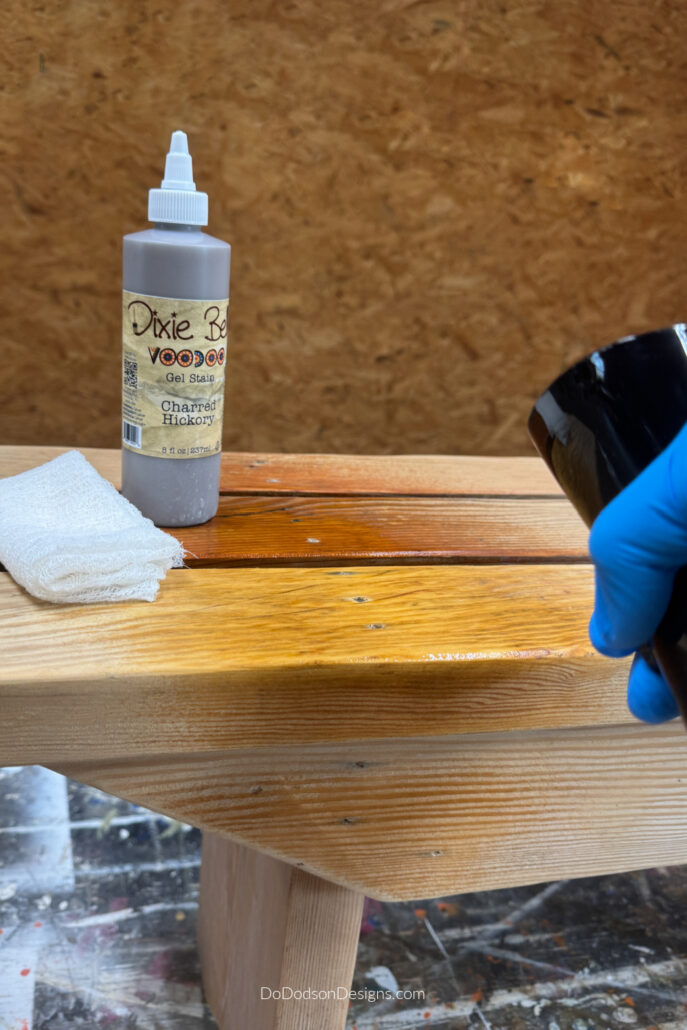
After misting the wood’s surface with water, add the gel stain to the surface. I squeeze it straight from the bottle. Be sure to shake the stain well before using it.
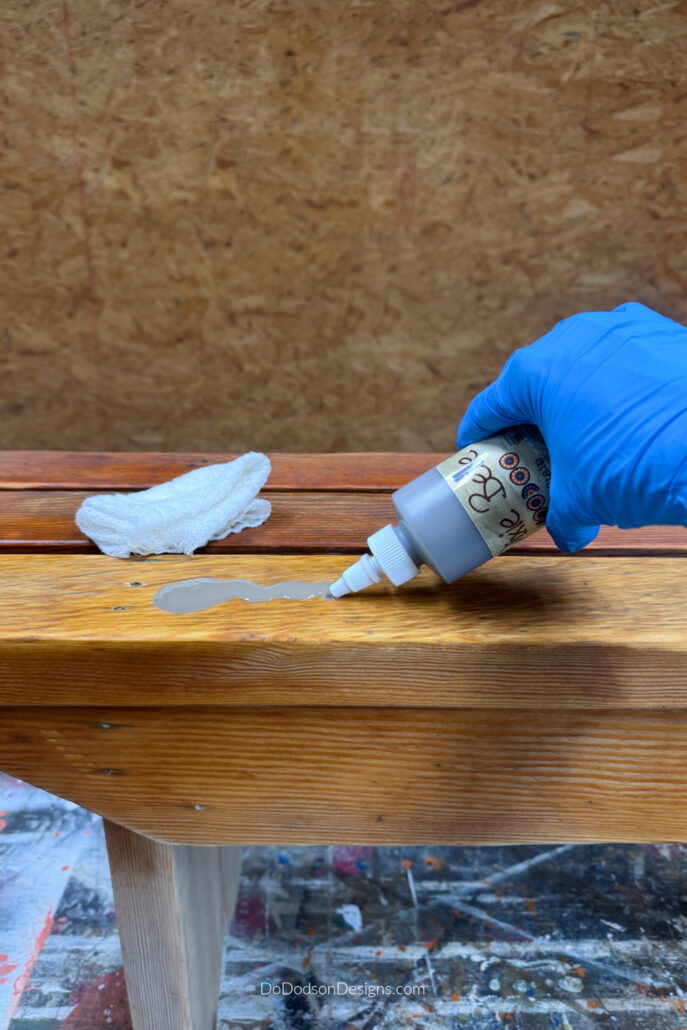
Spread the stain with a clean cotton cloth, gauze pad, or foam applicator and rub it into the wood.
Don’t worry about the amount of stain you’re adding. Add as much stain as you think you’ll need. You should end up with the stain covering the whole surface.
Look how this color toned down the orange!
If any stain remains after the first coat is applied, gently wipe away any excess stain on the wood’s surface. Then, allow the first coat to dry thoroughly. If more coats are needed to get the shade you desire, let each coat dry before applying the next one.
Multiple coats of stain can be applied to get the shade you want.
Add Topcoat For A Durable Finish
Once you have reached the desired stain color, apply a topcoat for enhanced durability. A clear wood sealant or a colored varnish would be appropriate, matching the tone of the wood and protecting it from stains.
Because I’m using this wood bench in my bathroom (wet area) next to the tub, I chose to use Gator Hide for this project due to its water-repellant and rock-hard finish.
Stir the contents of the container until mixed well. Do not shake. Doing so will create air bubbles that will affect the smoothness of your beautiful stained pine wood.
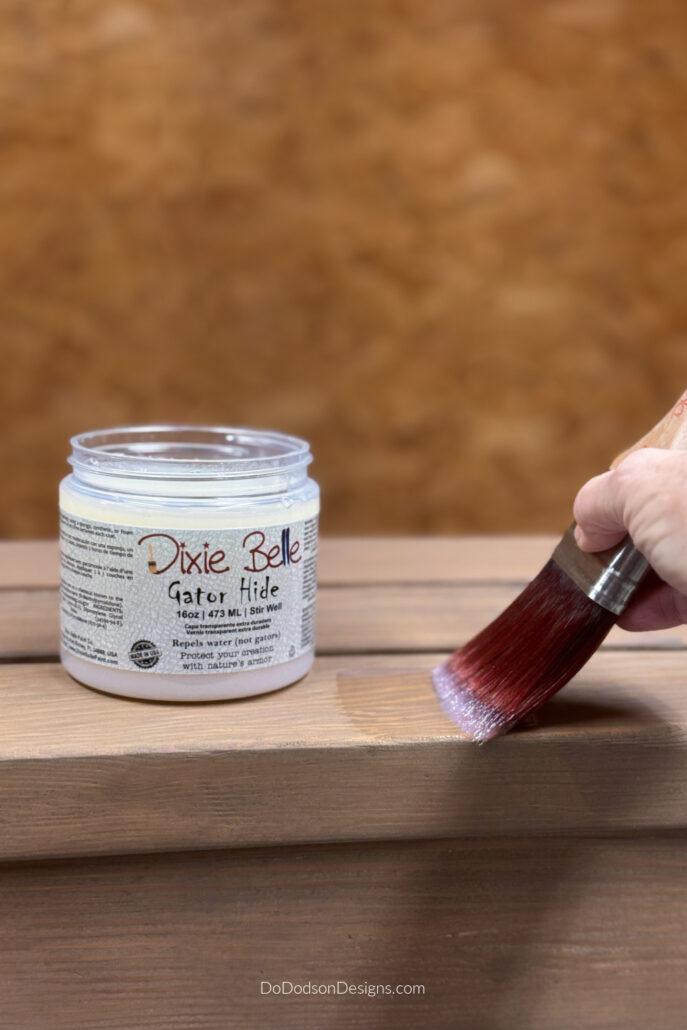
It’s easy to apply. Using a 2-inch good-quality synthetic paint brush, Apply a thin coat, working in one direction to minimize brush strokes. Do not overwork.
Allow the first coat to dry completely before applying the second coat.
You can also lightly sand between coats with fine-grit sandpaper. Do not sand the final coat.
Using this method of application with Gator Hide will result in a beautiful finish for years to come.
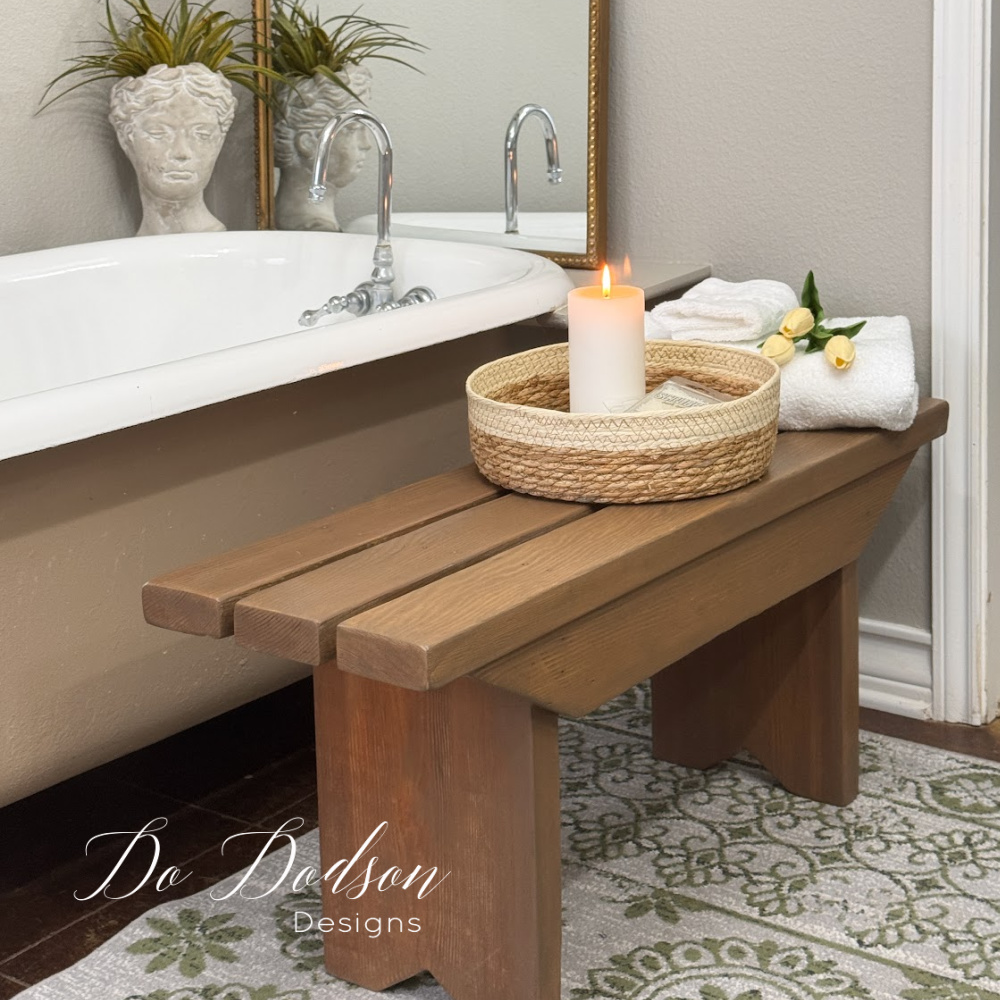
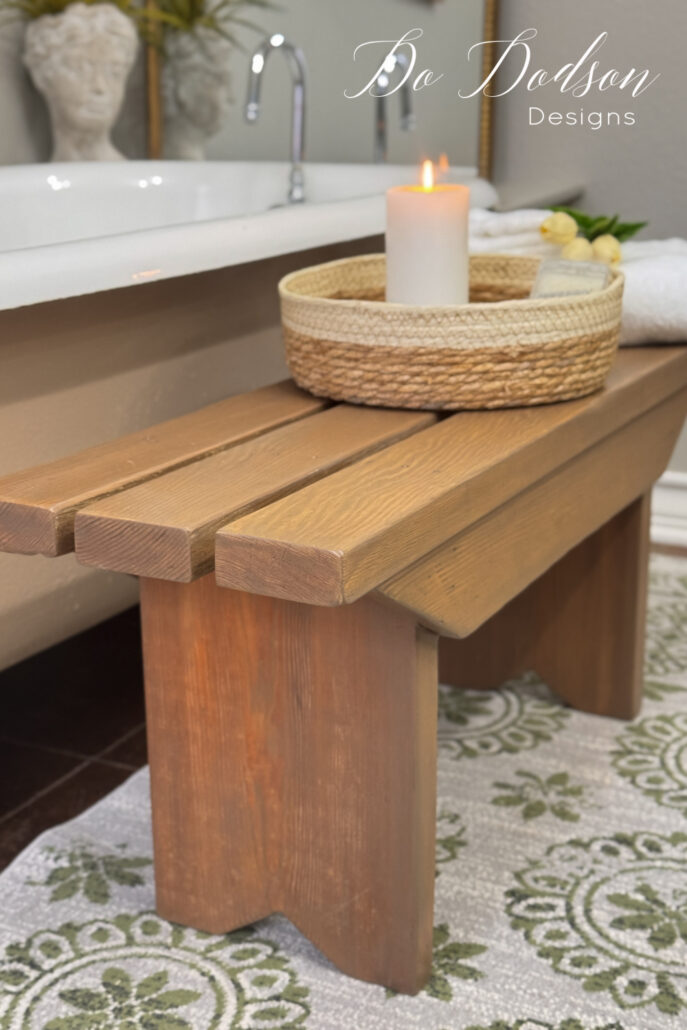
Bench Makeover Results
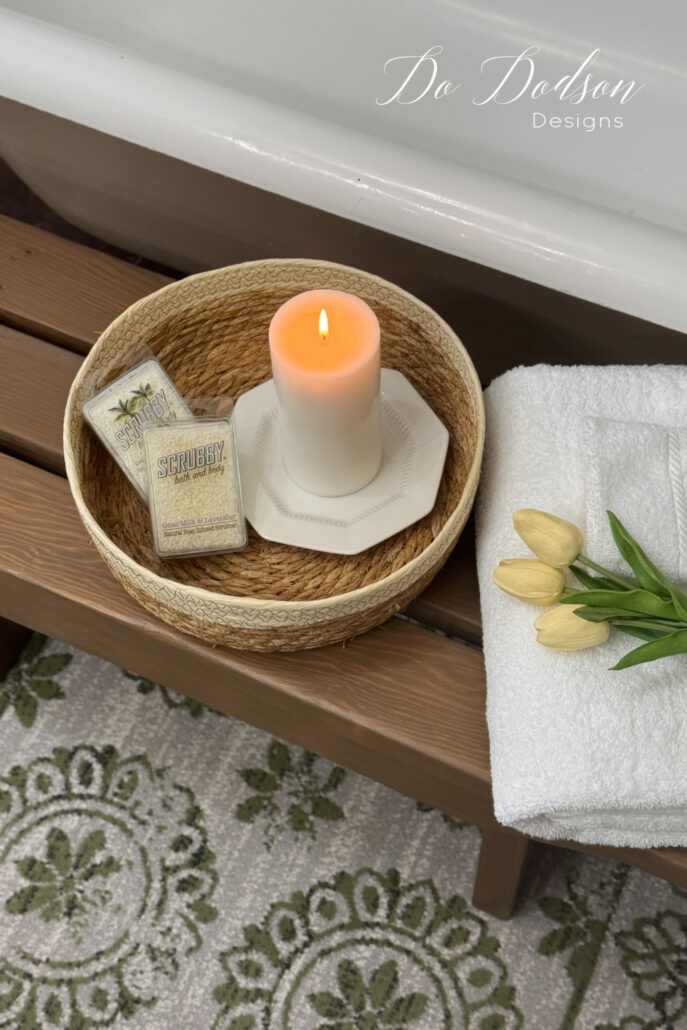
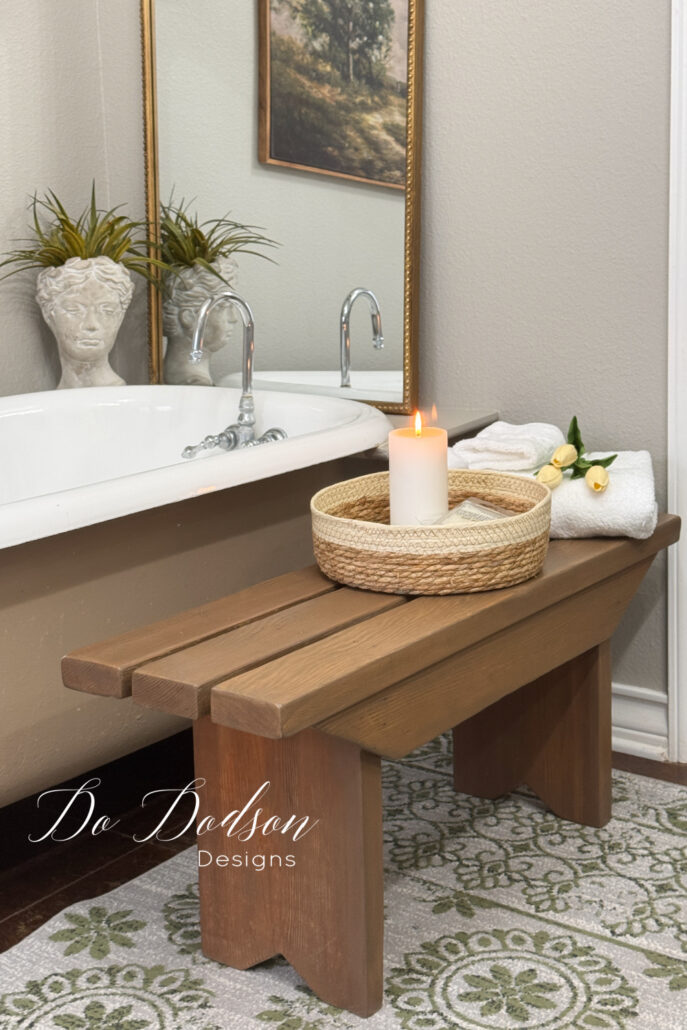
I’m so happy I got around to finishing this bench! It’s a nice addition to my bathroom, holding all the stuff I need (candle, too) for when I want to have a little “tubber” without getting everything wet. It’s all organized and at my fingertips—scrubby soap included! I L O V E this soap with the built-in scrubber!
And can I mention how much I love this antique tub? It was one of my favorite things when we purchased our home. Would you like to see more of our unique home? CLICK HERE for the video tour.
And the color of the wood turned out exactly like I wanted.
Thanks for reading today. I hope you enjoyed learning how to stain pine wood with gel stain.
Consider the ease of use and water cleanup with this gel stain when working on your DIY wood projects. I think you’ll be pleasantly surprised.
If you enjoyed this tutorial, please share it with your DIY friends. Oh, and PIN it to your favorite DIY board on Pinterest for easy access later. Don’t forget to say hi in the comment section so I know you stopped by. It always makes my day. 🙂
Until the next project… xo, Do
Thank you for this post! I learned several things from it.
The gum send off was precious!
Thanks, Janet! I’m glad this was helpful. 🙂
Do, I love the story about your Grandpa, your brother putting the gum in his pocket. Such heartwarming memories. The stool looks great, btw. 🙂 I like the new colors of the VooDoo stain.
Thanks friend! Grandparents make great memories. I wished everyone could experience this.
I like the new colors too. Thanks for reading. 😘
ABC gum!! Too funny Do! Love the bench !
Hi Cindy! Thank you so much for stopping by. Yeah, my Grandpa funny and didn’t even know it. 🙂
I’ve never heard of “ABC” gum before so it gave me a good chuckle. The bench turned out adorable with the Charred Hickory stain and I love that it toned down all the orange undertones. Great tip! XOXO
Hi Denise!
Thanks for stopping by.
When I find ABC gum, it always brings back good memories. I’m working on another pieces using charred hickory. It’s a great color. Have a beautiful week, my friend. 🙂