Do you love cats? Are you looking for a fun cat Halloween craft to add to your Halloween decor collection? Today, I’m sharing my step-by-step guide for making your own DIY wooden black cat using scrap wood. It’s the perfect addition to your spooky front porch decor!
Thanks to Dixie Belle Paint Co. for sponsoring this post. While I was compensated to write this post, all opinions are my own.
* As an Amazon Associate, I earn from qualifying purchases and through other companies as well. You will not be charged extra when you purchase through these affiliate links, but any income I make helps me create more amazing DIY projects to share with you! To see my full disclaimer, click here!
Halloween Black Cat Decor Craft
This year, I thought I’d get a head start on creating my Halloween decorations. I’ve been known to throw my decor together at the last minute, but this year, I have committed to finishing all my decorations by September. This is project #2. If you missed the #1, CLICK HERE to see the sweet treat I made for my Halloween / Fall centerpiece.
Back to the kitties! I found a cute idea on Pinterest for a DIY wooden black cat but decided to put my own spin on it. Initially, I planned to make one cat. Then, I figured three black cats would be even better. Wood scrap pile, here I come!
If you’re looking for a scarier wooden black cat option for your Halloween front porch decor? CLICK HERE to get a cutout for a cute but creepy version.

MATERIALS NEEDED:
- scrap wood pieces
- circular or miter saw
- jig saw
- speed square
- sandpaper or electric sander (my FAVE!)
- nail gun (hammer and finish nails)
- wood glue (water resistant)
- paintbrush
- artist brushes (for the cat eyes)
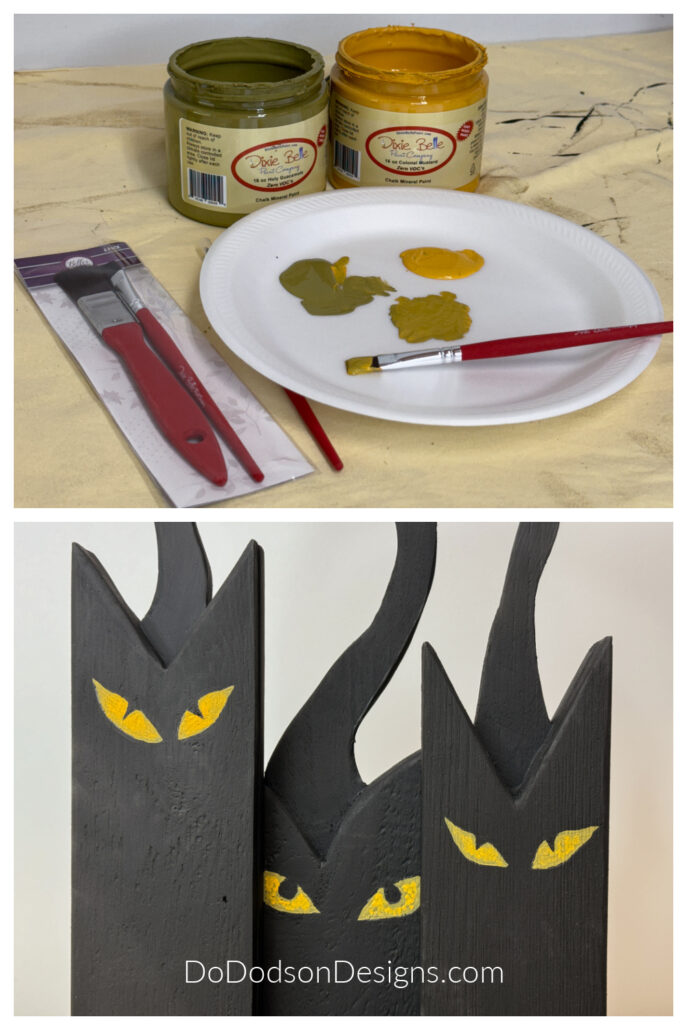
- Caviar black paint (Chalk Mineral Paint)
- Cotton white paint (Chalk Mineral Paint)
- Holy Guacamole (Chalk Mineral Paint)
- Colonel Mustard yellow paint (Chalk Mineral Paint)
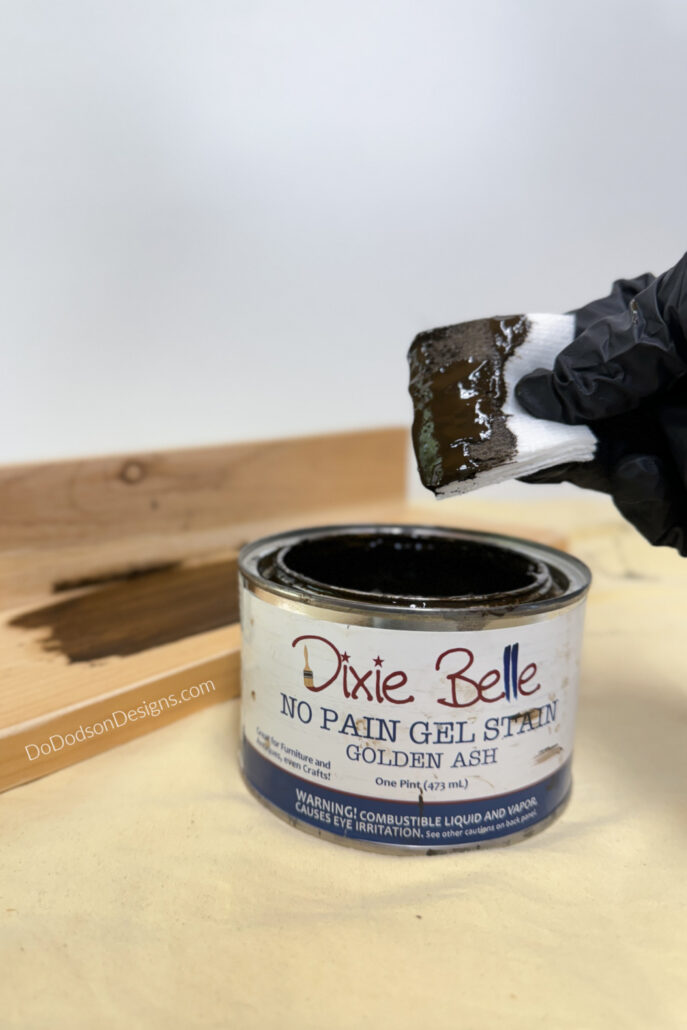
- Golden Oak No Pain Gel Stain
STEP 1: Cutting The Wood
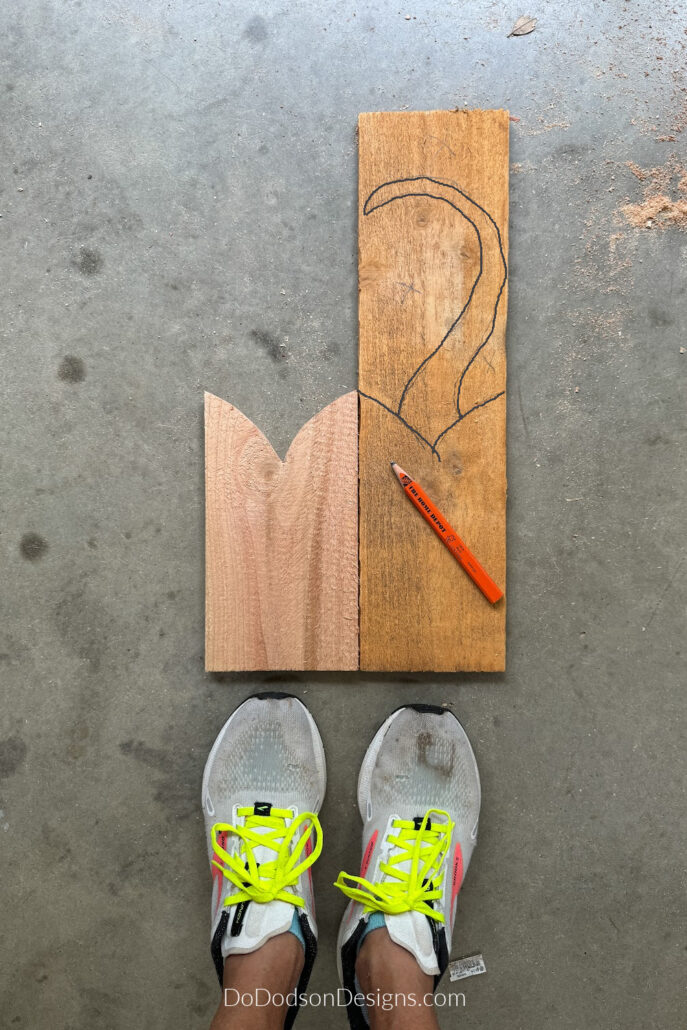
First, dig through your scraps for long pieces. I use whatever I have on hand, but for this project, I used a 1X4 fence picket for the body of the wooden cat and a longer 1X4 piece for the tail. After they’ve been cut, these pieces will be combined to create depth for your wooden black cat.
The size of lumber you choose to make your cat or cats is up to you. Big or small, tall or short, they’re all cute. I made one of the cats a little dumpy and fat.
The cat’s body is fairly simple. The ears were cut using either a 45-degree or 55-degree angle, depending on how pointed you want them to be.
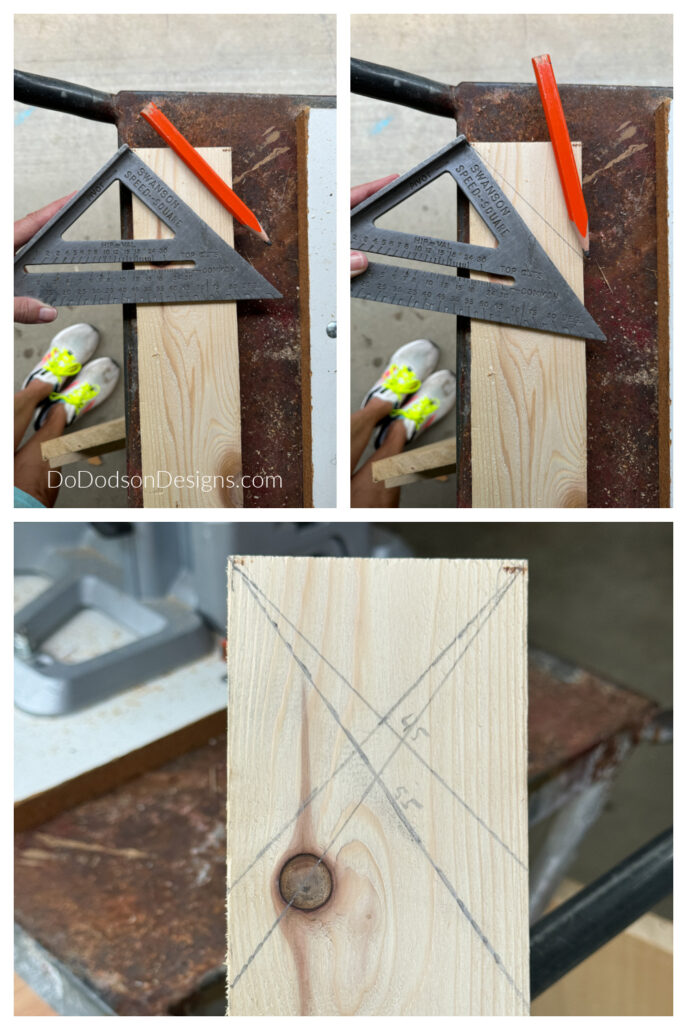
A speed square is your best friend when wood-crafting. It helps when you can’t use your miter saw.
Here is a visual to help you see what is sometimes hard for me to explain. I’m a visual learner, and I hope this helps.
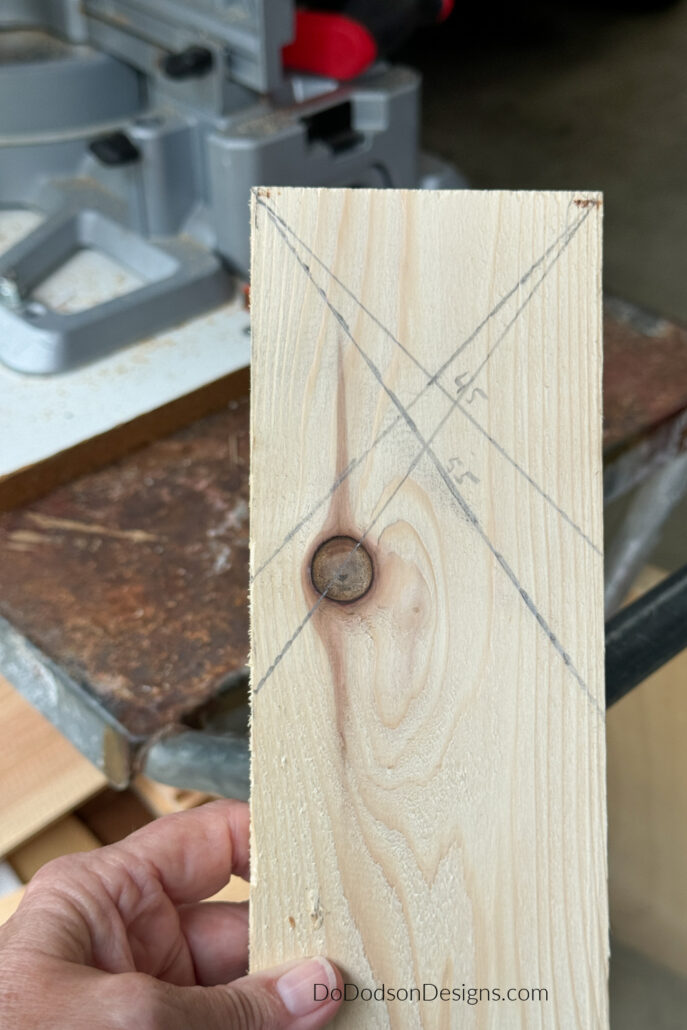
Place the speed square on the top corner of your board. This will be your pivot point for your angle. As you pivot the square, you can see the degree of the angle directly below.
Using a pencil, draw a line from the pivot point all the way across the board. Repeat on the opposite side.
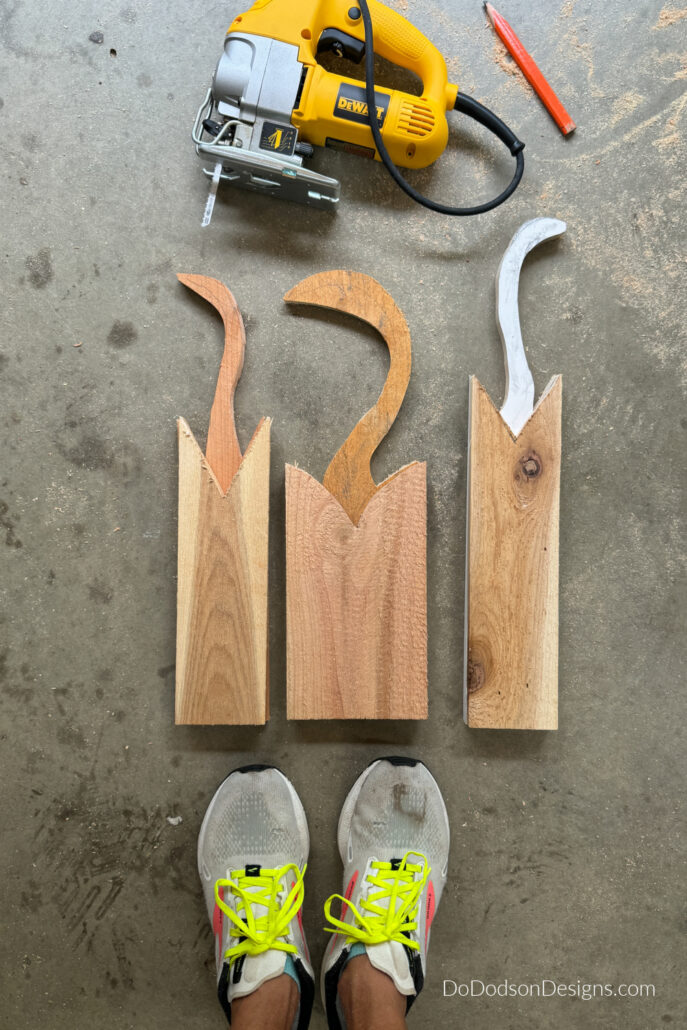
Once the angles are marked for cutting, use a jigsaw to cut the V from the center of the board to create the cat ears.
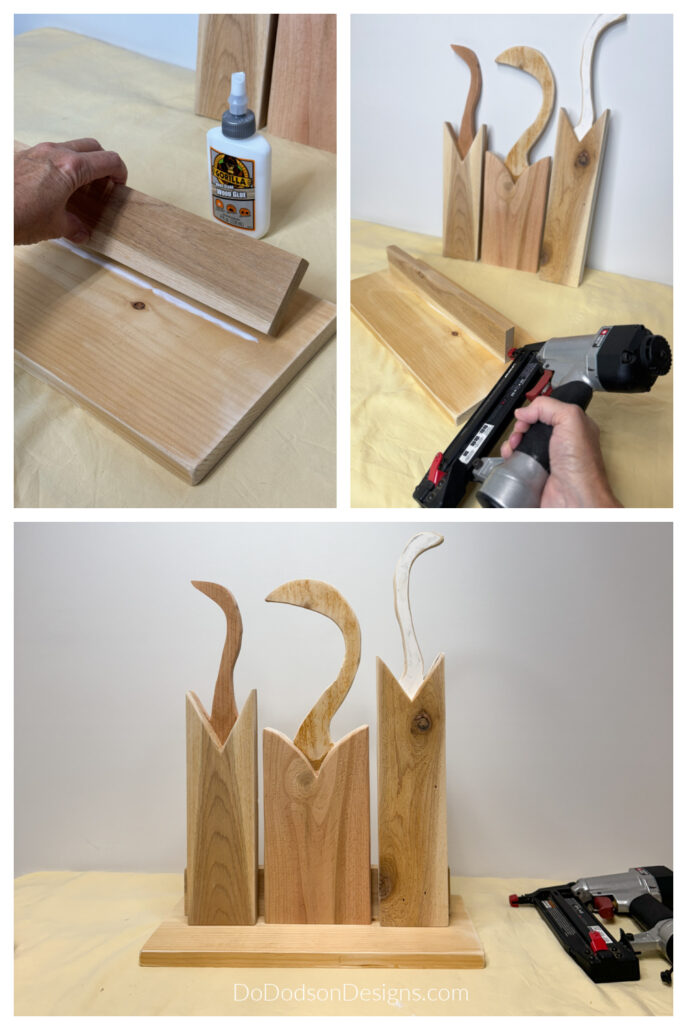
STEP 2: Cutting The Cat Tail
To create the cat’s tail, I placed the same-sized board underneath the body but longer and traced around the cat’s ears first.
Next, I drew what I thought looked like a cat’s tail—long and skinny with a curve at the end. I’m sorry, I didn’t make a template. Just use your second-grade imagination. It worked for me!
If you’re uncomfortable drawing the tail on the board, you can create templates on paper. Simply cut them out, lay them on the board, and trace around them to make an outline for cutting.
Once you have the design, use a jigsaw to cut out the tail, but leave it attached to the board.
Next, secure the two wood pieces together with wood glue and nails.
Here’s what the wooden cats will look like. If I say so myself, they’re looking pretty darn cute!
Next, secure the two wood pieces (right sides together) with wood glue and nails.
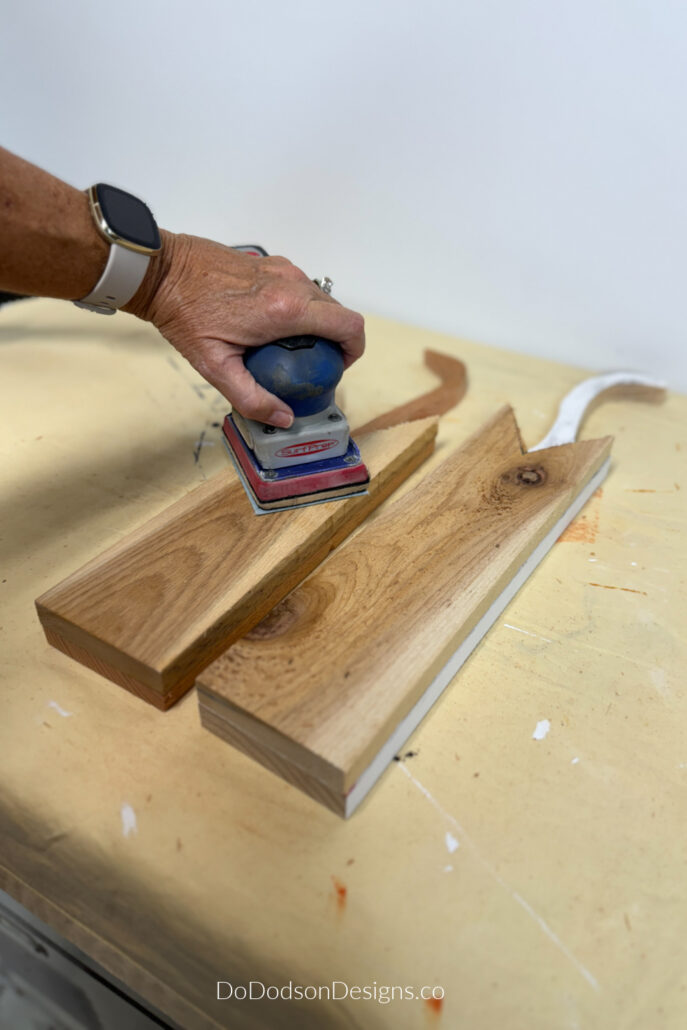
STEP 3: Sanding The Edges Smooth
Using 180-grit sandpaper, smooth away the rough edges of the wooden cat to prepare it for paint. Then, give it a final sanding with 220 grit. Brush away any remaining dust from sanding.
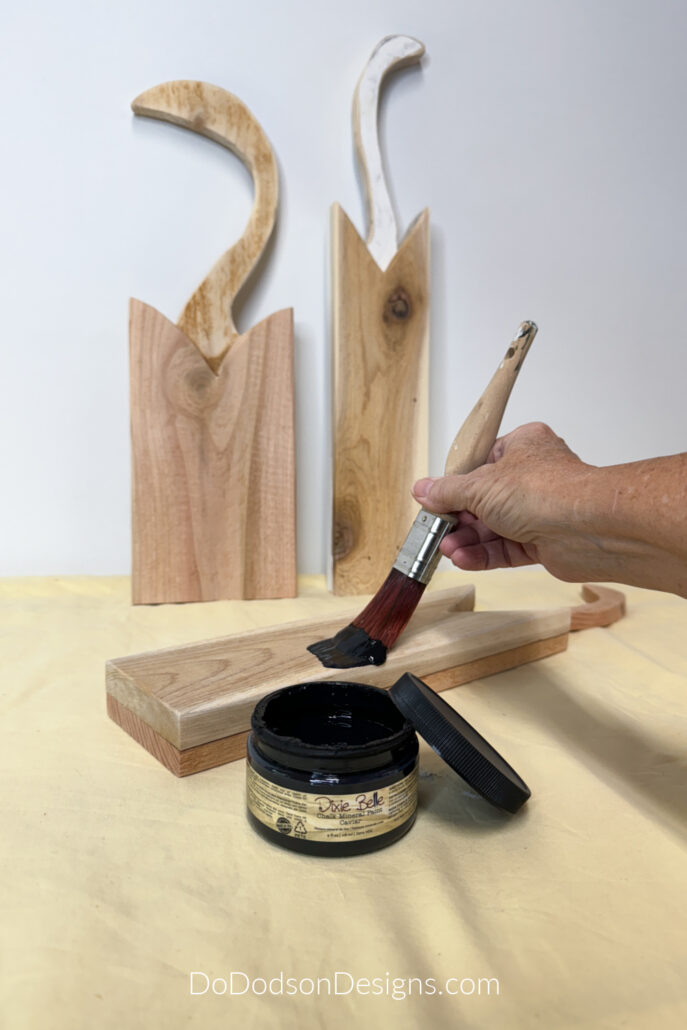
STEP 4: Painting The Cats Black
This was the fun part! Using true black paint (Dixie Belle Caviar chalk Mineral Paint), I painted both sides of the wooden cats.
This black paint is amazing, y’all! It covered the wood in one coat that dried to a matte finish. I use this paint for all my DIY wood decor projects.
No primer was needed.
STEP 5: Adding Details (Eyes, Etc.)
Of course, every black cat needs scary eyes. Before attempting to just paint them on, I used a pencil to outline my design. The pupil will be black to help the rest of the eye stand out, but you could add a touch of white paint if you want to highlight them. I like mine dark.
I chose two colors from my stash of craft paints that I thought would give me a greenish-yellow.
Using an artist’s brush, I blended the two colors ( Holy Guacamole and Colonel Mustard) and filled in the outline of the eyes, being careful not to paint the pupil.
Next, I used yellow paint to add some random dots around the black pupil to brighten the eyes.
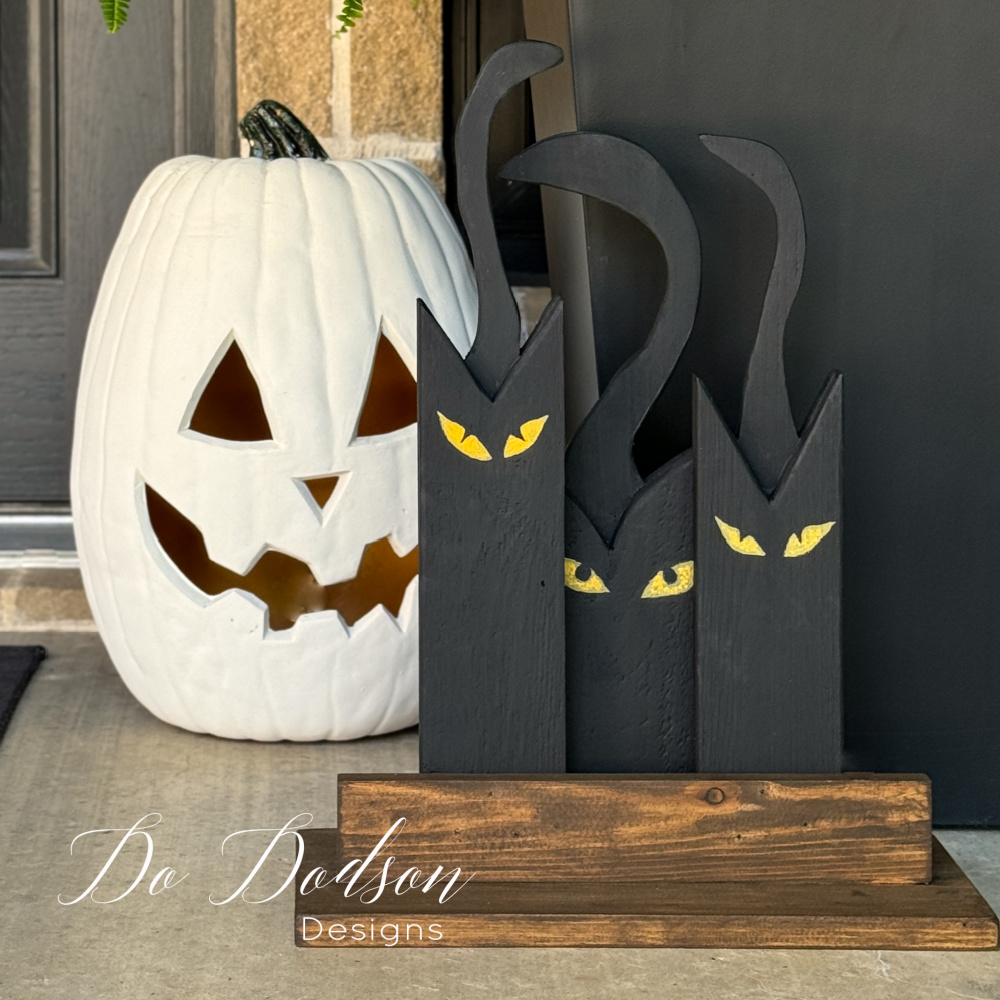
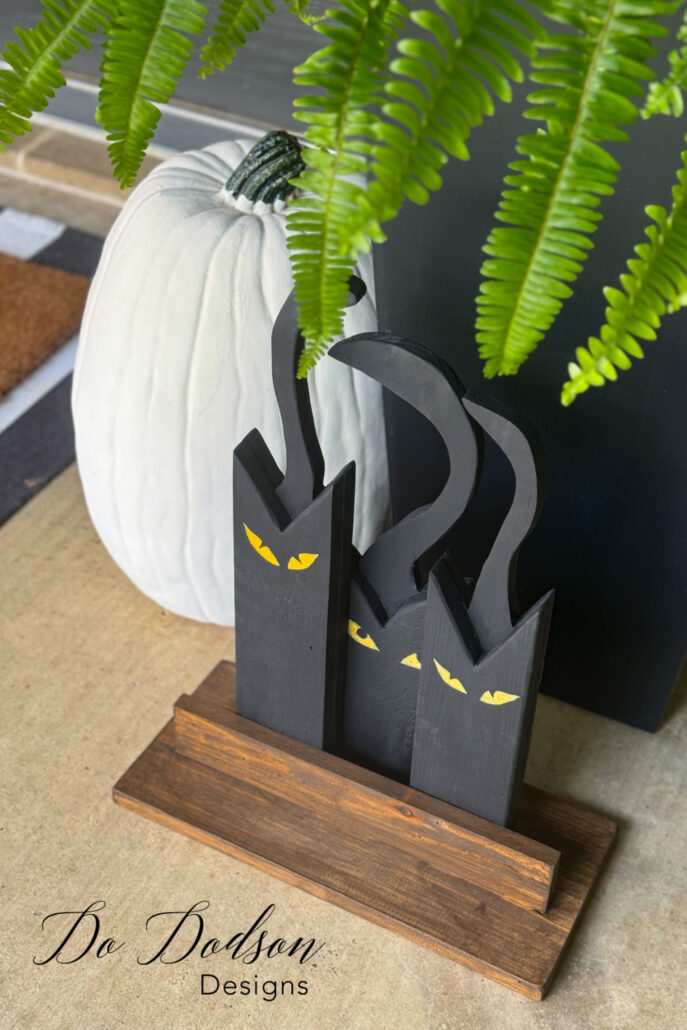
I like how they turned out. The slight slant to the eyes gave them that cat-like look. These guys are up to no good. Ha ha!
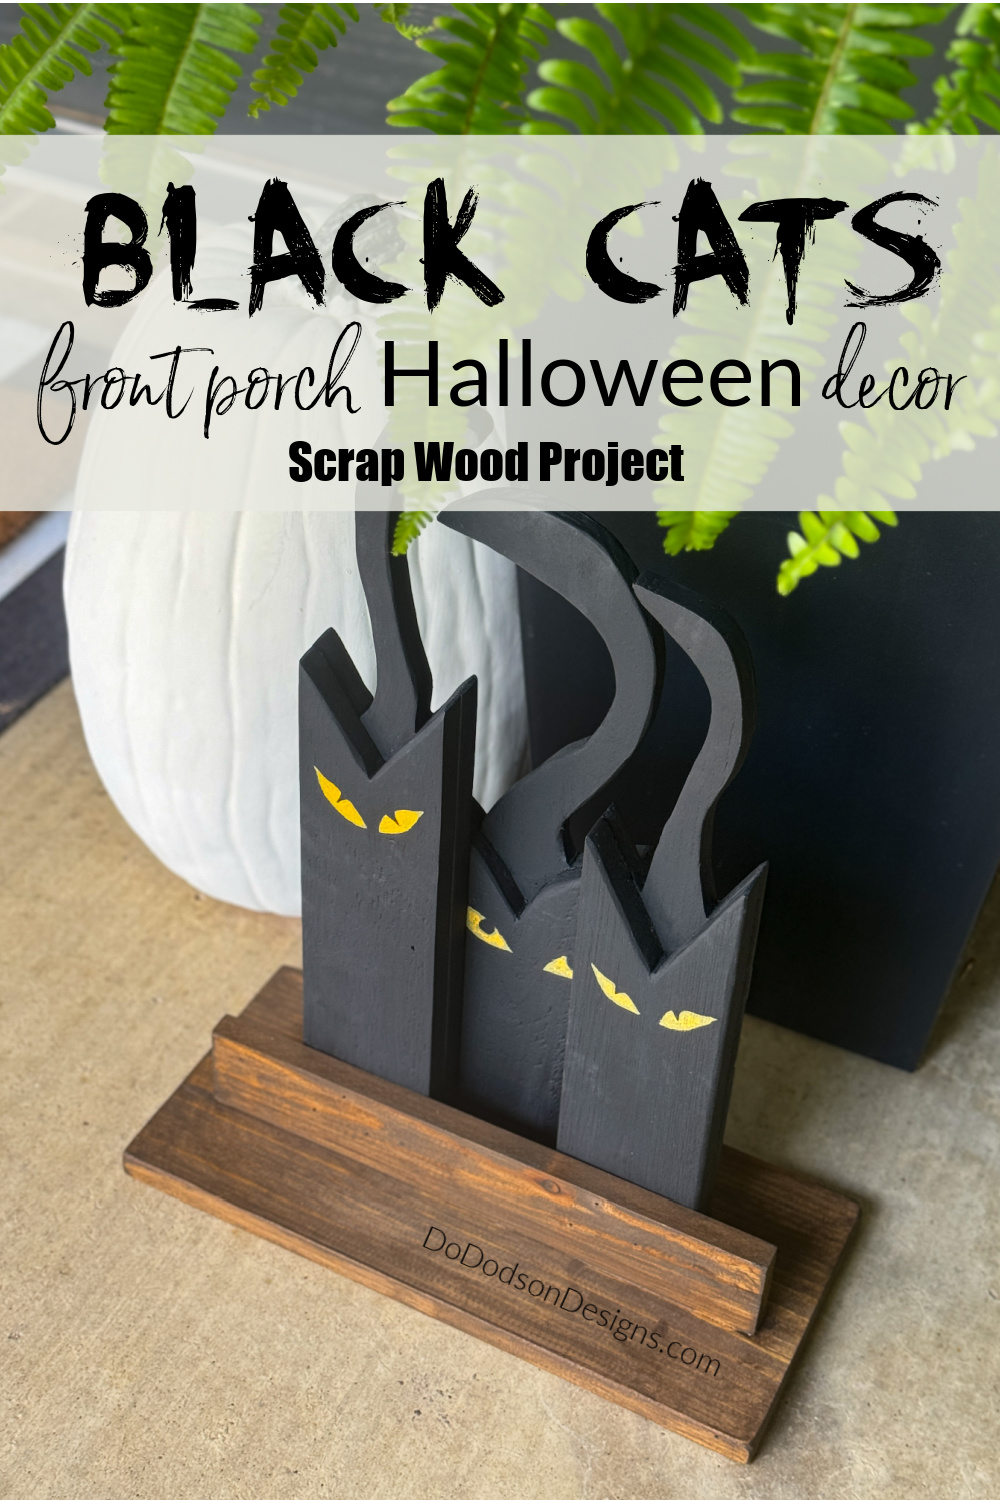
STEP 6: How To Make A Wood Stand
Lastly, if you want to display your cats on the front porch for all to see, I suggest making this simple wooden stand. It’s super simple, and you can use any size of scrap lumber you have.
For the base, I used a 1×6 and cut the length a bit longer than the three cats side by side.
The second board I used for back support was a 1×2 that I positioned upright on top of the 1X6.
I added some wood glue and secured the two boards together with my pneumatic nail gun using finished nails to secure the ends. I like using the finish nails as they only leave tiny holes in the wood that are easily covered with thick craft paint or wood stain.
Using what I had on hand (2×2 gauze), I applied a liberal amount of the stain, wiped back any remaining on the surface, and allowed it to dry thoroughly overnight. This stain does not need to be sealed as it already has a sealer built in.
I used a wood stain (No Pain Gel Stain GoldenAsh) on the base. This wood stain is perfect for those quick and easy wood craft projects. It’s a one-and-done application.
STEP 7: Attaching Wooden Black Cats To The Stand
Using my nail gun and finishing nails, I overlapped the wooden cats, securing them from the front and back against the back of the stand. Again, you will sell tiny nail holes but those become less visible after paint or stain.
You can always use a wood filler if you choose, but for these wood crafts, I don’t mind the imperfections. These black wooden cats will live outdoors on my front porch with the pumpkins. No one will see them but me.

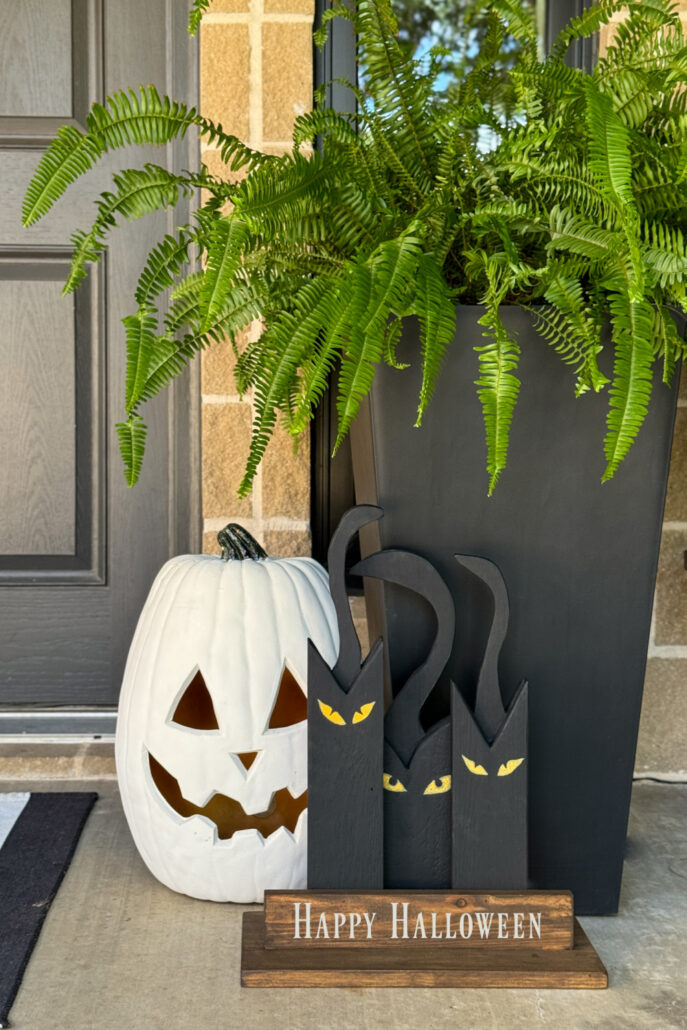
Wooden Black Cat Display Front Porch Decor!
Oh my goodness! These spooky-eyed kitties turned out so good. I envisioned them in a white pumpkin patch, but unfortunately, the pumpkins here haven’t been harvested yet. I’m a bit early, but I love Halloween. You better believe I’ll add more pumpkins with my black cats. Pumpkin shopping is always the highlight of the season.
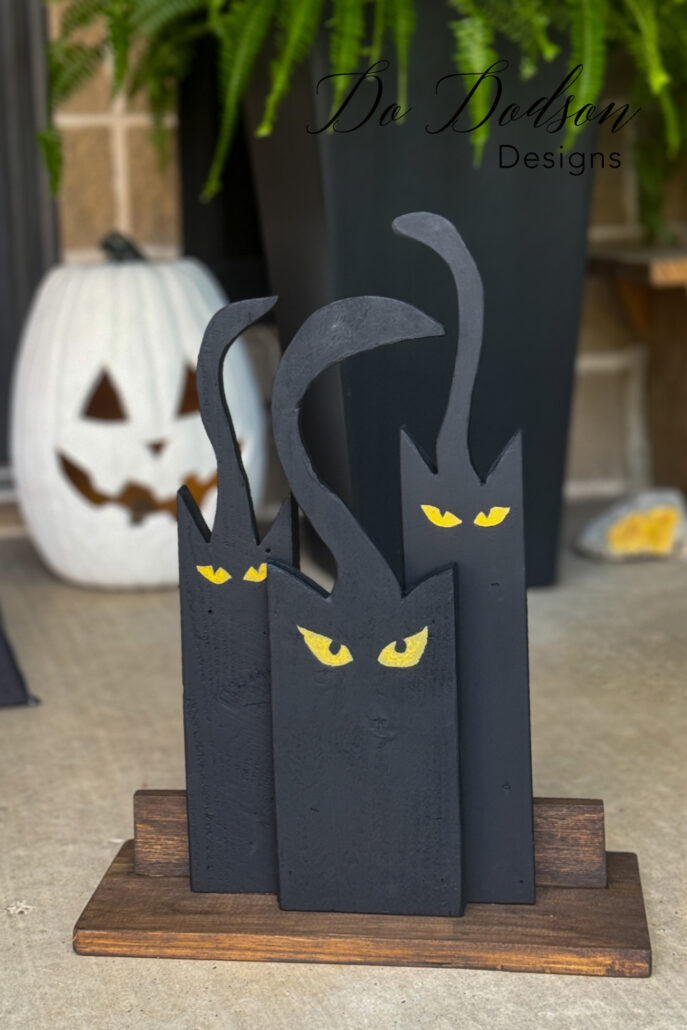
The funniest part about this project is that it can be double-sided. The back side doubles as a sign where you can add your own message to your visitors. Welcome or Happy Halloween.
Since moving back to the country we don’t have many trick-or-treaters at our home. But I know our friends and family will enjoy the cute addition to my existing Fall decor.
Making these DIY wooden black cats is a fun and budget-friendly way to decorate. They can also be reused every year. Now, that’s my kinda DIYing!
I hope you have enjoyed my black cat Halloween decor tutorial. I’d love to hear your thoughts and what you would do to make them your own.
Inspire me and others by sharing your ideas in the comment section. I always love hearing from you. Thanks for stopping by. 🙂
Until the next project… xo, Do
These are super cute Do! XOXO
Thank you, Denise. 🙂
I’m not a cat fan. But these are fantastic!
Thank you, Cindy! I have plan to make other front porch decor items so I hope you follow along. Have a fantastic week. 🙂
Appreciate you showing the detail with the speed square and throughout the project. Great idea!
You’re so welcome, Paula. Sometimes, it’s the tiniest details we get hung up on in woodworking. I’m glad it’s helpful. I hope you have a wonderful rest of the week. 🙂