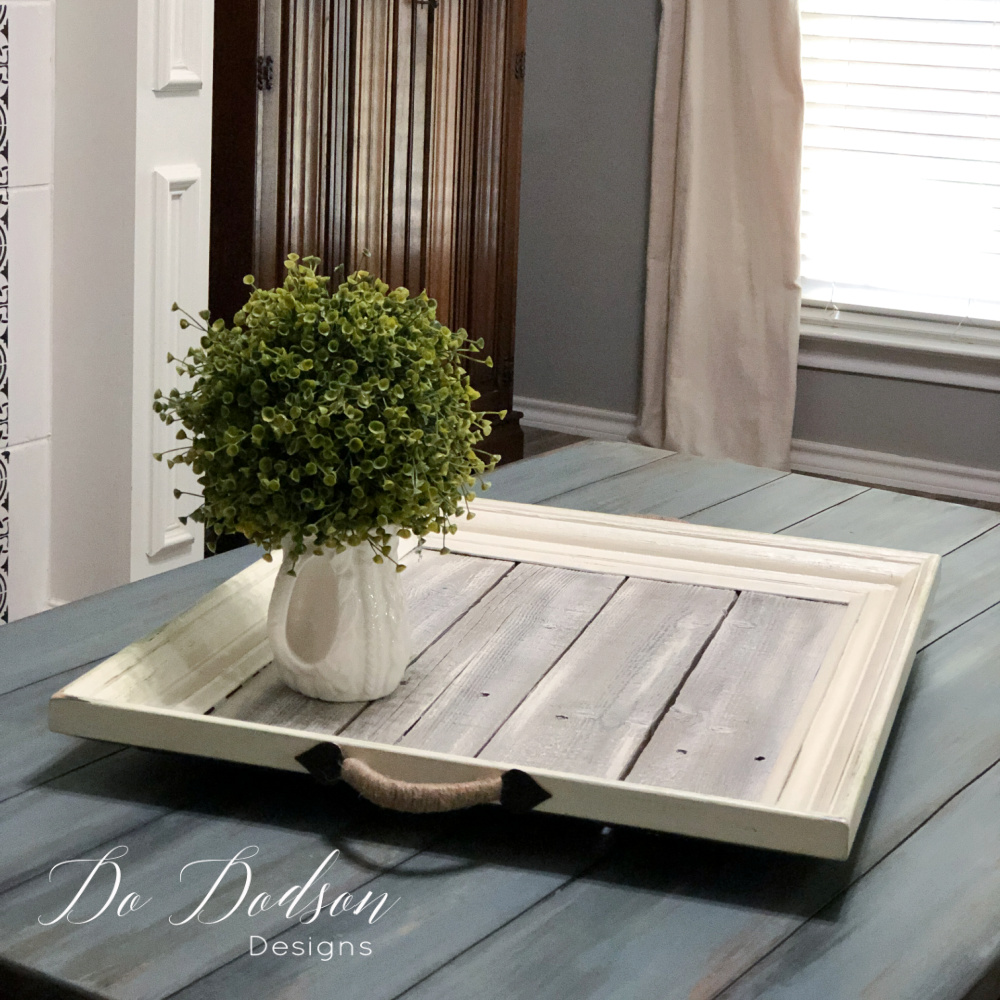

Hello creative friends! Today’s project was a “let’s see what I can create with this” idea. Actually, I was waiting for the paint to dry and was bored. After a quick search on frames via Pinterest, I came up with this DIY Tray made out of an old picture frame. Here is how it turned out. Super cute and easy!
This post contains a few affiliate links to help you find the products I use. You are not charged extra to use any of the links, but any income I make will be used for more fun projects! To see my full disclaimer, click here!
DIY Tray From Old Picture Frame
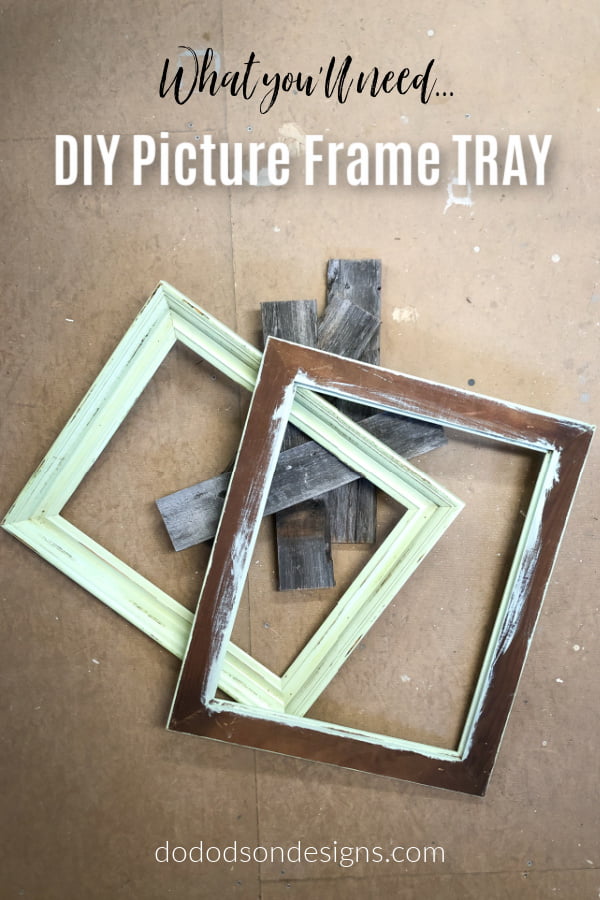
SUPPLY LIST:
- old picture frame
- repurposed lumber (I used old fence pickets)
- wood glue
- nails
- hammer
- R.A.D-Pads (sanding pad) or sandpaper
- tape measure
- saw
- chalk mineral paint (my favorite… buttercream)
- felt pads
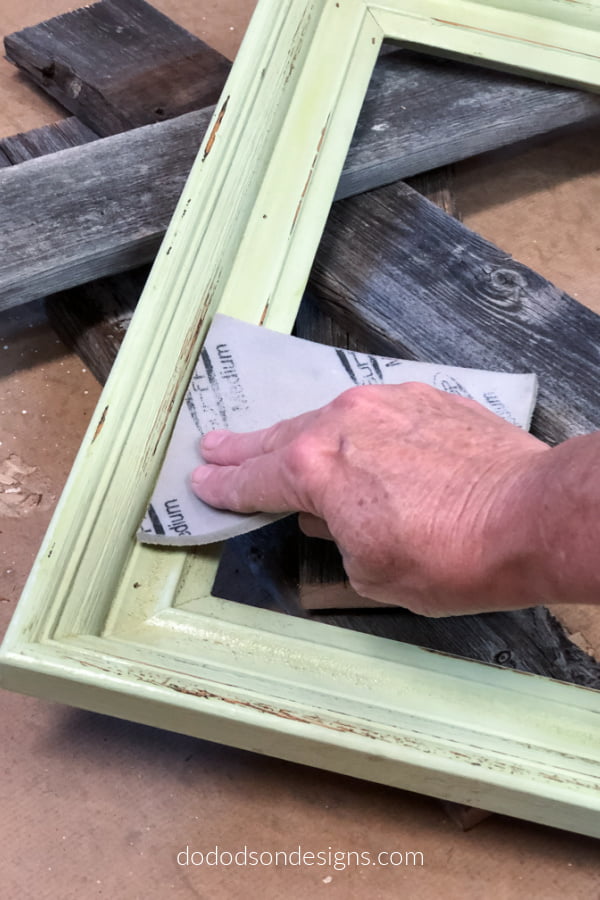
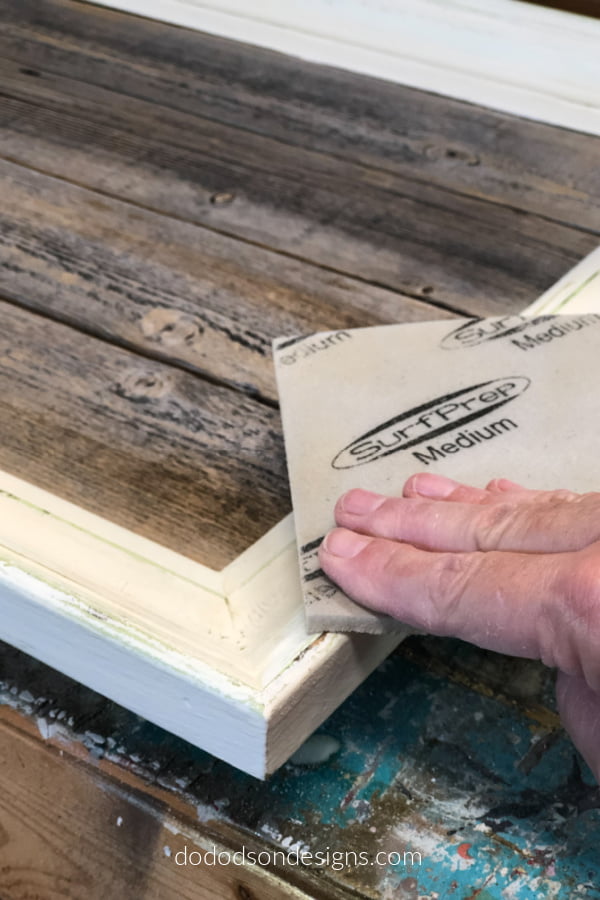
Prepping The Frame
I found this vintage frame at a garage sale for .25 cents. SCORE! That’s why I have a junk pile laying around for picking. HA! But you never know when the creative mood strikes, and I want to be prepared.
The bonus with this frame is that someone had already painted it a beautiful farmhouse green. I could have used it as is, but I want a more subtle look for my picture frame tray. The first thing to do is to clean up the frame. I used my foam sanding pad to remove any chipped-off paint and clean it with a damp cloth. Now it’s ready for paint.
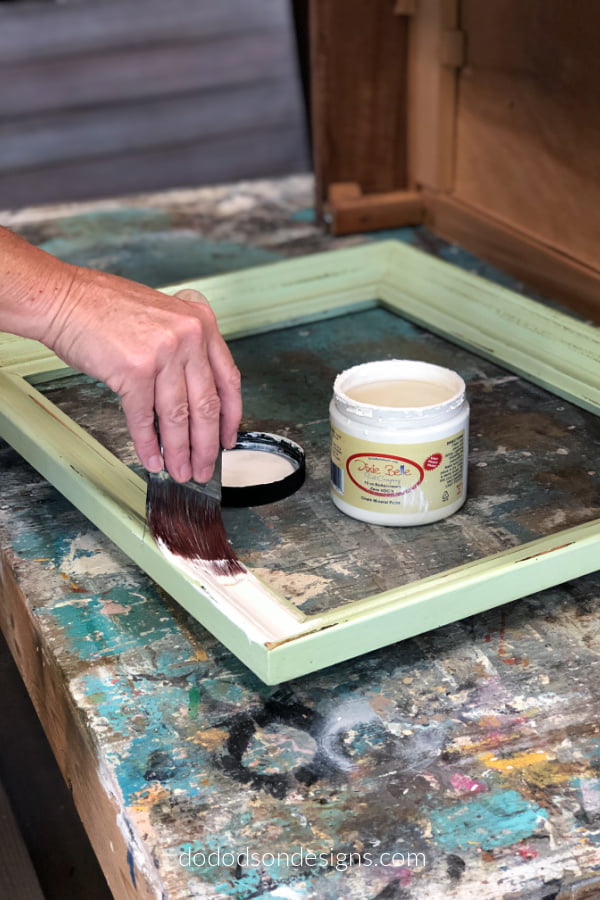
Painting The Picture Frame Tray | No Prep Paint
The next step is to paint. I used my favorite chalk mineral paint in buttercream. A beautiful vintage color that works well with my farmhouse decor. The reason I love this paint is that there is very little prep when using it for home decor. When I’m creating DIY home decor, I usually paint right over whatever I’m working on. Just like I did here. As long as the paint is intact, you should have no problems painting over the existing finishes. It seems like I find someone else’s projects more and more and give them a third time to go around. I LOVE that!
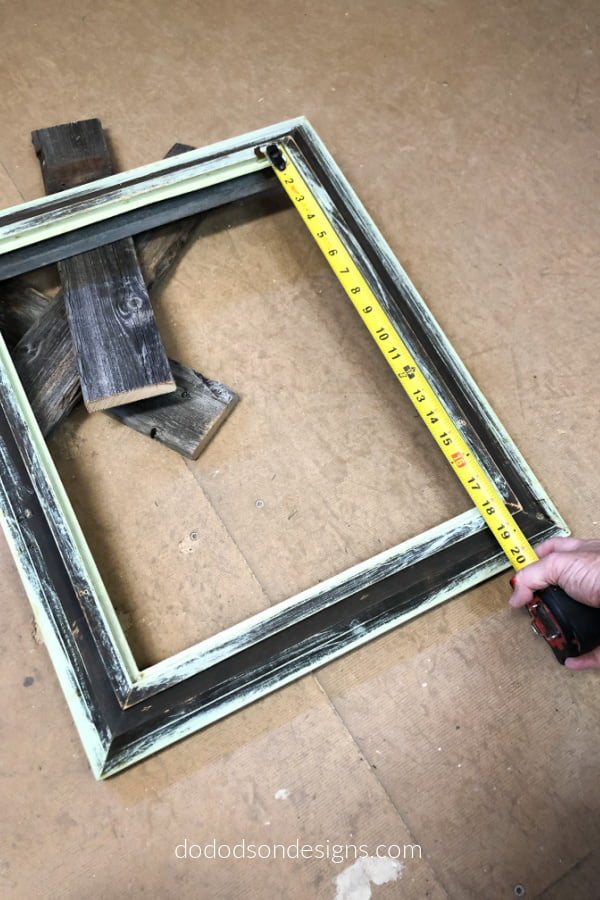
Measuring The Boards For The Tray
BUSTED! I didn’t paint the underside of the frame. So, if you happen to come to my home, don’t turn anything over. LOL, it’s a waste of good paint.
Next, you’ll need to measure the opening for the bottom of the picture frame tray. You’ll do this by flipping the frame over and measuring from edge to edge where the picture is inserted. Since it will be used as a tray, I measured from the longest end to end. Then you’ll need to cut your boards to the correct size. Because every frame is different, you’ll need to adjust the boards (or wood) you’re using. For this project, it just happened to work out without having to adjust too much. I did leave a little gap between the boards to make up for the difference. And I see no reason that you couldn’t use different-sized boards. That would add to the charm.
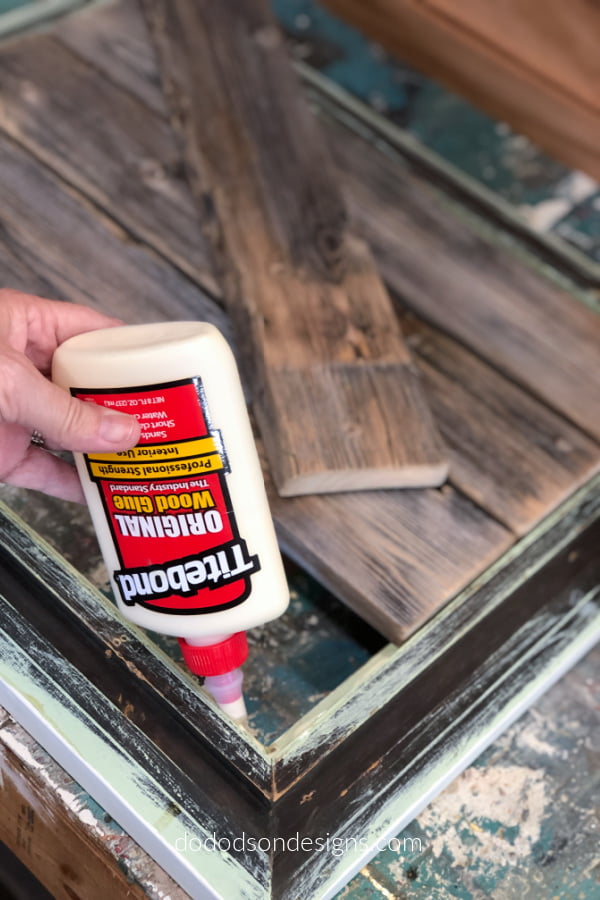
Securing The Boards For the Picture Frame Tray
Use good wood glue to secure your boards to the picture frame. You can use glue, but you may also want to secure them with nails. It just depends on what you’re using it for. Is it functional or decorative? I didn’t nail my boards because it’s just for decor, and I have had no issues with it being secure.
Distressing The Paint For An Authentic Farmhouse Look
What’s a farmhouse picture frame tray without distressing? Everything I have is scuffed up. If it’s not, to begin with, I have grandkids and furry friends that will take care of it for me. So why not? Remember, these were beautiful farmhouse green in the beginning. Distressing over the chalk mineral paint allows the beautiful farmhouse green to peek through. It’s perfect!
*In the finished pictures below, I added little dry brushing with the buttercream chalk mineral paint over the rough fence picks. It was just a bit dark for my like. Much better.
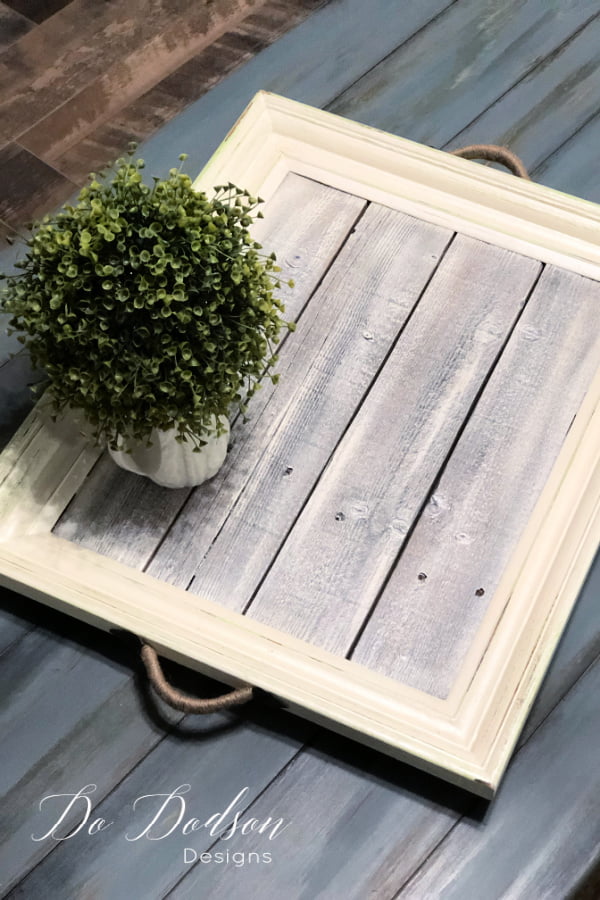
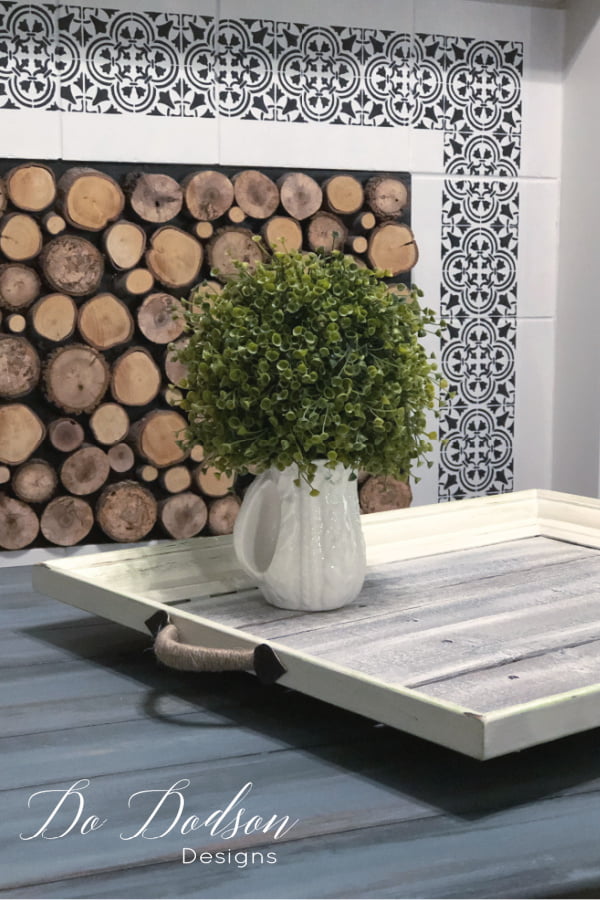
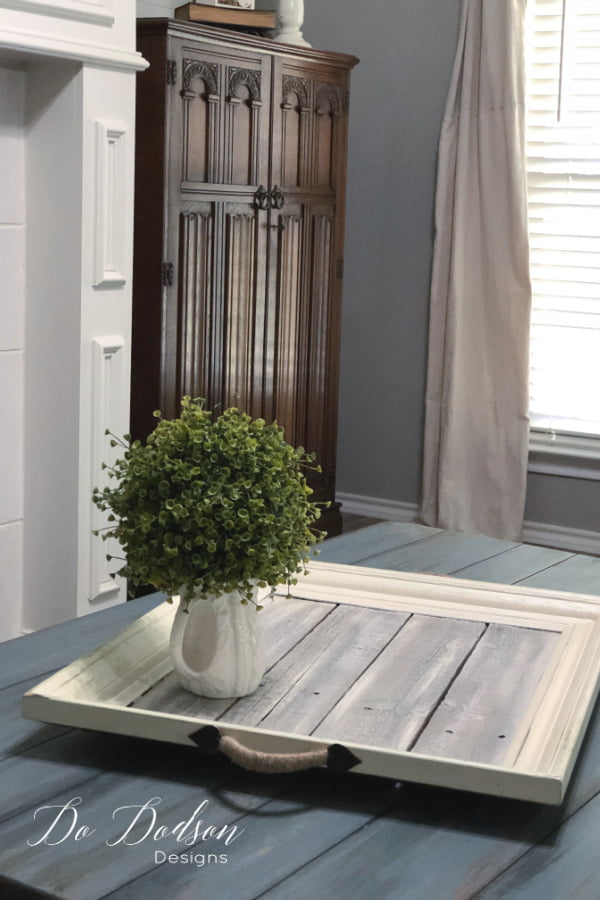
How about that for a “waiting on paint to dry” project? Now I have a beautiful picture frame tray that will surely spark conversations when guests come to visit. Yep, I did that! And my favorite part of this DIY home decor project is the visible holes in the fence pickets. 10 years ago, I put those holes there while building that fence. It feels like an old friend has come to visit.
Love this project? Let me know in the comment section. I’d love to hear your feedback. Or just say hey!
Until the next project… xo, Do

Cool project & great end result! Love your “show”!!! I just smile when your posts pop up as I already know you’re bringing us great stuff. Plus funny comments & Do Wisdom😜
Thank you, Janice! So glad you’re enjoying my craziness. 🙂
I love this idea. Perfect gift for my “Farmhouse style” daughter in law. Thanks, Do!
Oh, MaryHelen! She will love you even more if you show up with one of these. You’re a good bonus Mother. 🙂 Enjoy
Your winner winner chicken dinner (email) gave me a chuckle… you’re too cute Do! This is a great must-try project. I can’t tell you how many frames I have hanging around waiting for a redo! Have a great week my friend. XOXO
🙂 I’m such a booger but I’m never boring. Thank you! xo 🙂
Great idea and great job Do.
I love seeing what you are up to next.
Keep the nifty ideas coming.
Thank you.
Thanks, Brenda! I sure will. So glad you’re enjoying them. It’s always more fun to share with others. 🙂 Blessings to you and yours.
Thank you Do! This tray is so pretty and I love the idea of having something to do during the wait for the paint to dry on your other project!
Hi Marilyn, Thanks so much for joining me. It’s a great way to be productive and create some fun DIY home decor. 🙂 xo
Awesomeness!
Thank you, Bevan! Thanks for stopping by. 🙂
Hi it looks great 👍 did you or could you put feet on it ?
Hi Rhona! I used felt pads but you can totally add feet. Chunky pieces of wood with wood glue would do the trick. 🙂
I’ve only had a chance to check out a few of your projects, but I’ve never been disappointed. You’re creative, talented & very entertaining!
You’ve planted several idea seeds in my mind.
Thank you!
Thank you, Kathleen. I’m so glad you found me. I do enjoy sharing and I hope you find value and inspiration in my posts. 🙂 Do
I think this is one of my faves! Love the rustic/classic feel it brings to the space. I just may have to try this one.
Thanks, Tammy! I can see how you would put your creative spin on it. Happy day, my friend. xo
Donna, I absolutely love your picture frame tray. I also love the handles. Could you please let me know where you bought these handles? Thanks very much.
Lori
Hi Lori,
Thank you! I got the handles at Hobby Lobby. 🙂
Love love love! Wait, how many loves can I give it? I’m obsessed with trays. I “love” how this came out. Your whitewashing of the boards came out fantastic! The color is more to my liking too. I can do glue, okay maybe nails too if I try. Better yet…can we be best friends so you can make me one? 😊
Hi Mary! I laughed out loud… of course, we can be friends. It sounds like we have a lot in common. Don’t forget to sign up for my weekly newsletter, and I’ll send all my DIYs via email. Thanks for stopping by. 🙂
Beautiful project! Loved the idea 😊
Hi Naween! Thank you. Glad you enjoyed it.
Hi ~
I love your rustic farmhouse tray! I searched the internet for just this type of post and found your website yesterday. I love it!
I have an idea to cleanout my house that has way too much “stuff” and I want to upcycle and repurpose all that I can. I have old picture frames, books and videos, and a ton of unused elementary school classroom supplies. I have leftover Christmas wrapping paper and greeting cards, and leftover crafting supplies for making dried flower arrangements. I’ve been on Pinterest searching for any helpful ideas.
Does anything come to mind for you… of things I could do with all I’ve listed? I bet you have other posts that I’d love to read. Do you know of something you’ve written that may spark some ideas that can try? Thank you for your time!
LeAnne Lav
Hi Leann! I’m so glad you found me. I have so many blogs about DIY home decorating and decor. Even furniture! The best way to find related blog posts is to use the search bar on my website. For example, search with the word you’re looking to use. Search books, picture frames, and you’ll find related blog posts—the same with wrapping paper. Oh, and don’t forget to sign up and subscribe to my weekly newsletter. It’s free, and I share projects weekly. 🙂 Have a fantastic week, my new friend. xo
Beautiful projects. I will be using pallet boards, painting them various colors from my livingroom and standing too. Then put them in a mitral frame. I have tons of hardware from my friend that refinish’s furniture and gives me the old hardware.
Hi Julie! Doesn’t it feel great to repurpose these things? I get such a kick out of doing so. Keep on DIYing. 🙂 xo