The easiest way I know to customize stencils is to cut them to fit your needs. That’s exactly what I did with this raised stencil project. [re]-design by Prima sent me this amazing stencil, and I’d like to share how I customized it to fit my project. ♥ With the help of some Dixie Bell Products, I created a one-of-a-kind unique finish on a vintage hutch. Well, part of the hutch… read on.
This post contains a few affiliate links to help you find the products I use. You are not charged extra to use any of the links, but any income I make will be used for more fun projects! To see my full disclaimer, click here.
Before The Raised Stencil Makeover
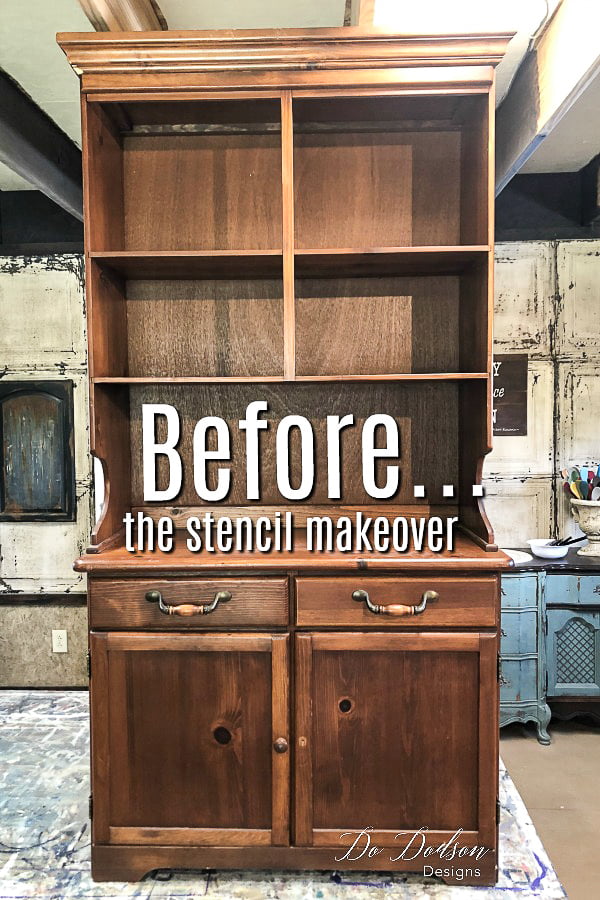
Sometimes when you purchase furniture sight unseen, you end up with mismatched pieces. After closer inspection, the top part of this hutch doesn’t match the bottom. A quick fix for that is to nix the top. Right? Oh, and let’s talk about how I LOVE painting a full hutch… uh no 🙂 Am I the only one that feels this way? I think not!
Products list for this project:
- White Lightning
- BOSS (clear)
- Premium Chip Brush
- Reusable Stencils
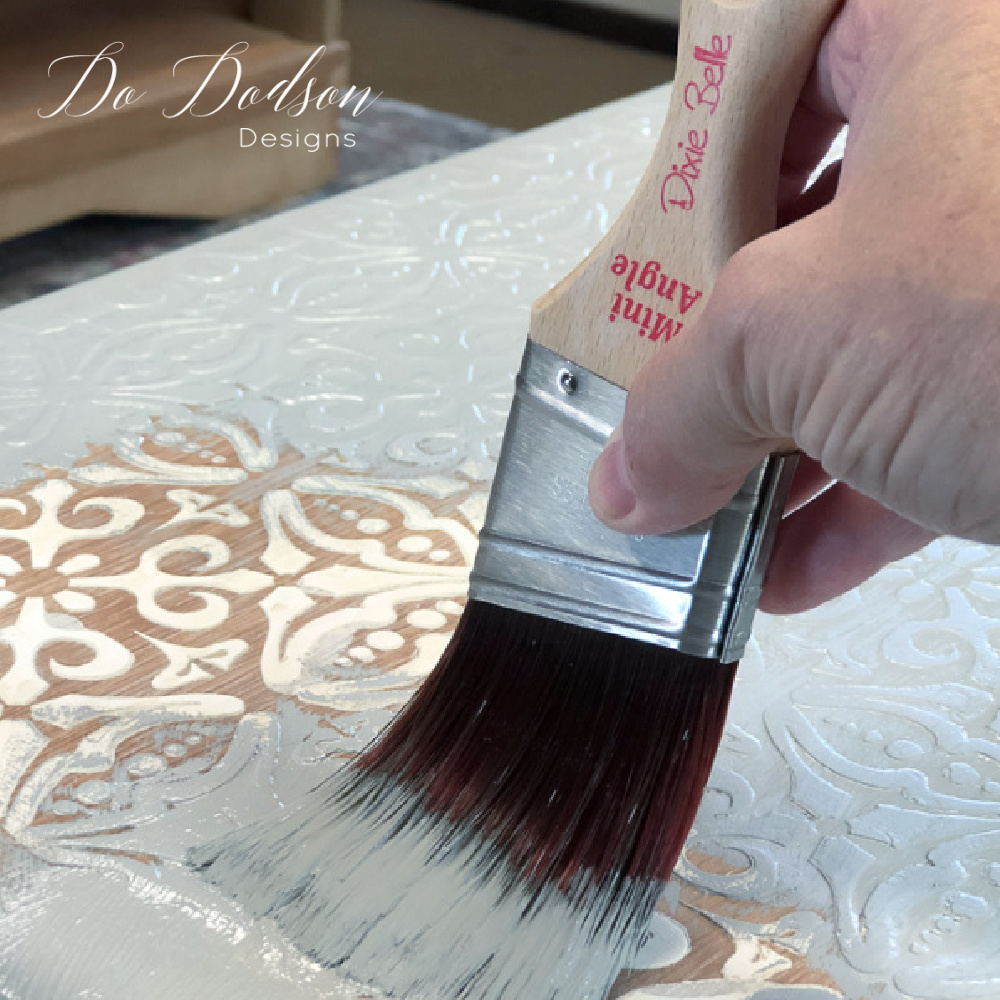
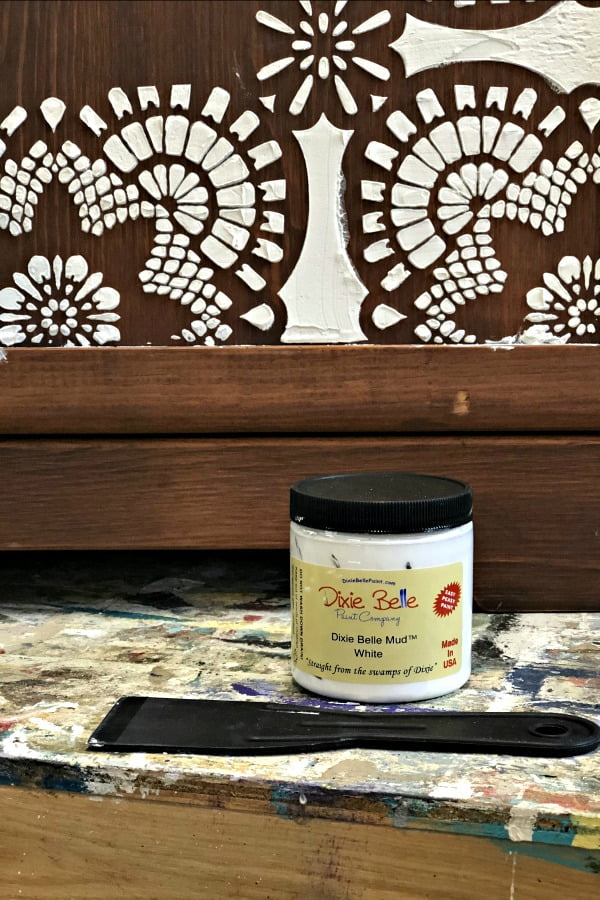
- Mud (Dixie Belle Mud) for raised stencil
- Painters Tape
- 220-grit sandpaper or sanding block
- Iron Patina Paint
- Green Patina Spray
- Farmhouse Green (chalk mineral paint)
- Caviar (chalk mineral paint)
- Chocolate (chalk mineral paint)
I started my project by wiping down the wood with Dixie Belle’s White Lightning. It removes layers of dirt and grime that could prevent your finish from adhering properly. Ain’t nobody got time to repaint! DO it right the first time!
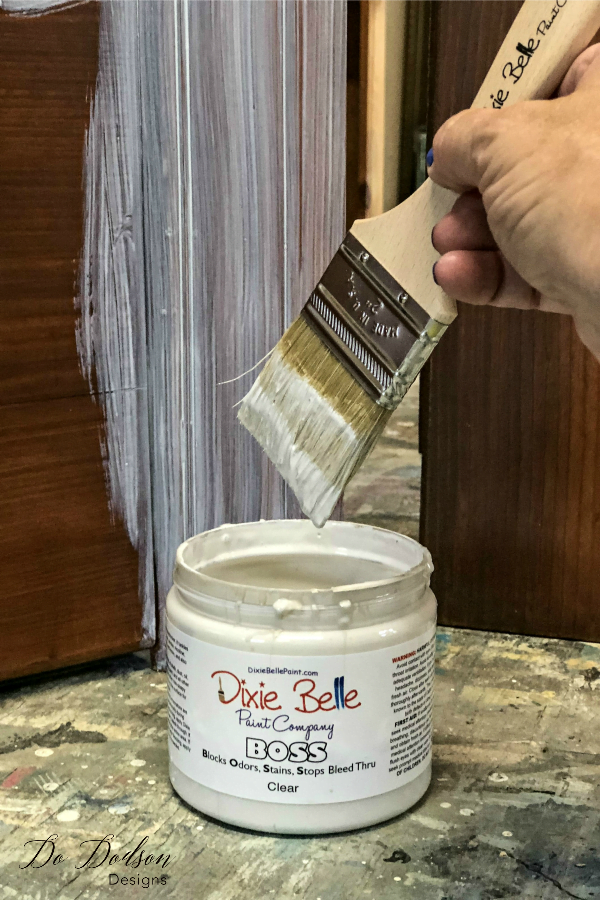
After my piece was clean, I applied one coat of BOSS (blocks odors, and stains, and stops bleeding through) with a chip brush. Believe me when I say I’ve been burned too many times by taking chances. There’s a little wisdom that comes with this gray hair. 🙂
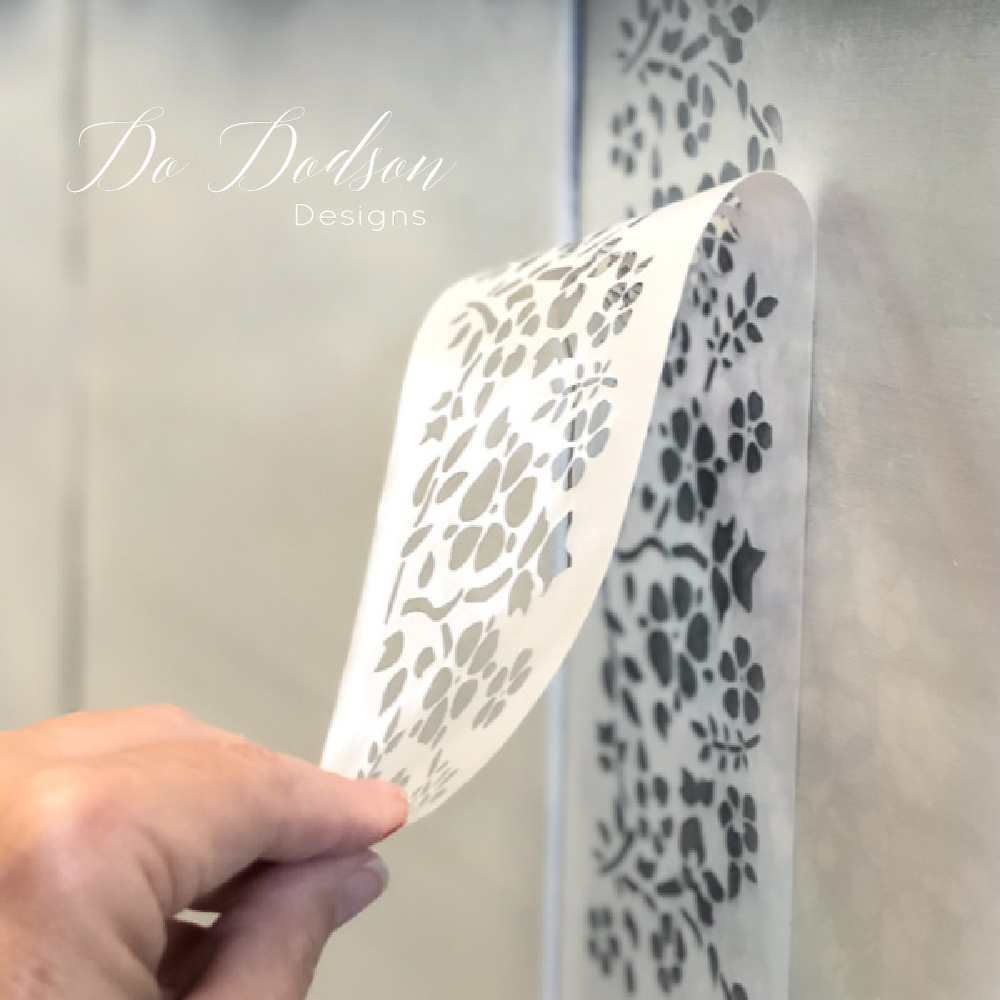
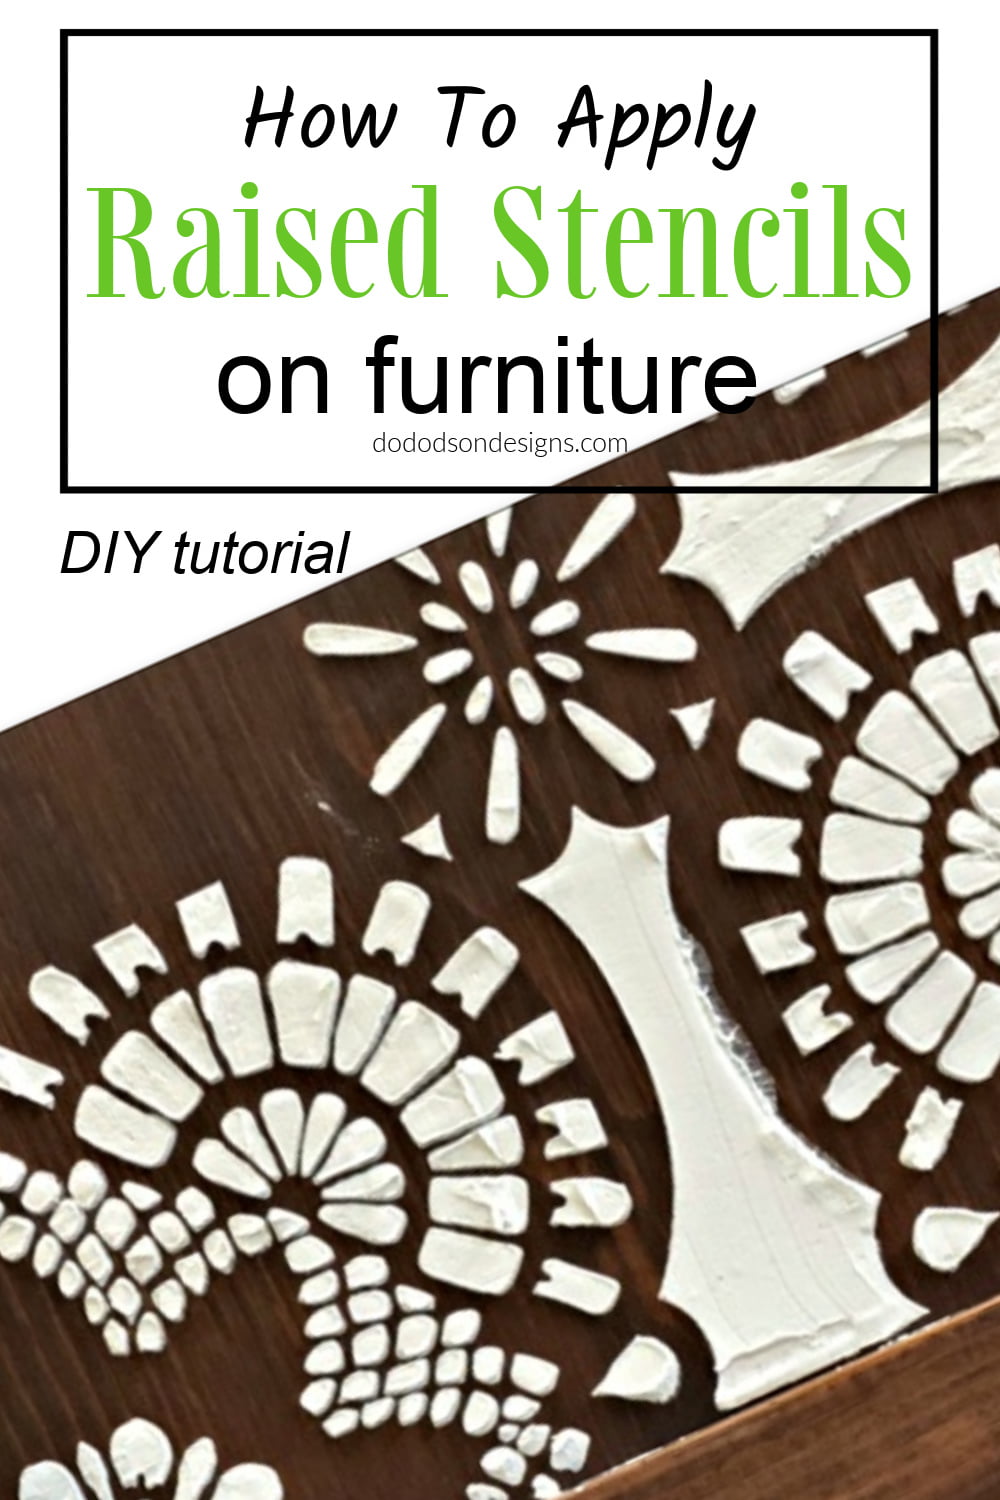
How To Customize Stencils and Add the Raised look
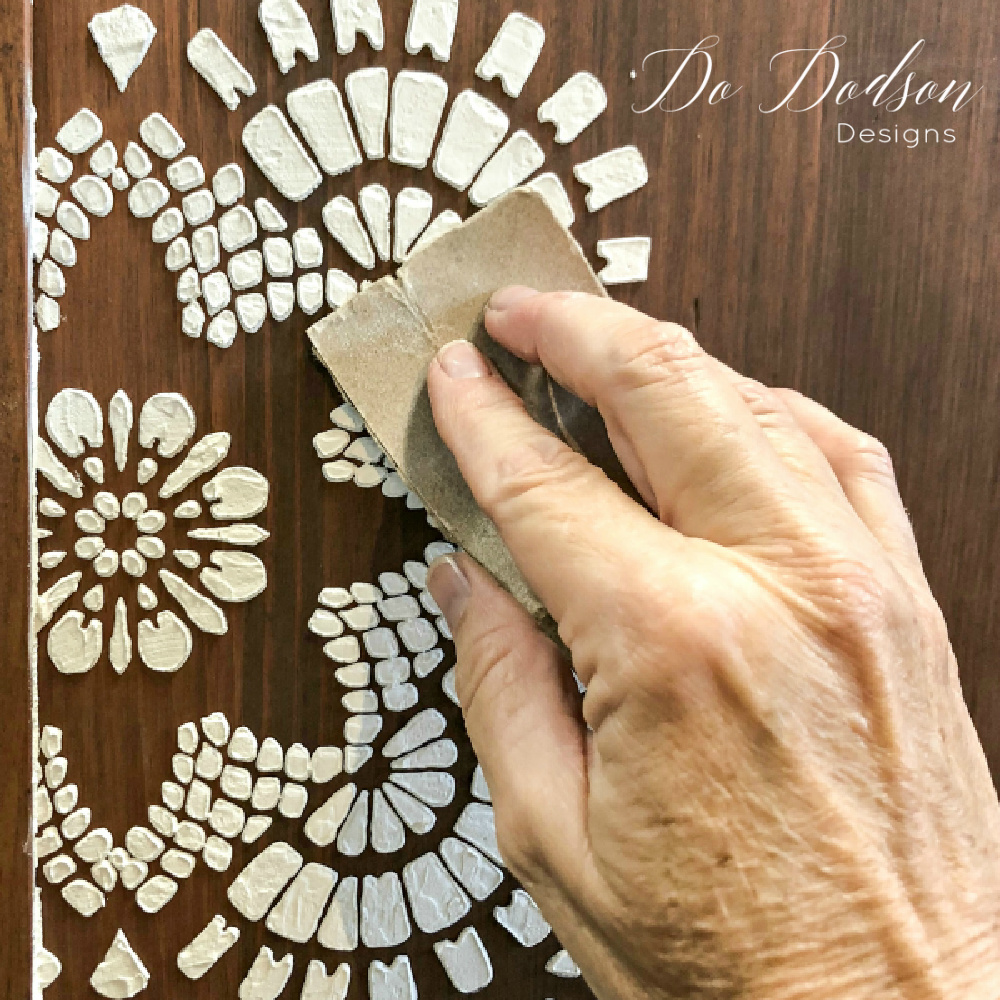
Isn’t this stencil pretty? It reminds me of my Grandma’s doilies. I loved the look, but there was one problem. It was too large for the inside of my furniture doors. Got scissors? Did you know you can customize stencils? Easy peasy! I simply cut the stencil to fit the inside of the door. It worked great! Here’s a quick video of the application of the raised stencil. Enjoy the show!
Dixie Belle MUD comes pre-mixed in 3 colors. Black, brown, and white. Once it’s dried, it’s ready to paint.
Before Painting Over The Raised Stencil
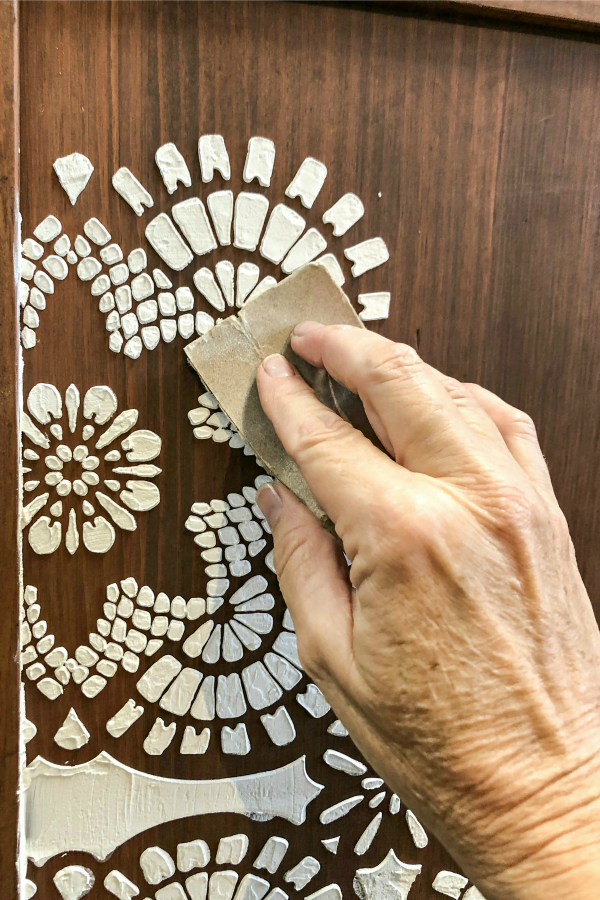
The surface of the raised stencil will be a bit rough, but no worries. A light sanding with a 220 grit sandpaper, and you’re ready to go. I like the texture, and after painting over it with chalk mineral paint and Dixie Belle’s Iron Patina, it was a match made in heaven. Did I tell you how much I love this stuff?! Rusty goodness is my JAM!
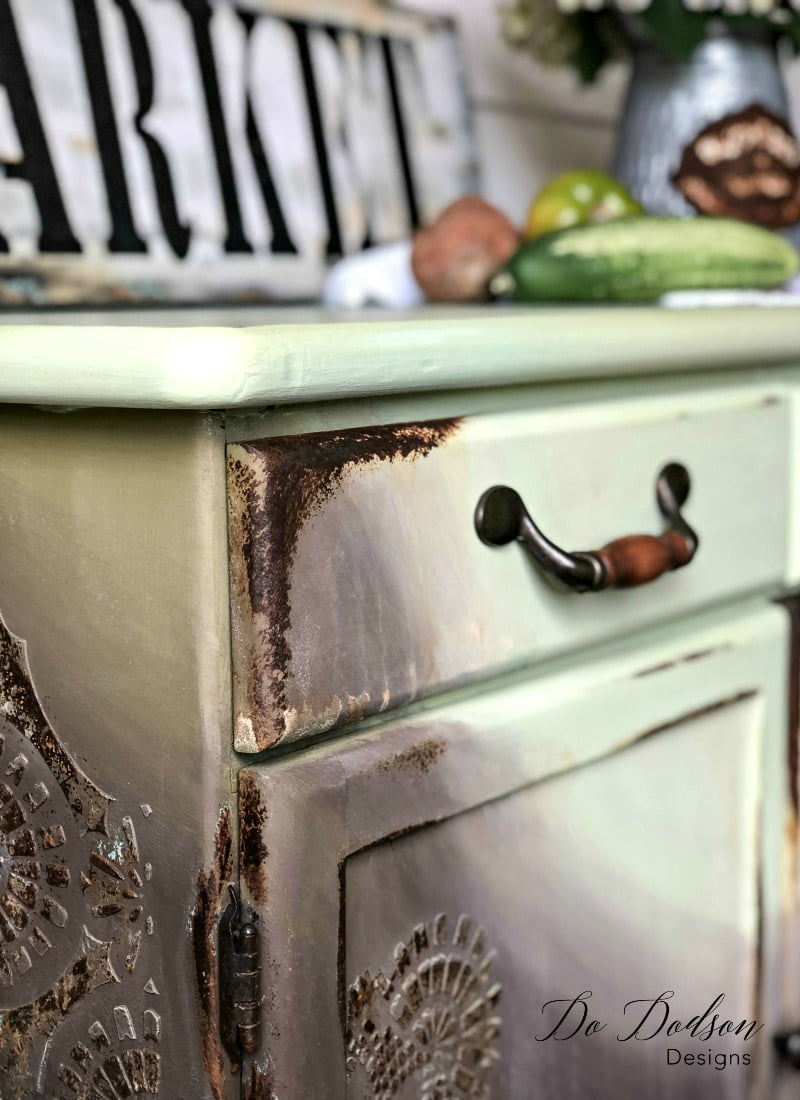
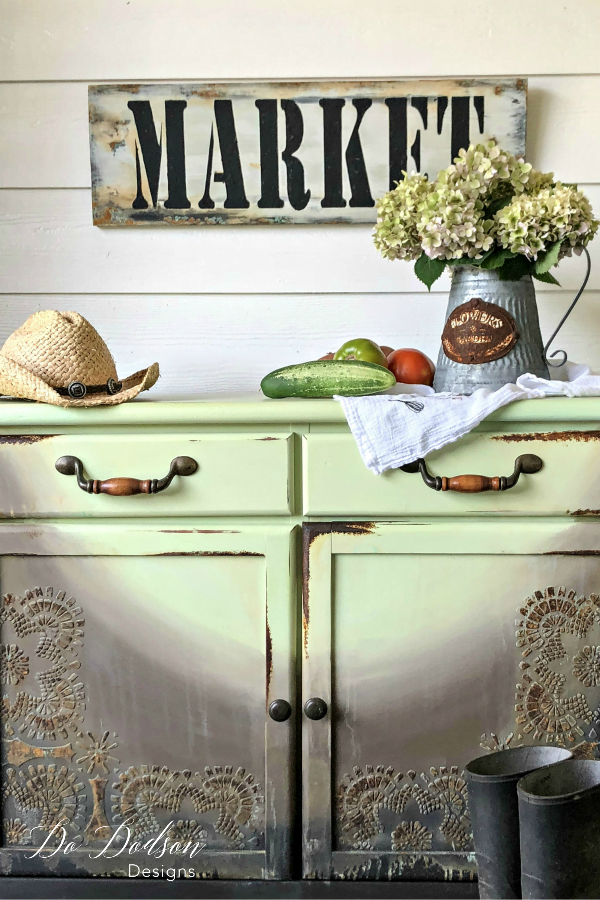
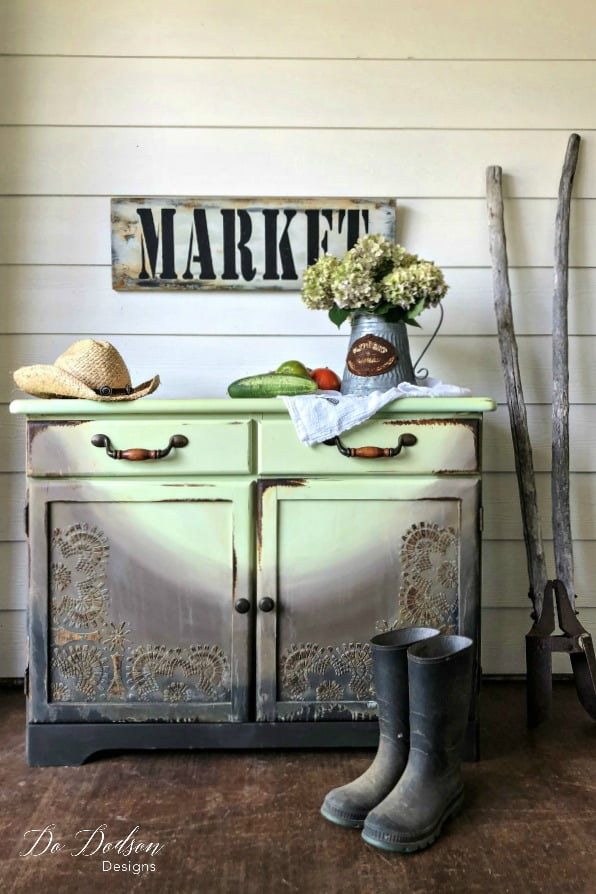
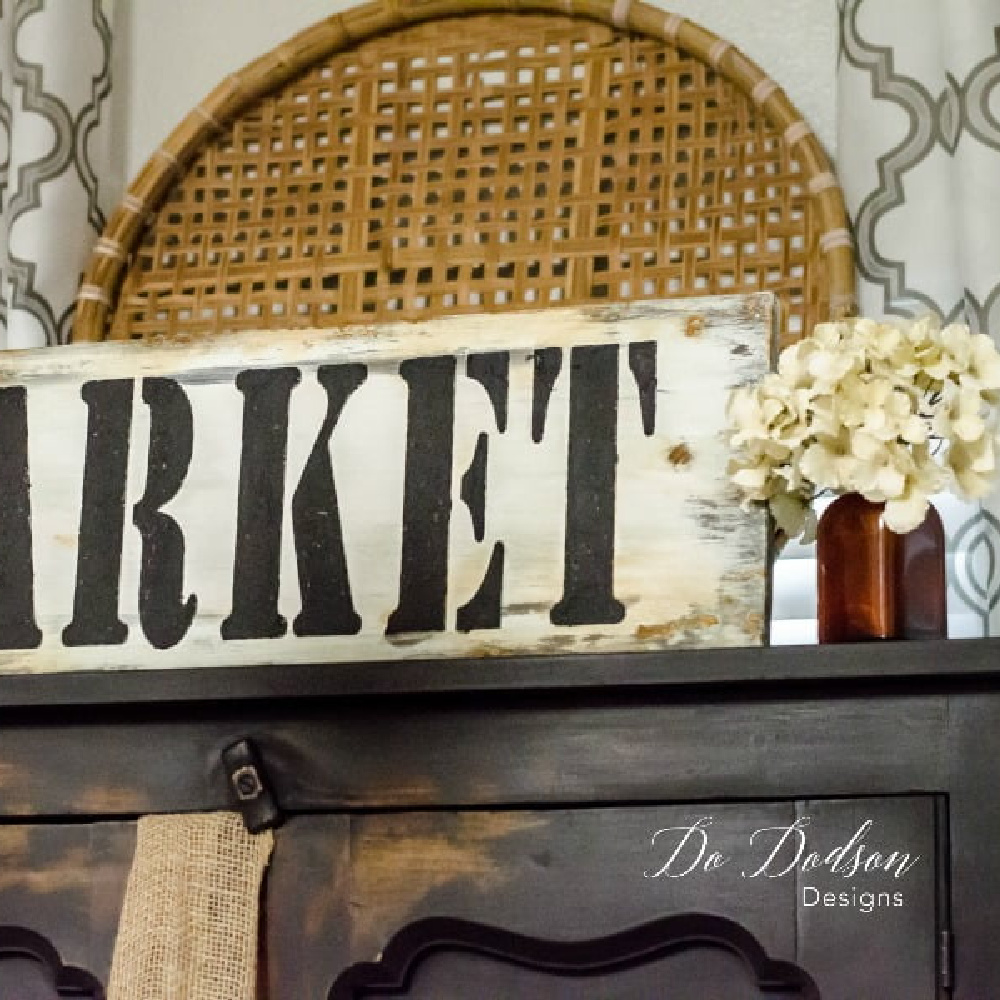
This was a super fun project! It’s a really easy way to change the look of a simple cabinet. Did you notice that MARKET SIGN is in the photo above? Did you see that? I used this same method with that sign. Raised stenciling with an element of rusty goodness. L-O-V-E
Do you have an idea for a raised stencil project? I’d love to hear about your ideas and past projects. Your comments are always welcome. Or just say, “HEY.”
Until the next project… xo, Do