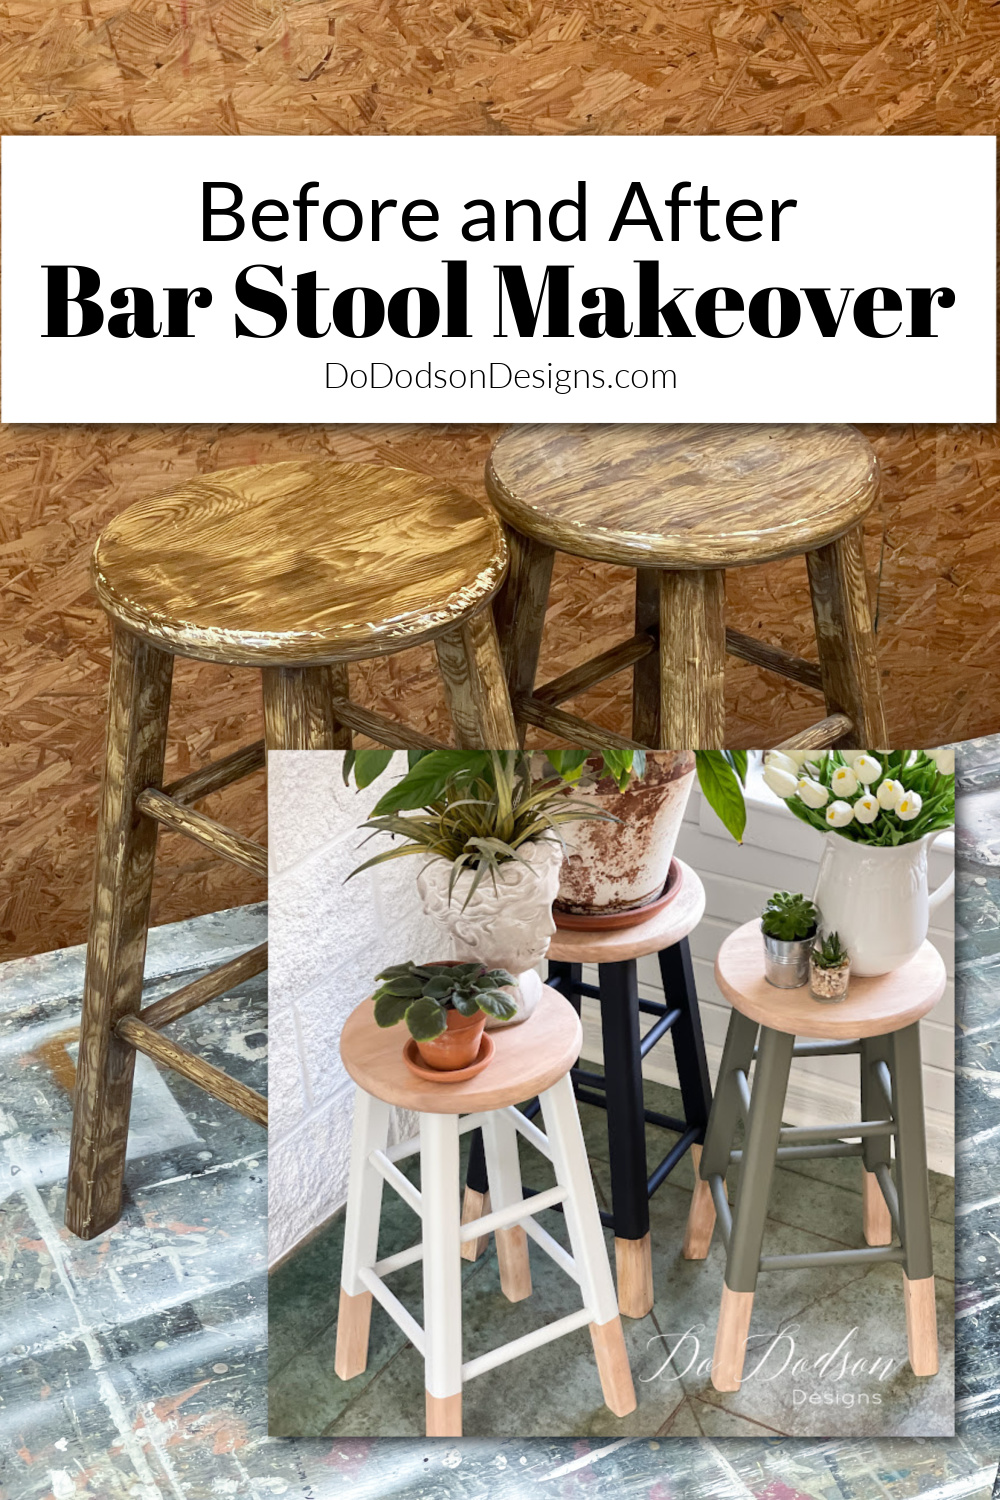
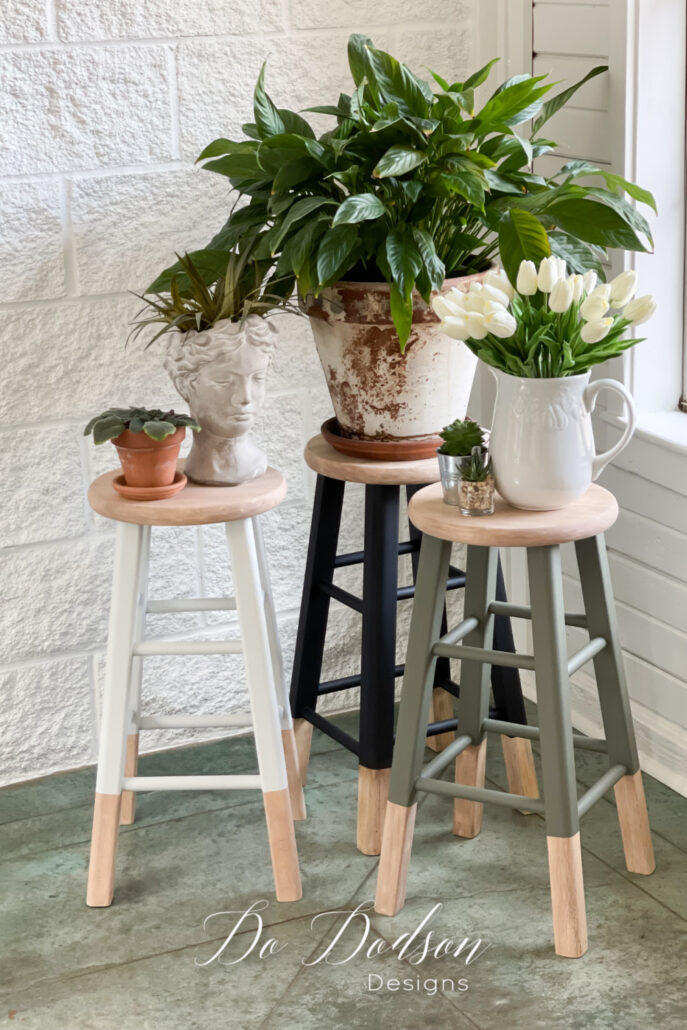
Hey, friends! Today, I want to share this wooden bar stool makeover that will teach you about color wash staining and painting wood stools. It’s the perfect DIY project for beginners, and I’m showing you a smart new use for them in the home.
Thanks to Dixie Belle Paint Co. for sponsoring this post. While I was compensated to write this post, all opinions are my own.
* As an Amazon Associate, I earn from qualifying purchases and through other companies as well. You will not be charged extra when you purchase through these affiliate links, but any income I make helps me create more amazing DIY projects to share with you! To see my full disclaimer, click here!
Bar Stools Get A Whole New Look
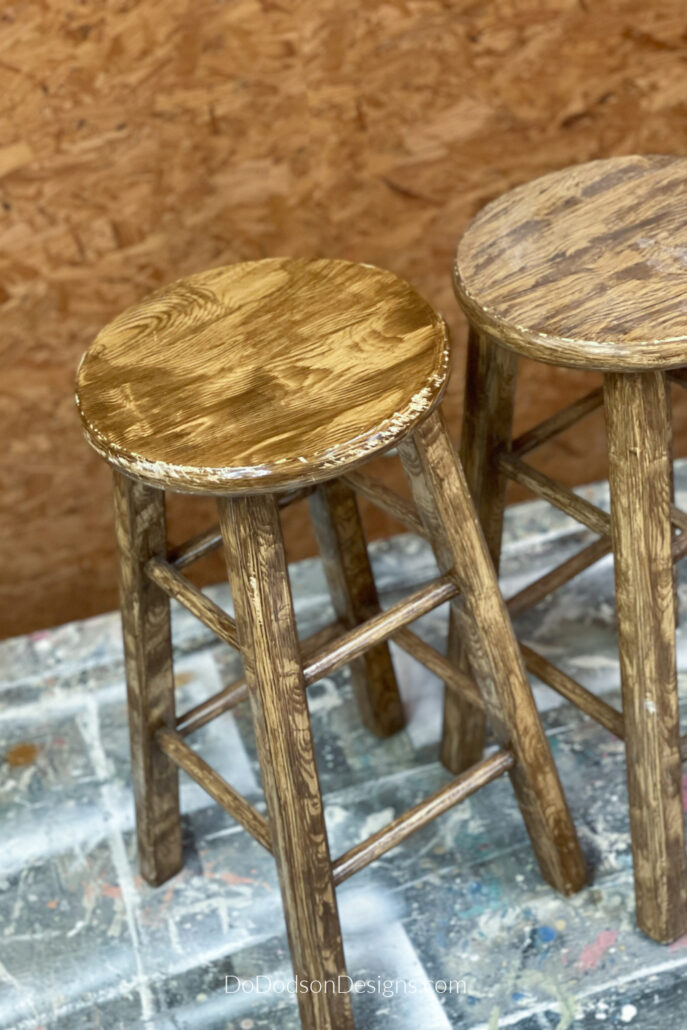
When I found these backless stools in my in-laws’ attic, I had no idea what I would do with them. Surely, they have some hidden potential, and you know I can’t pass up anything that’s wood and FREE. So, I grabbed them.
Back Story. My husband lost both his parents in the last two years, so I wanted to do something special for him and in memory of his stepmother, who loved plants and gardening as much as I do. I always coveted her African Violet plants, which were always in bloom no matter what time of the year we visited. I also inherited the plant, and I haven’t killed it yet.
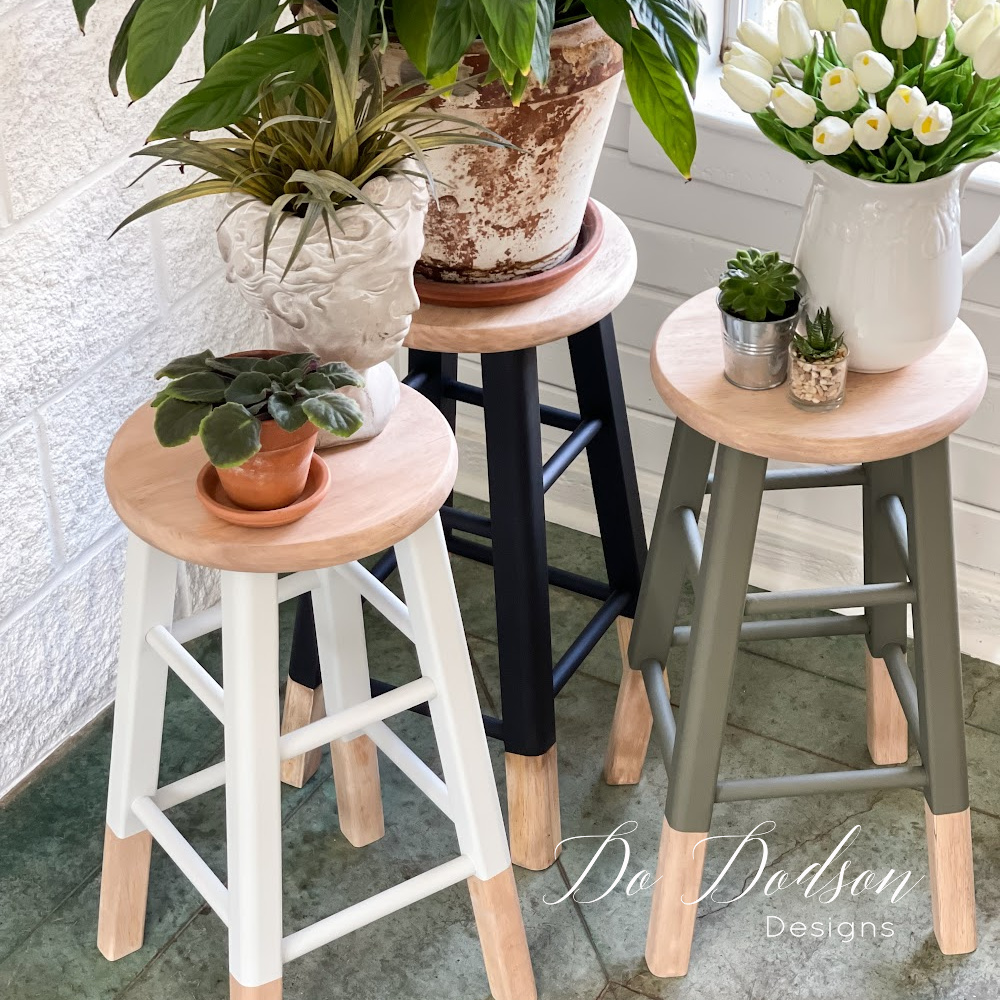
That’s when I thought of turning these wood bar stools into plant stands (a new life)—reincarnated for our sunroom.
This was such an easy DIY, and they will be used to hold my plants in winter during the cold months. Yes, we have cold weather in Texas. SHOCKER!

MATERIAL LIST:
- solid wood bar stools
- SurfPrep Sanding System
- Voodoo Gel Stain (Tobacco Road) Water-based
- Frog Tape
- paintbrush (1-inch flat small syntI’vec brush)
- Silk All-In-One-Mineral Paint (Catus Silk Paint)
- stain blocker (to prevent bleed-through of wood tannins)
- Easy Peasy Spray Wax clear matte
Old Bar Stool Makeover Tutorial
I envisioned giving these old bar stools a modern look with a farmhouse vibe. I’ve been obsessed with raw wood and paint combinations lately, especially when they involve natural wood legs. With the help of Pinterest, I had a vision for my color scheme—a classic look with clean lines.
STEP 1: Before starting any wood furniture makeovers, inspect the pieces for structural damage and make necessary repairs. Vintage furniture, and especially wood stools, almost always need repairing. However, I was pleasantly surprised that these were in good shape even after being stored in the attic. They just needed a little love.
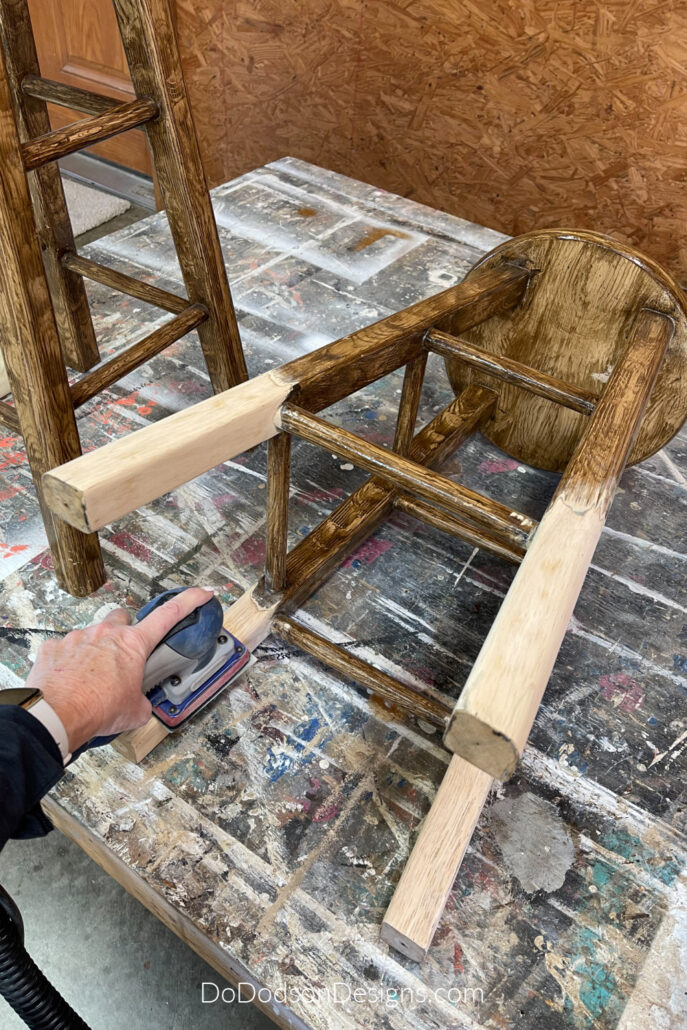
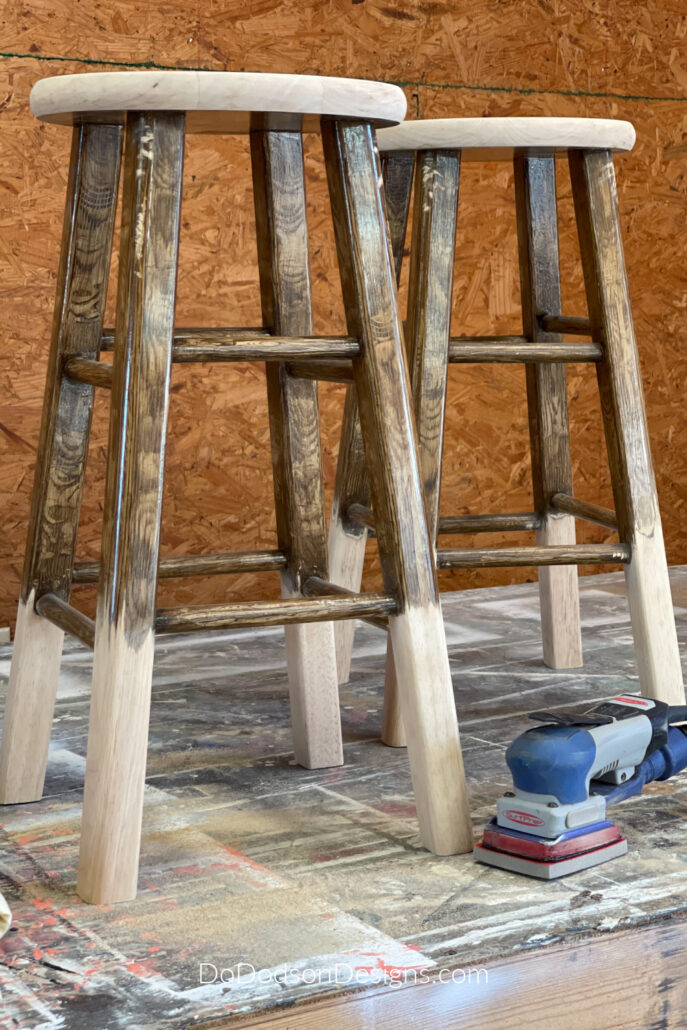
STEP 2: After cleaning the wood, I used my SurfPrep electric sander (starting with 180 grit and finishing with 220 grit) to strip off and remove the old finish to the bare wood on the legs and the bar stool seats. I only sanded as high as the first footrest and a little above that because I planned to stain the wood I had sanded and paint the rest.
Water-Based Stain On Wood
STEP 3: After cleaning and removing all the wood dust, I noticed the wood was very light and would need some color. I decided to go with a color wash instead of a wood stain.
Using a color wash can give you more control over how much color is absorbed into the wood and also helps tone the wood undertones. Depending on the wood, some woods can have pink, yellow, or orange tones; when you seal over raw wood, those colors are accentuated.
Here’s how I did it. With a water-dampened low-lint cheesecloth, add a small amount of the water-based gel stain to the cloth (squeezing the water and stain together with your fingertips), rub it into and with the direction of the wood grain, and allow it to dry. The more water you use, the lighter the color. This method is good if you’re unsure how the wood will absorb the product. Repeat this process until you get the shade of color you want on the wood.
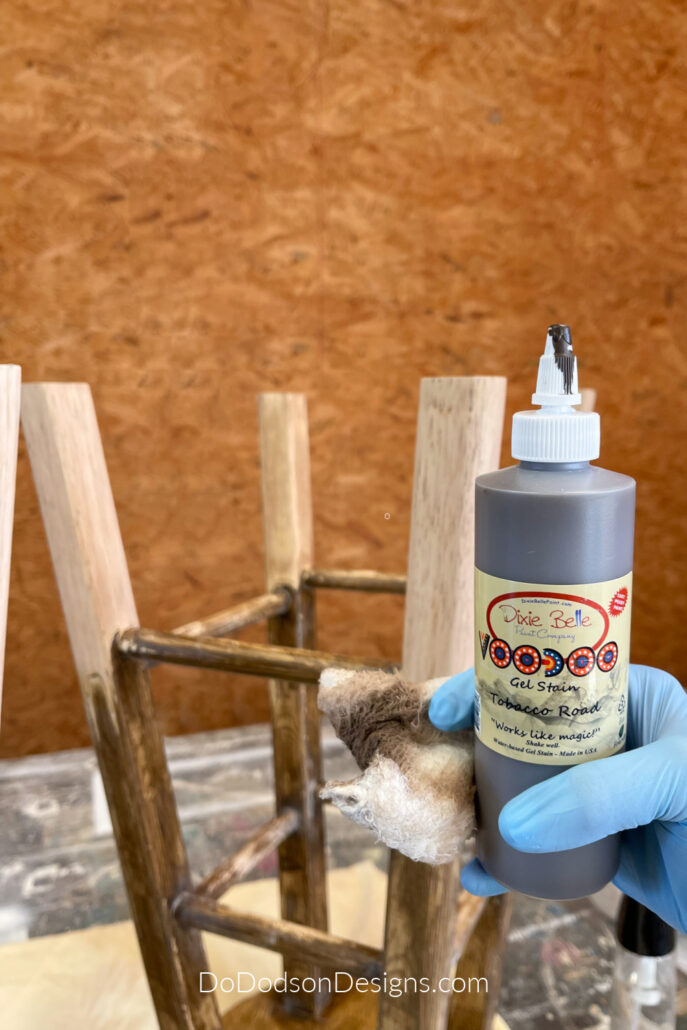
* I’ve tried this application using a sponge, but I didn’t feel I had as much control as when using cheesecloth.
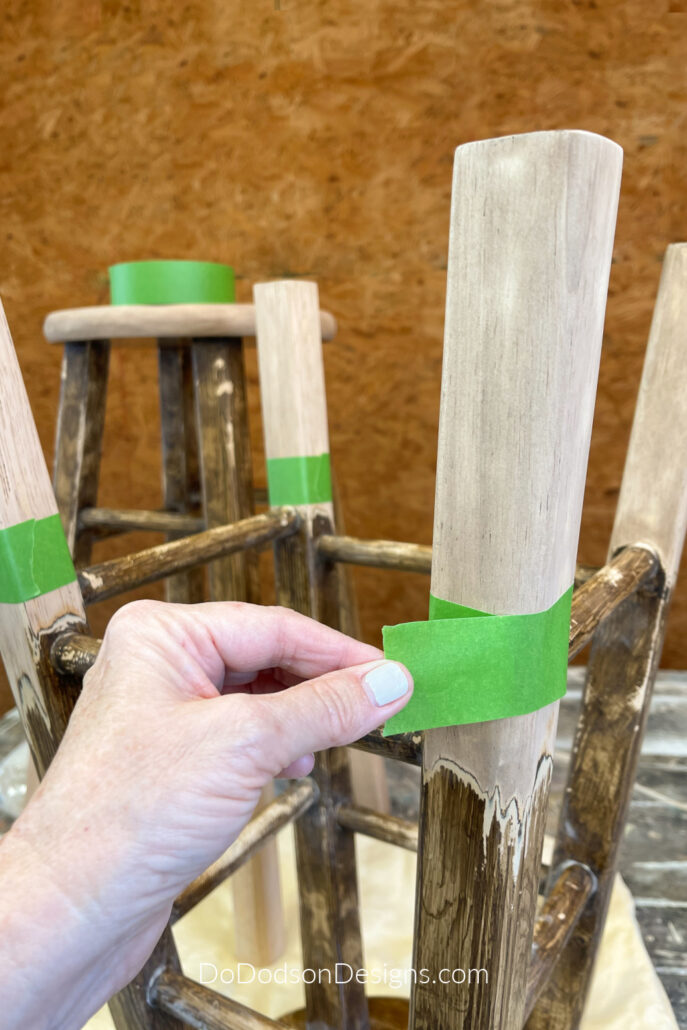
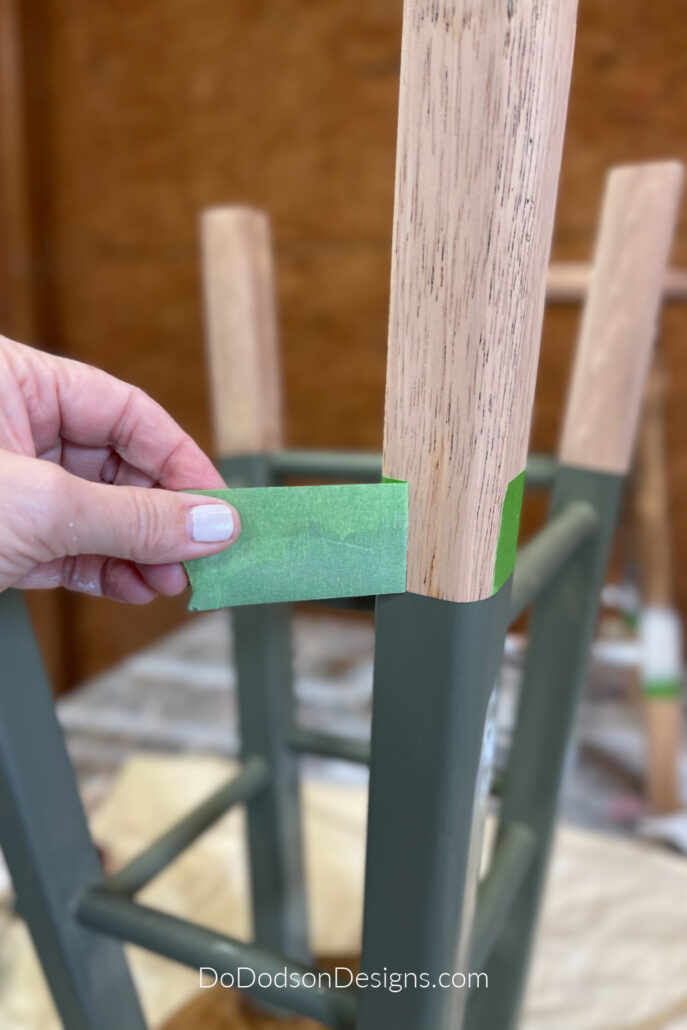
STEP 4: Allow the water-based stain to dry thoroughly on the wood. Next, with frog tape, tape off the lower part of the legs that you want to stay wood. Make sure to run your finger around the tape to seal it well to prevent paint from bleeding underneath. A good seal is super important to prevent paint from bleeding.
Making sure the wood is smooth will help prevent the paint’s bleeding under the tape.
Blocking Wood Tannins | Tricks Of The Trade
STEP 5: This next step is crucial if you paint over raw wood. Trust me when I say I have learned the hard way, and I want to share my best tips with you.
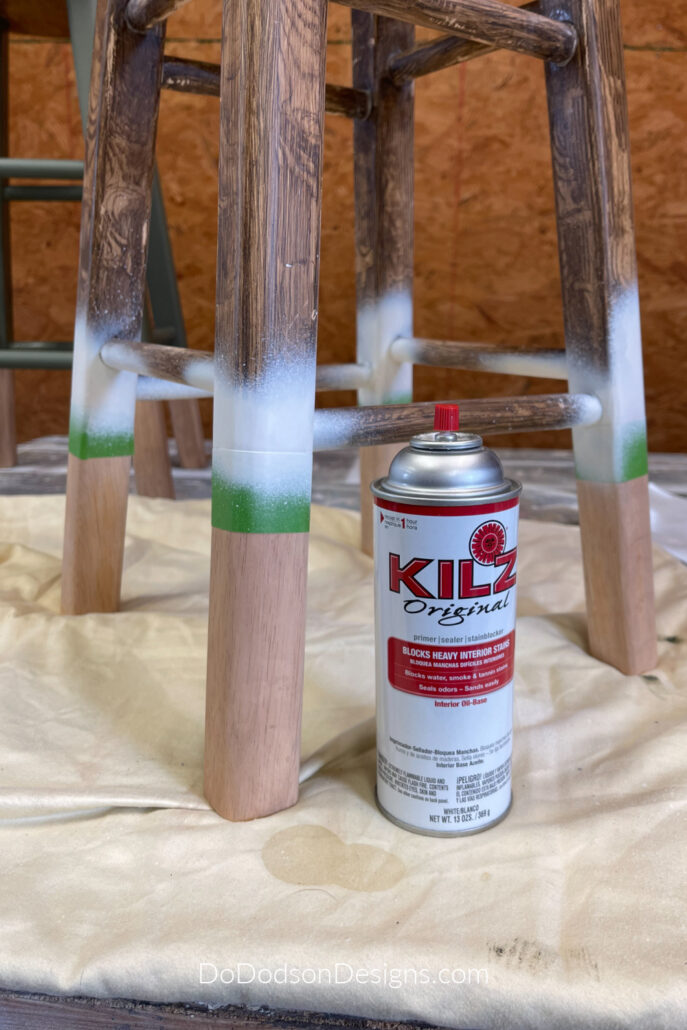
Use a good stain and tannin blocker before painting over wood. Many are on the market, so you may have to try a few to find what works best. Every furniture painter has an opinion. I recommend a shellac-based primer or an oil-based primer. Both will do a great job of preventing stains and wood tannins from bleeding, especially when using white paint.
For this project, I grabbed what I had in the studio, which is an oil-based spray primer. Primers come in a paintable form or spray. I bought this a while back because it was on sale for another home project I had going on. The spray gives a smooth finish but is much messier if you don’t have a spray booth. I took the bar stools outside to spray them.
Silk All-In-One Mineral Paint
STEP 6: Time to paint! This is my favorite part, and I bet it’s yours too. Do you need a quick, easy, and durable paint finish without all the hassles of having to seal the paint? This paint is what I recommend and has quickly become my favorite for one-color finishes.
Apply this paint using a good-quality synthetic brush. Yes, brushes matter. Two coats of paint are recommended for a durable finish with a 20-30-day cure time. CLICK HERE to learn more about how to use Silk All-In-One Mineral Paint and get my honest review.
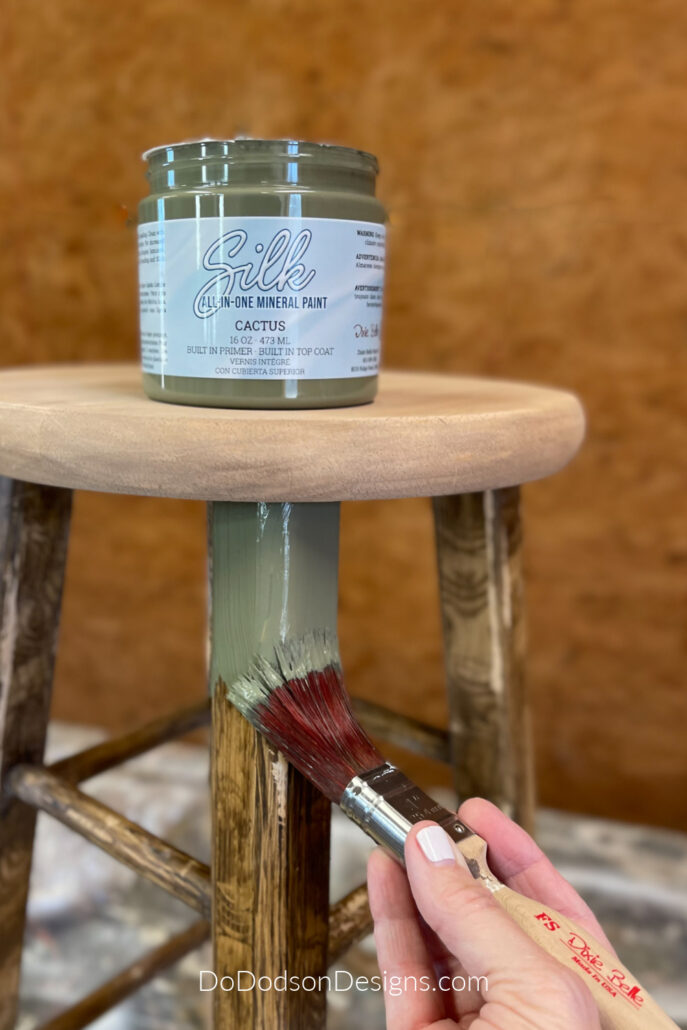
After removing the tape, check out that crisp, clean line. No bleeding!
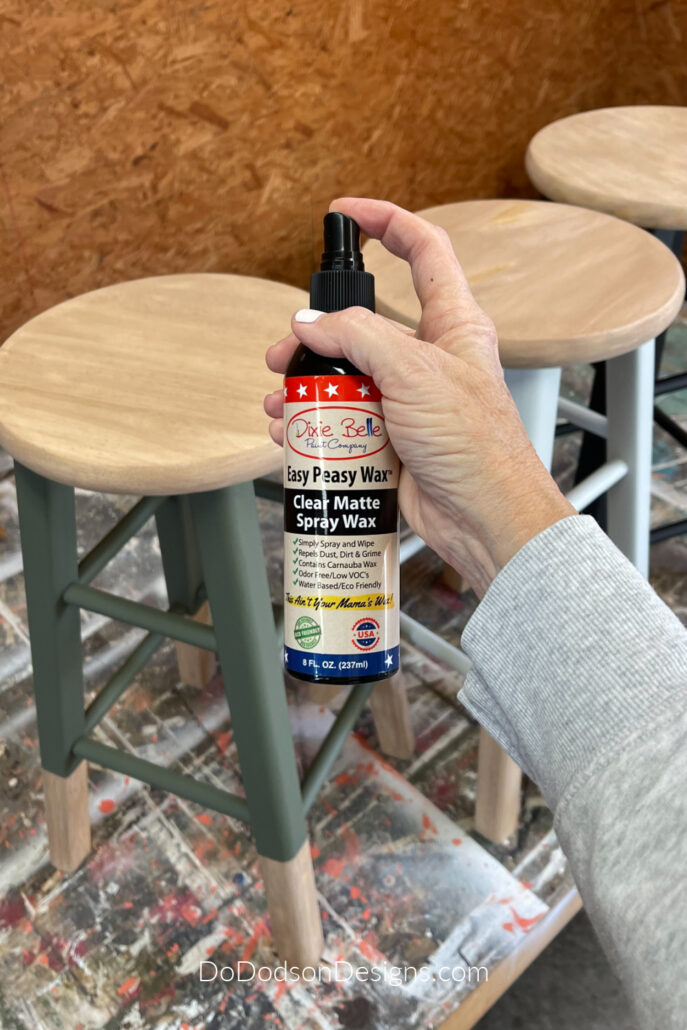
STEP 7: I used Dixie Belle’s easy-peasy spray wax to seal the wood on this project. This wax is the easiest wax you’ll ever work with. Spray it on and buff it with a soft cotton cloth for a silky-smooth finish. Multiple coats can be applied after each application has dried. I love the feel of wax on furniture and especially love that it doesn’t change the look of the farmhouse feel the wood has on these bar stools.
Plant Stand | Kitchen Island Bar Stools Ideas
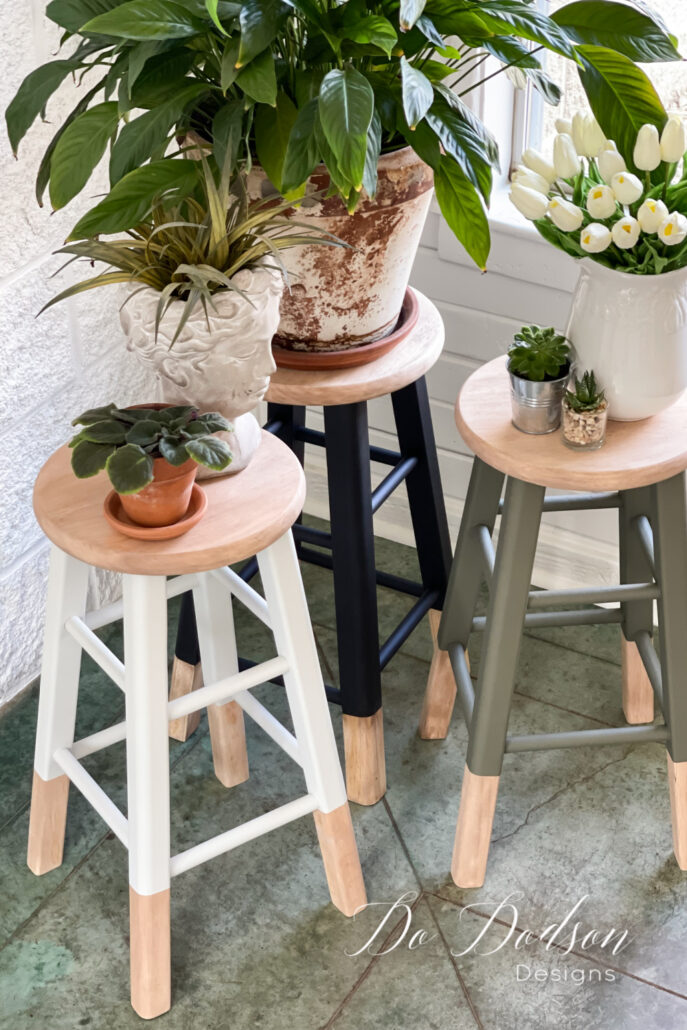
To say these are treasures is putting it mildly. Once belonging to someone dear, they have been reincarnated, have a new home, and have a new life as beautiful plants stand. I can’t ask for a better outcome for these repurposed wooden bar stools.
When my grandchildren visit, I’m sure they will be used as extra seating on my beautiful kitchen island. They also complement my painted white kitchen cabinets.
I can hear the argument now over who gets what color. Oh, the joys of being a kid again. 🙂
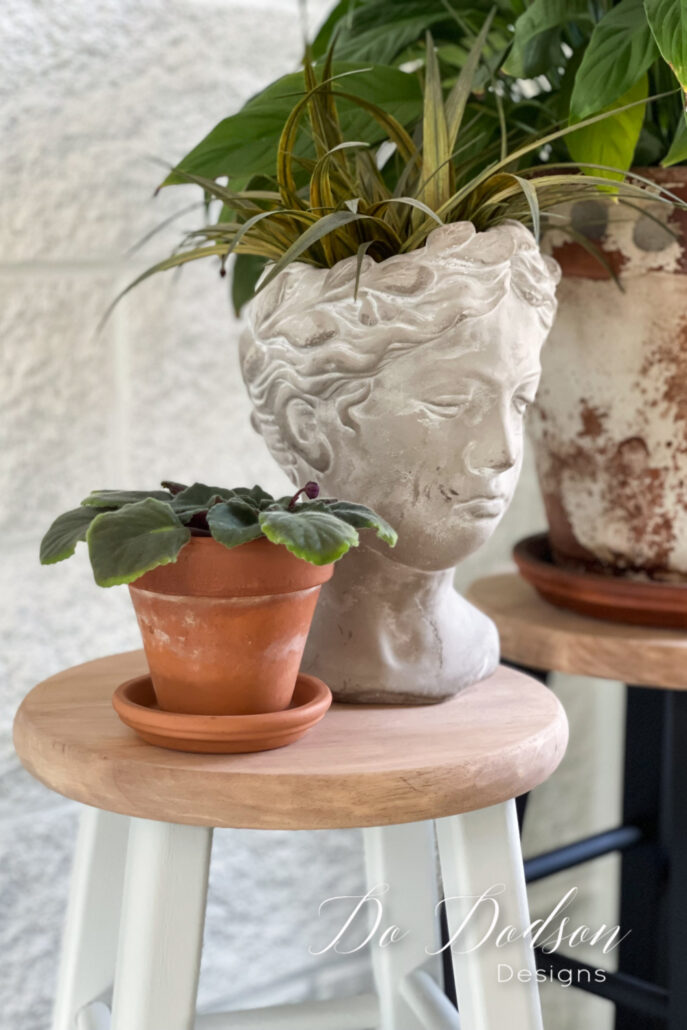
Thanks for joining me today. I hope you have enjoyed this DIY project because I sure did. It does my heart good to know the stools will be used to hold living and breathing life now.
I’d love to hear your thoughts, and as always, I love hearing from you. Share with me in the comment section, or say hi so I’ll know you stopped by.
To watch the complete video tutorial of these bar stool makeovers, CLICK HERE to learn how to join me in The Art Of Painting Furniture, where I share even more.
Until the next project… xo, Do

Such a lovely corner. I love that you gave your step-mother-in-law’s plant a front row place of honor! The family mementos that we carry forward are so important in keeping our sweet memories of someone we’ve lost. By the way, where did you find the face planter?
Hi Gayle!
Thank you so much. The little African violet has one bloom on it now. All the feels!
The face planter I picked up at a thrift store, like I do a lot of my home decor. It’s fun to find these treasures. Have a great week. 🙂 xo
These look amazing! Stools make great plant stands
Thanks, friend! I had never thought about it until I found these. Have a great week. 🙂 xo
Stoličky jsou naprosto úžasné- zvláště v barevně fantastické trojici barev—-Prima podnět udělat něco podobného
Moc díky za inspiraci. Těším se na další proměny….Bí
Translated to English… The chairs are absolutely amazing- especially in the fantastic trio of colors–Great inspiration to do something similar Thanks so much for the inspiration. I’m looking forward to more transformations….Bí.
Thank you so much; I appreciate your kind words. I really felt like giving them a different look with the natural colors would look best, and I’m very pleased with the outcome. Have a great week. 🙂 xo
I like your videos but not the constant interruption of the ads.
Hi Sally,
Thank you for the feedback. We’re always trying to limit the ads, but with today’s economy, it pays the bills. We do whatever we can to be able to share what we love with our readers. Have a great week, and thanks again. 🙂 xo
I LOVE these and I LOVE how you styled them! I’m all about adding some greenery and these look fabulous! have a super weekend. XOXO
Thank you, Denise! I really enjoyed working with my plants, and yes, greenery just makes every better. Have a great week, friend. 🙂 xo
Hi Donna!! I love painting stools! There are so many possibilities. I love how these turned out. They will make beautiful plant stands.
Thank you, Cheryl! I didn’t know, but I’m glad I do now. Have a great week. 🙂 xo